Each U.S. Mint facility is unique and exciting, as Mike and Darrin Unser of CoinNews.net discovered in their visits. The tour of the Denver Mint provided its own treasure trove of memories for the men, and it was caught on camera.
A bit of enchantment occurs in watching the whirling of machinery and all the robotic movements during every process of coin production, so when you re-read the articles, as I have, you come to appreciate the vast amount of detail at which the men were able to recall. To wrap up the behind-the-scenes look at the Denver Mint, Darrin and Mike give their final comments, followed by a composition of photos from their visit.
Final Comments
Mike: It’s impossible not to sound like a broken record when talking about all the people we’ve encountered at the U.S. Mint facilities in San Francisco, West Point, Philadelphia and now Denver. The same words come to mind after you leave any one of the plants and think about those you’ve met — professional, smart, dedicated, driven, competitive, and fun… to name a few. They have an enviable working environment and culture that you’d more expect from a smaller family owned business, not from a large government bureau with revenue last year of more than $4.3 billion.
Darrin: I would have to agree! It was completely overwhelming to find such a close-knit culture in what is really a large-scale manufacturing operation. Each person we spent time with not only took pride in their own part of the process but seemed to also revel in the improvements and accomplishments of the entire facility.
Mike & Darrin: For making our visit possible and so enjoyable, we’d like to give a big THANK YOU to Tom Jurkowsky, U.S. Mint Director of Public Affairs; David Croft, Acting Associate Director for Manufacturing; Randy Johnson, Chief, Die Manufacturing Division; Jennifer DeBroekert, Public Affairs Specialist; and Thomas Fesing, Public Affairs. And, of course, the special folks who made the time to talk and show us what they do.
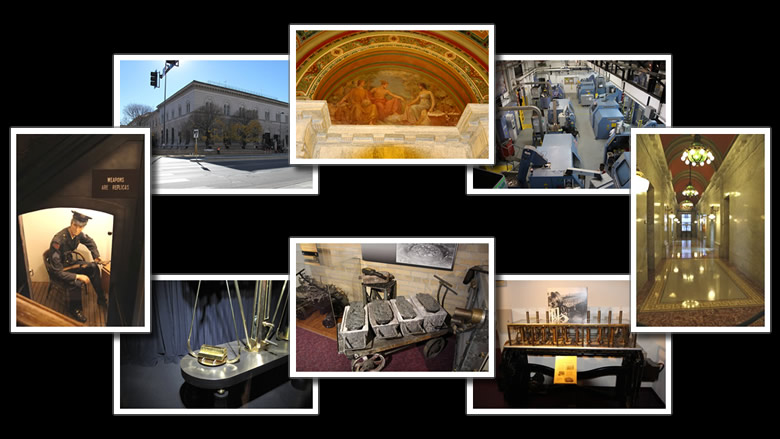
Denver Mint Photos
Below are photos that we’ve presented in our series of articles about the Denver Mint. The photos are categorized by section titles with those titles linked to the original article. If any photo catches your attention, those links are the best resources for more information. Often times, there are videos in the original articles that offer further and better clarity — especially for the die production, coin production and numismatic packaging operations.
Our first major piece on the U.S. Mint facility in Denver focused on its free, public tour, with later articles about the production process seen during our private tour. These first photos are just a sampling of what you’d see when taking the public tour.
An overview of some exhibits from the Denver Mint Public Tour
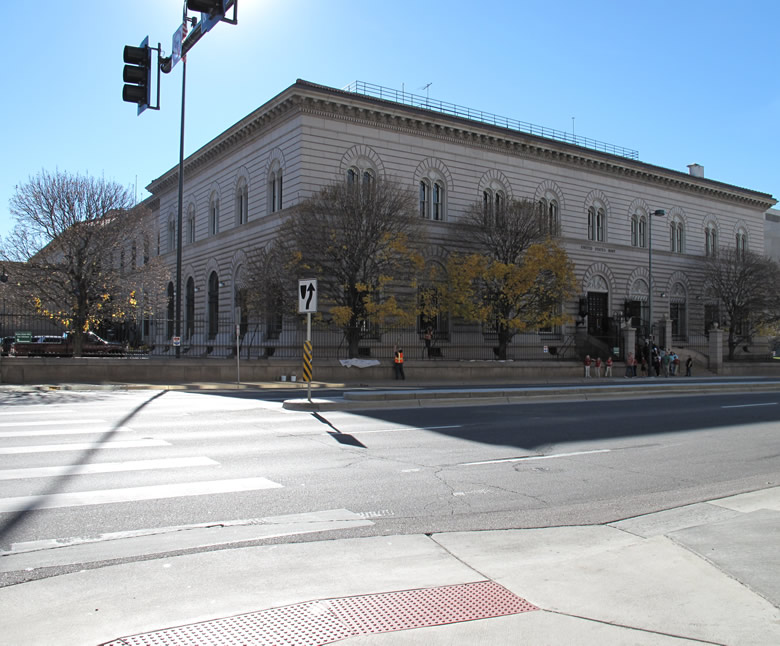
US Mint at Denver in 2013
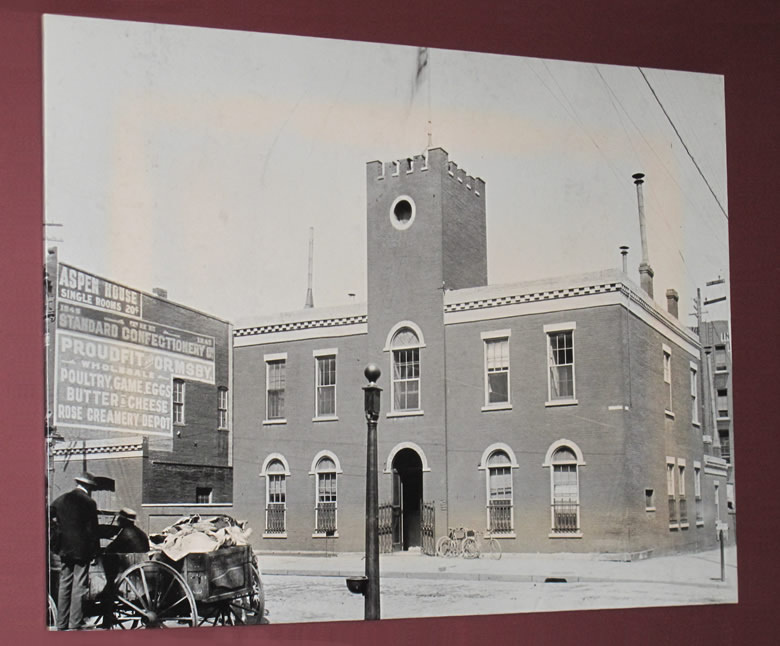
US Mint at Denver, Circa 1906
US Mint at Denver, Circa 1860
US Mint at Denver, Circa 1890
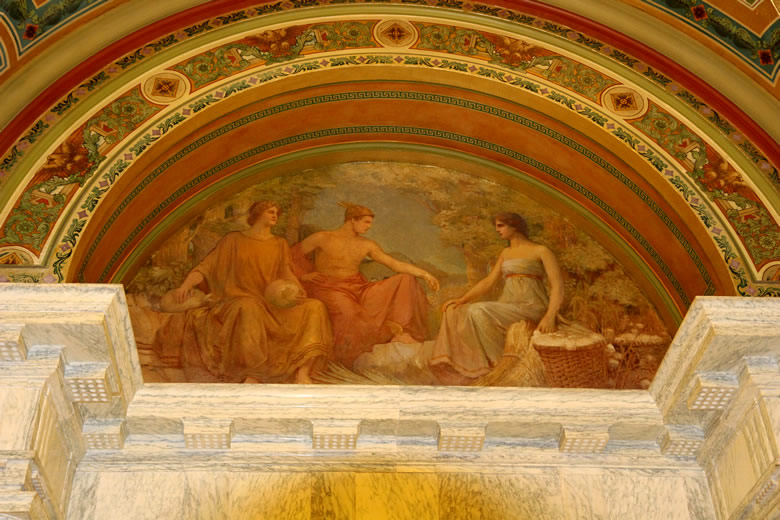
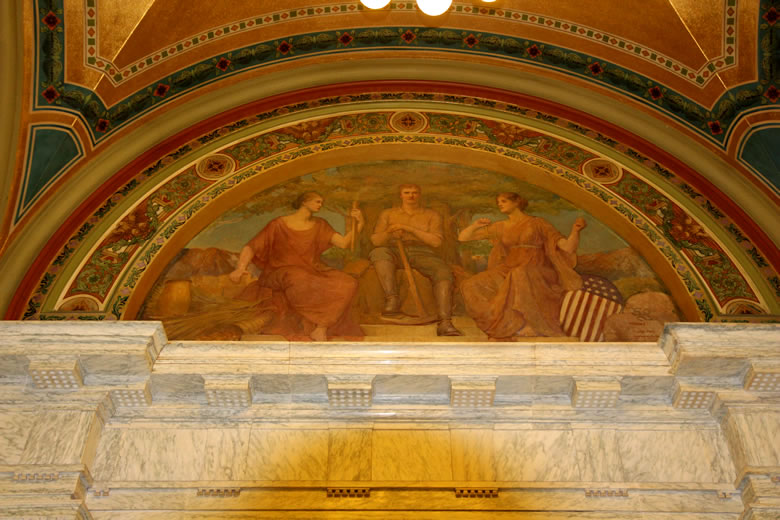
Grand Hallway at the Denver Mint. Part of the original 1904 building, this building is listed on the Denver Register and National Register of Historic Places. The grand hallway is a highlight of the public tour and features Tiffany-style chandeliers that weigh up to 450 pounds. The chandeliers, made by Mitchell Vance Co., are surrounded by grey-veined white marble from Vermont and a terrazzo marble floor. Designed by famed muralist Vincent Aderente, this mural is one of three that adorn the Grand Hallway exit. This mural represents Commerce. The other murals, pictured below, represent Mining and Manufacturing.
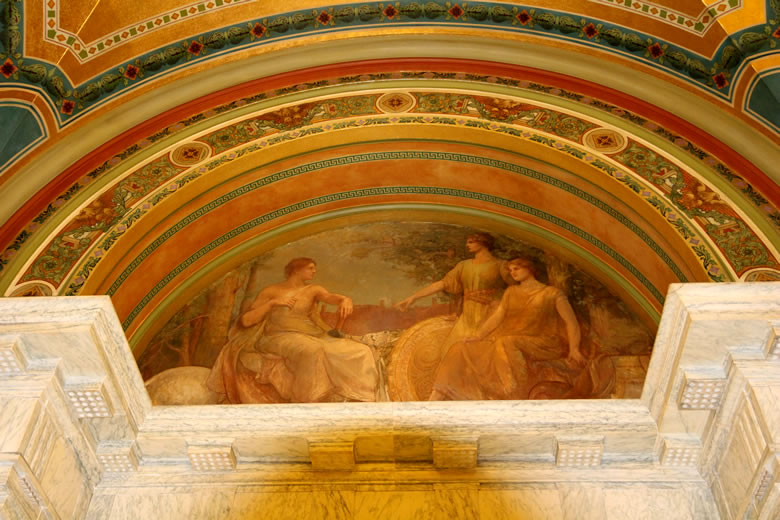
A photo of the Vincent Aderente mural representing Mining
A photo of the Vincent Aderente mural representing Manufacturing
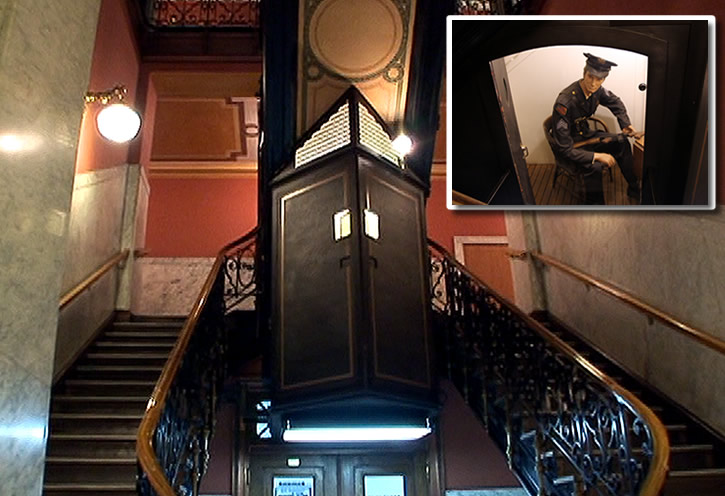
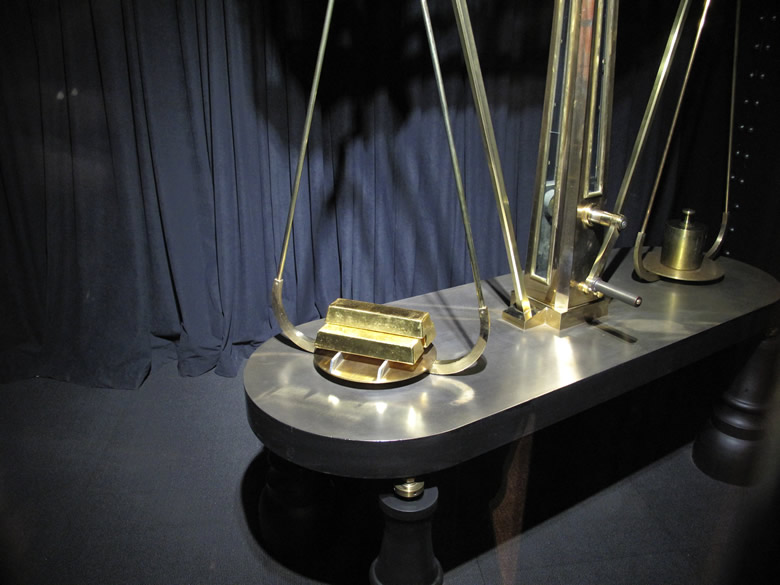
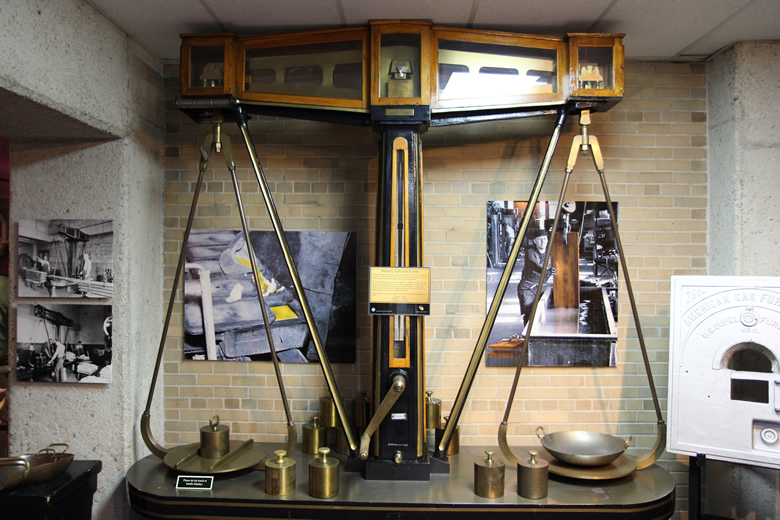
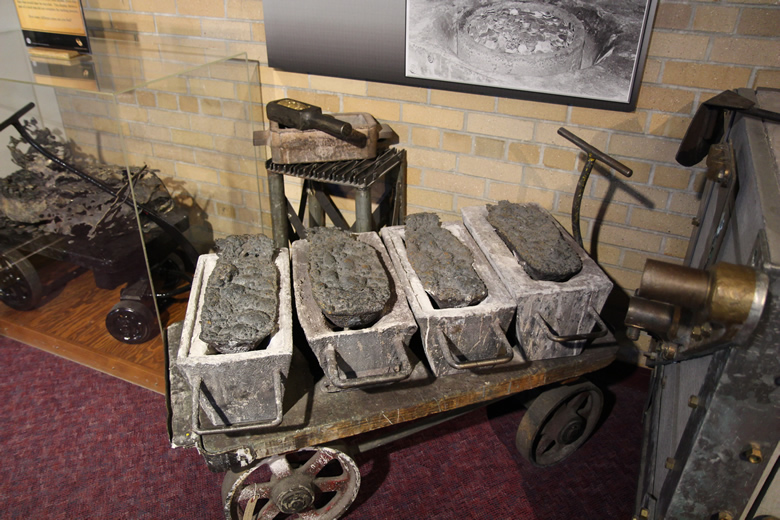
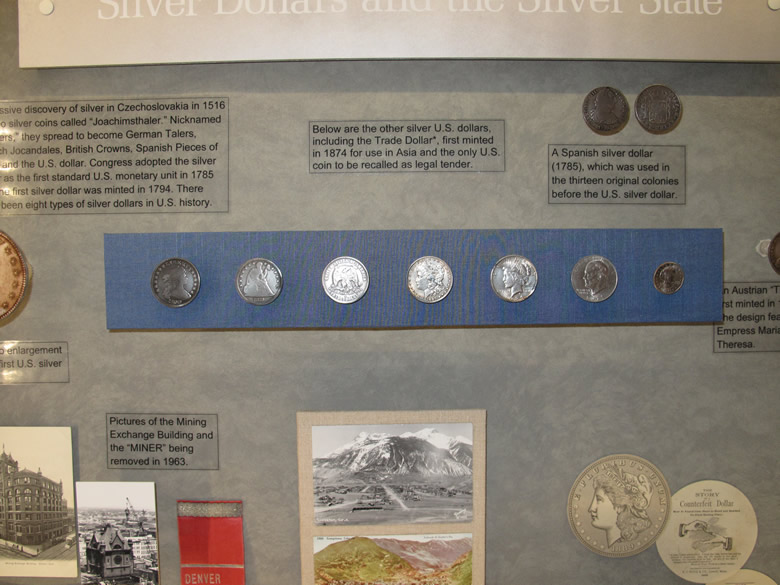
Machine gun nest overlooking the Grand Hallway. It was used to protect the main entrance. Officers on duty were armed with a Thompson sub machine gun, a Winchester repeating rifle, and tear gas filled nightsticks. If needed, officers could press a foot petal inside the nest and set off tear gas in twenty different locations throughout the Grand Hallway. (The smaller photo in the upper right shows the inside of the gun nest that is pictured in the main photo.) A highlight for many visitors, this exhibit displays three 24-karat gold bars stored in the public tour gallery of the U.S. Mint at Denver. This photo taken from the public tour gallery shows a section of the Denver Mint’s coin production floor This photo taken from the public tour gallery shows an overlook of the numismatic area at US Mint in Denver An older-style scale used by the Mints. Counter-weights were placed on the left pan and the item(s) weighed on the right. When everything was balanced, the total of the counter-weights gave the weight of the object(s).
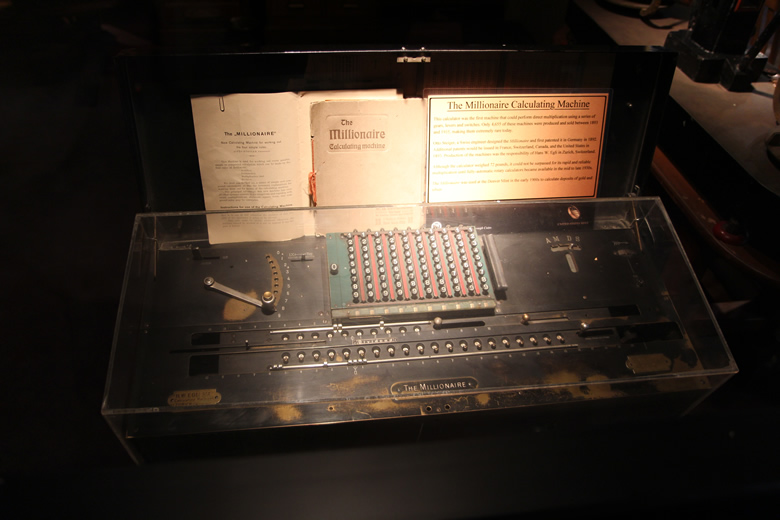
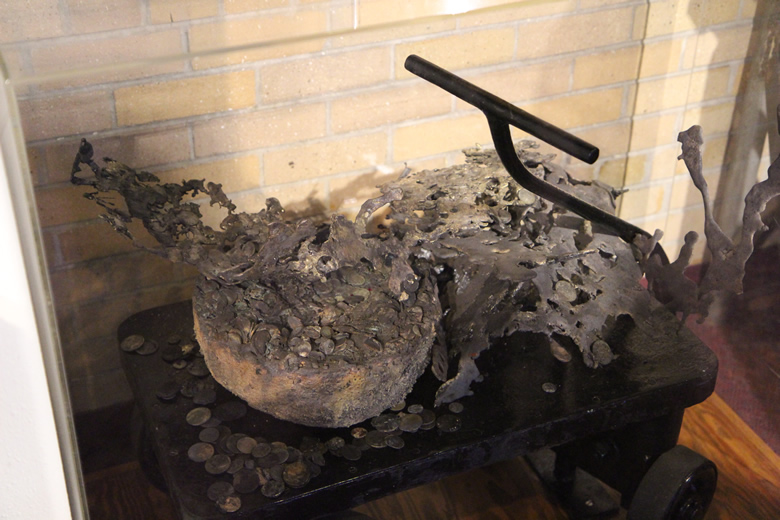
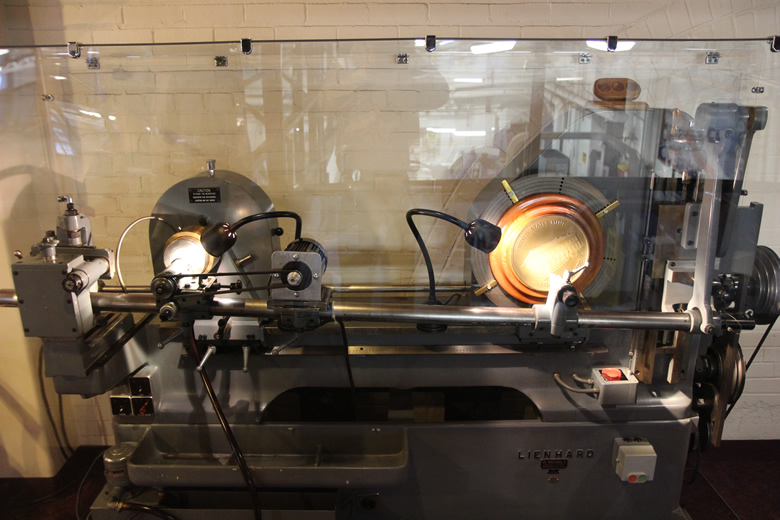
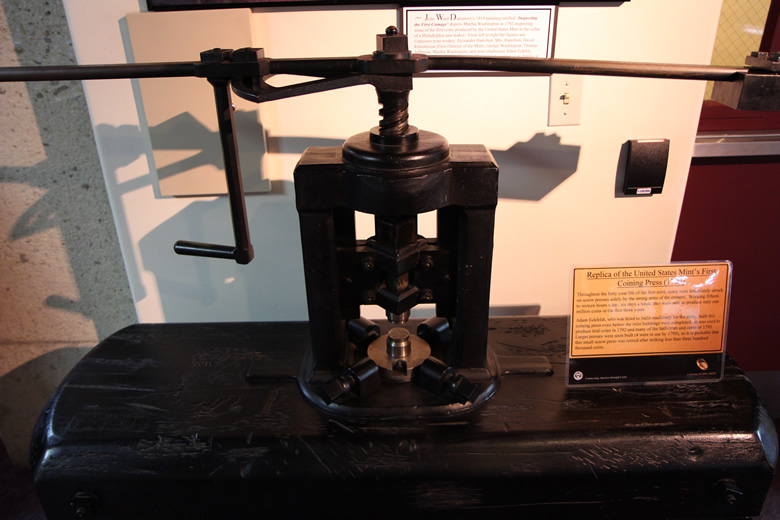
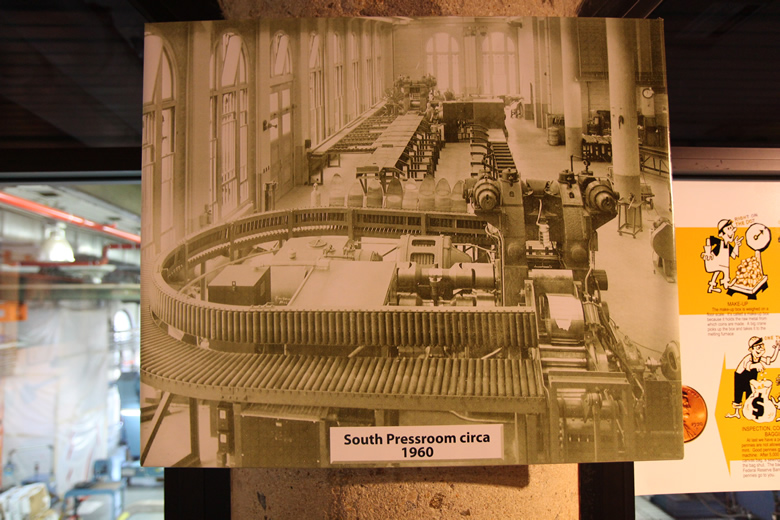
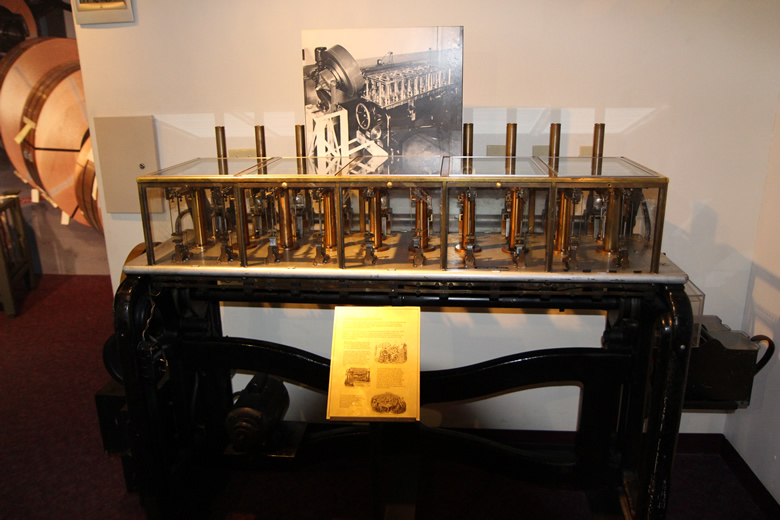
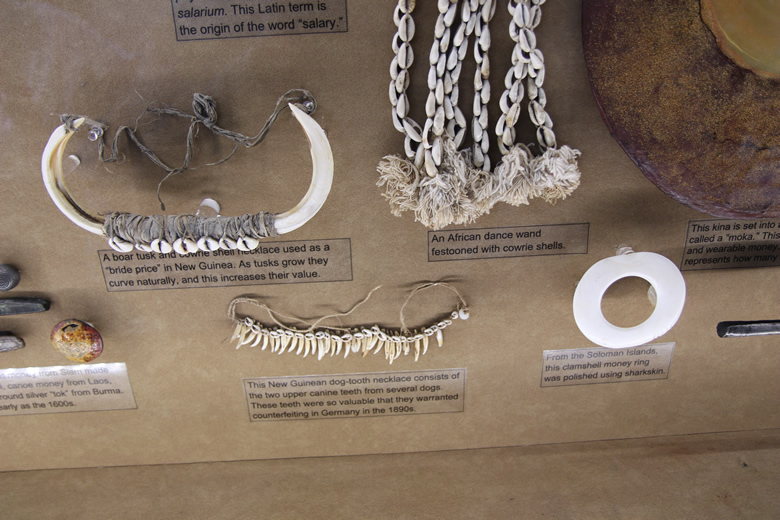
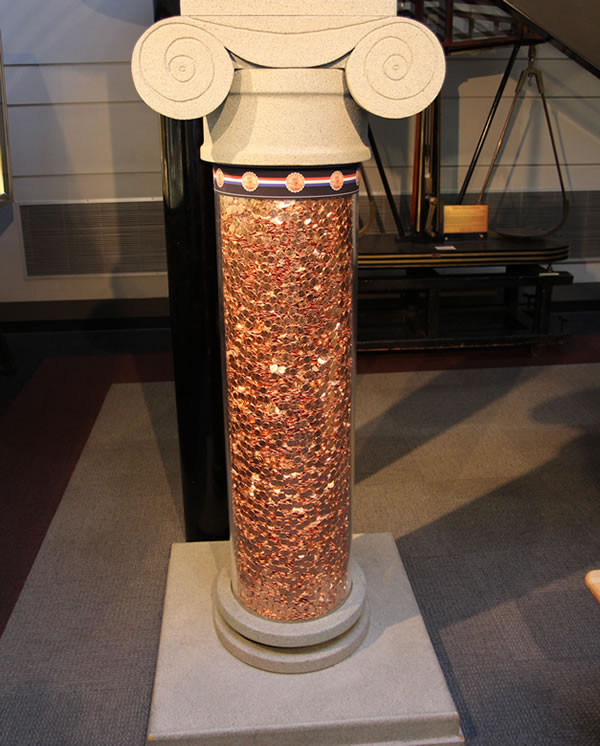
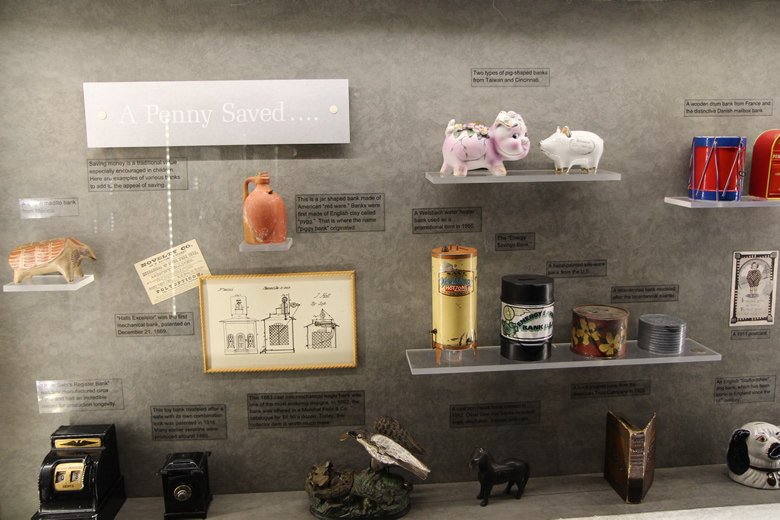
Here, a mock-up of one of the first Denver Mint offices from the early 1900’s. The portrait in back is of Abe Lincoln. The model ship in the far back was built by a Denver Mint employee.The Millionaire Calculating Machine was used at the Denver Mint in the early 20th Century to calculate the deposits of gold and silver. Only 4,655 were produced and sold between 1893 and 1935.The gray bars represent slag, which is an example of material being formed into ingots, or destroyed coins.Before 1994, problem coins were melted down into bars for later recycling. This photo and display shows a part of the melt that did not finish.This Janvier transfer engraving machine on display at the Denver Mint was actually used at the Philadelphia Mint in the early 1900’s. This machine was used to reduce the large engraving models to the actual coin size. Today, computers replace the need for the transfer engraving machine.Replica of first Coining Press used by the United States MintA photo of the South Pressroom of the Denver Mint, circa 1960Here, a photo of the Seyss automatic weighing machine. It was used in the early days of the U.S. Mint to weigh gold and silver coins. It has ten scales, each connected to tubes fitted for various coin denominations. Added blanks would get sorted in three ways – by exact weight, underweight and overweight. Heavy blanks would get filed and re-tested. Those that were too light were rejected for melting. Correctly weighted blanks would move on to a coining press.This photo shows a section of a display about objects that were used as money. They include a boar tusk and shell necklace used as a “bride price” in New Guinea, an African dance wand festooned with cowrie shells, a clamshell money ring and a New Guinea dog-tooth necklace – these teeth were so valuable that they were counterfeited.This column of cents on display at the Denver Mint Public Tour is a child favorite. Inside are 127,389 of 2010-D Lincoln cents. The coin weight is about 698.4 pounds.This photo shows a section of a display describing various silver dollars from around the worldThis photo shows the Mint’s display of unique piggy banks from around the world
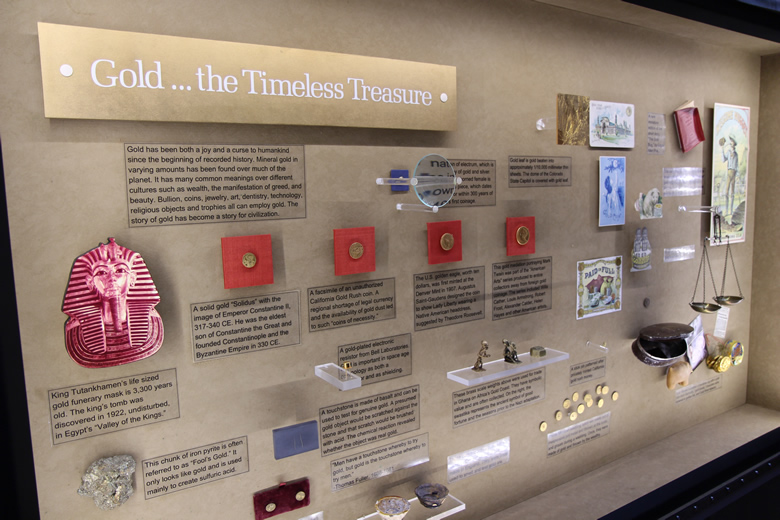
A section of a display about gold and some of its early uses, to include several types of gold coins. One of the educational posters that describes the different parts of a coin
Our next article in the series showed how dies are produced at Denver. Dies, cut from rods of steel, are hubbed to take on coin designs, shaped to fit in coining presses, and heat treated for strengthening to withstand the pressure of striking blanks to make coins.The link above offers full details, here are photos with summary information.
A photographic overview of several die manufacturing processes at the Denver Mint
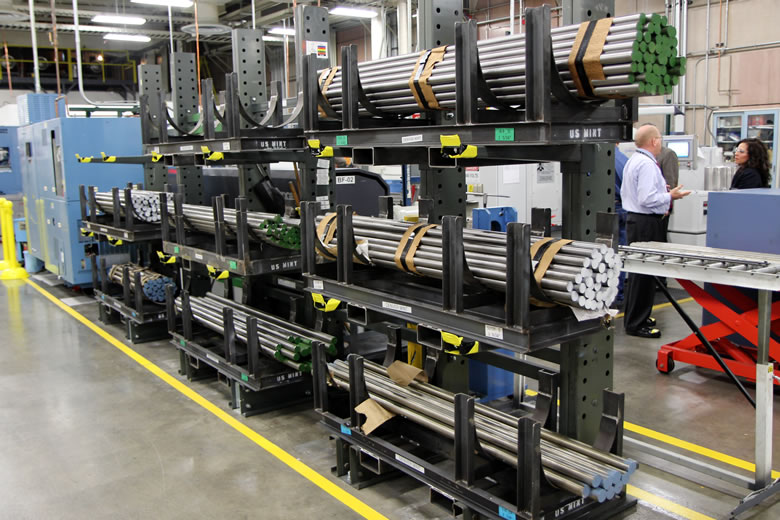
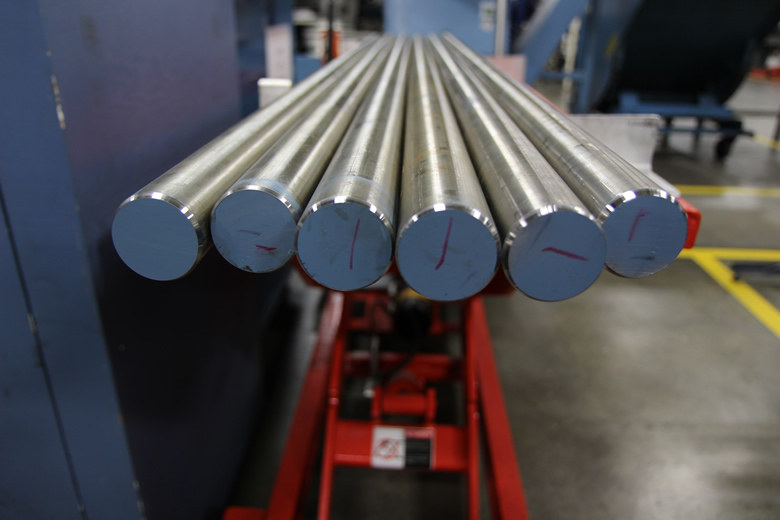
Racks of die steel bars at Denver Mint
A closer view of the raw ends of die steel bars
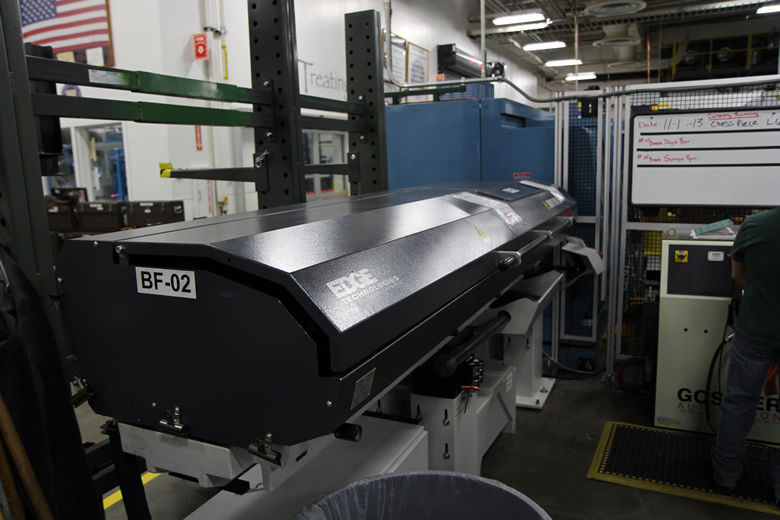
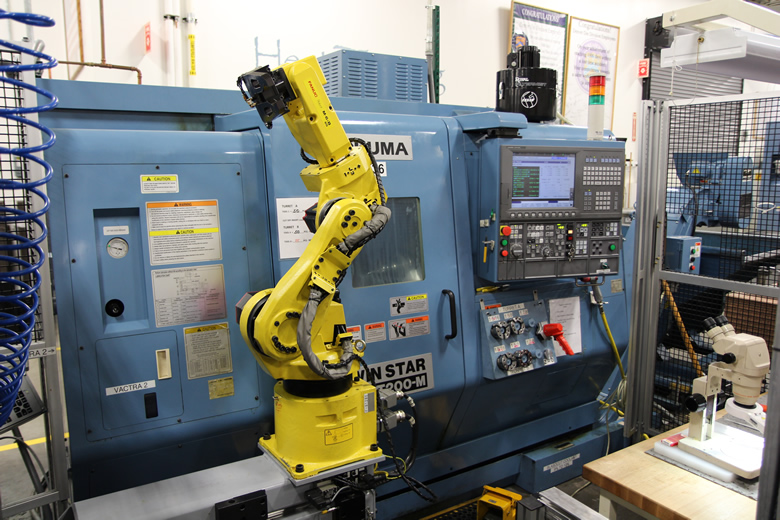
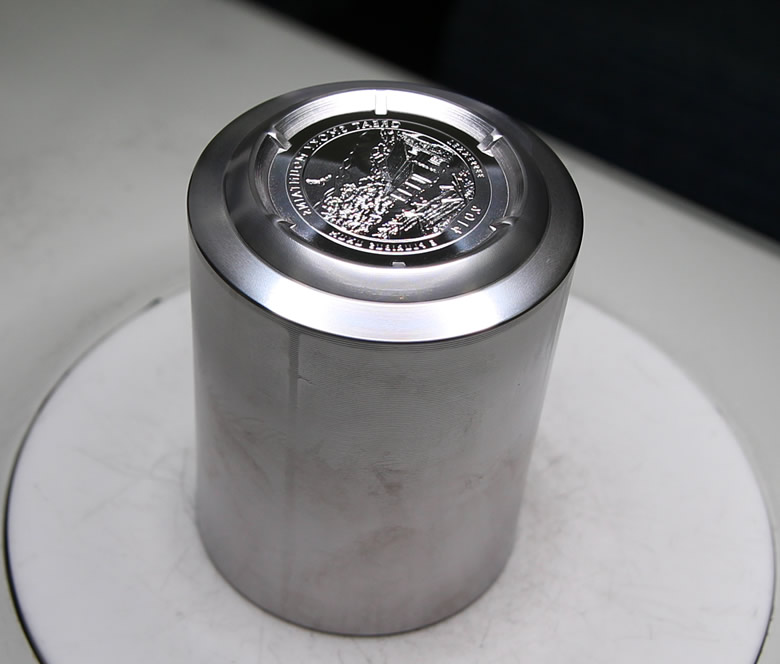
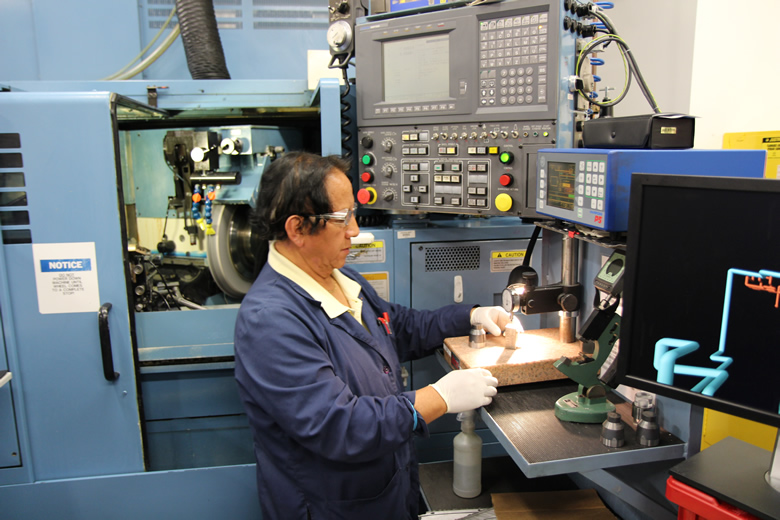
This bar feeder is attached to the CNC lathe shown directly below. Steel rods, like those shown above, are placed into the feeder. This Okuma Twin Star LT 200-M CNC Lathe accepts a long steel bar, cuts a piece from it and then gives the top end a cone-shape. Richard Diekemper checks the finish on the die blanks after they are polished in another machine Thielenhaus. Videos of Thielenhaus are in the original article.
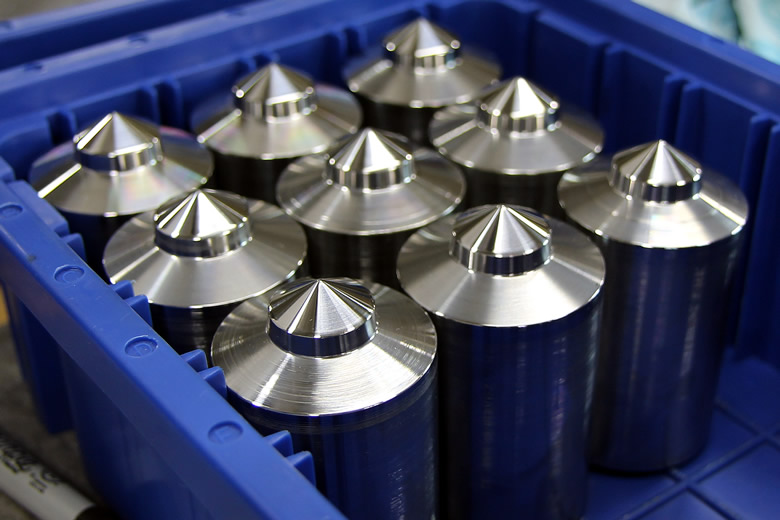
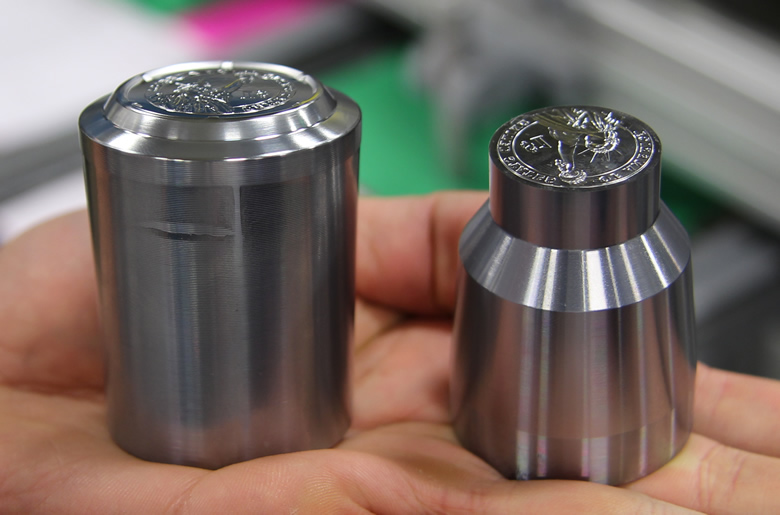
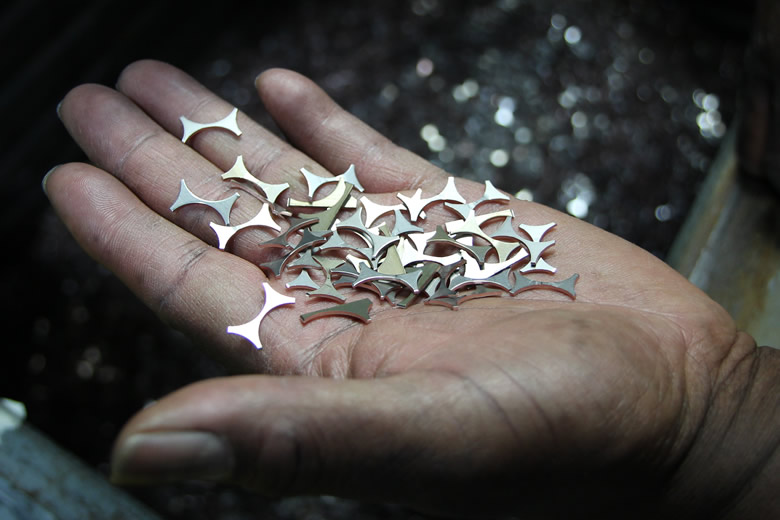
A basket of die blanks
A view of die blanks from another angle
The Hubbing department is where die blanks are pressed with designs to become coin dies. Of the four United States Mint production facilities — West Point Mint, San Francisco Mint, Philadelphia Mint and Denver Mint, two share the task of hubbing.
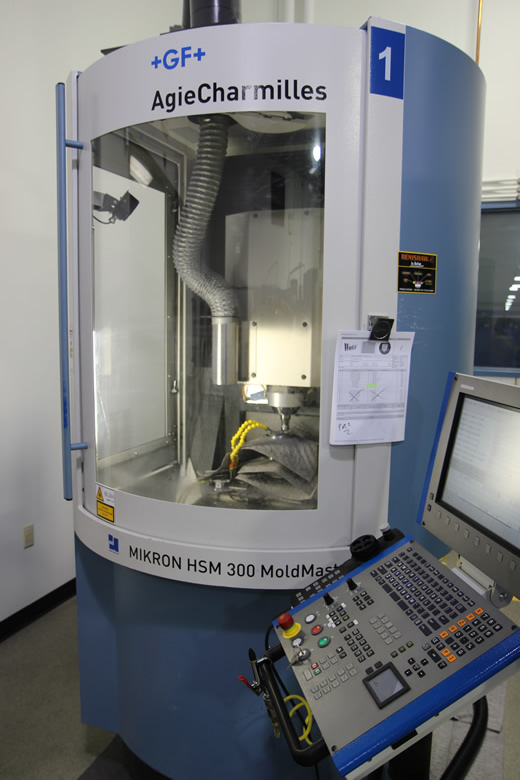
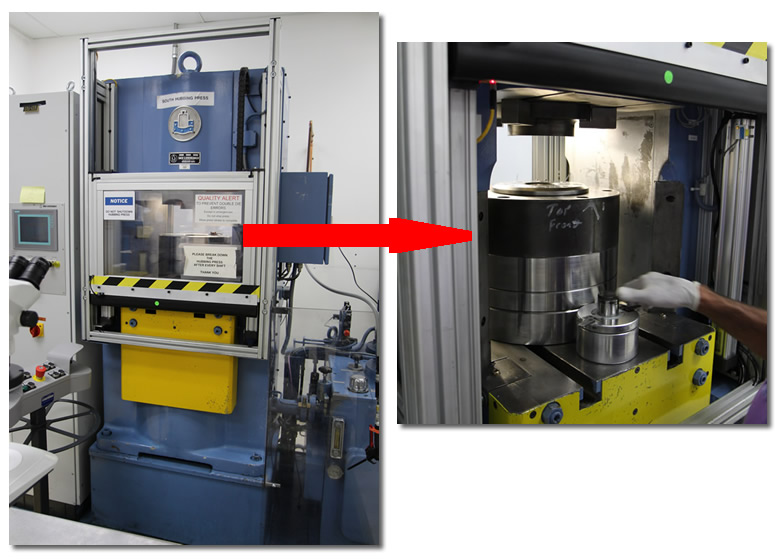
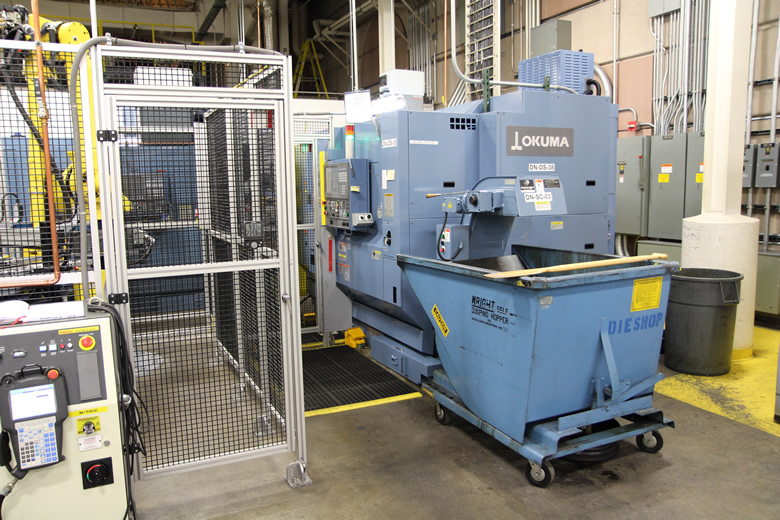
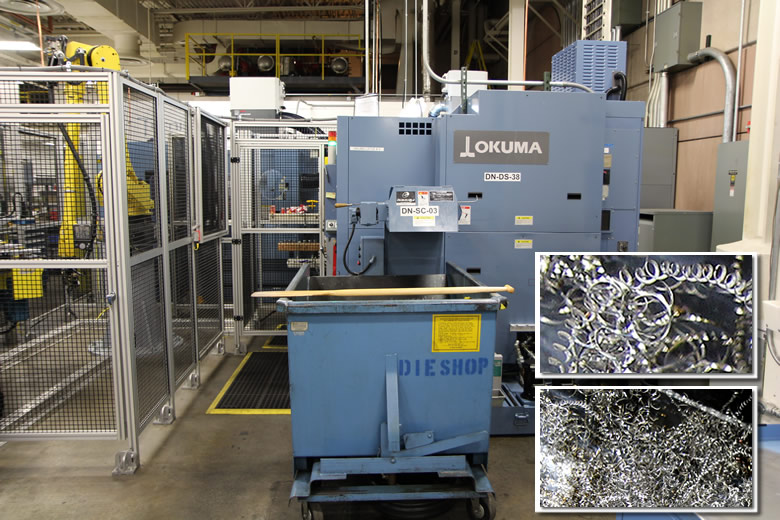
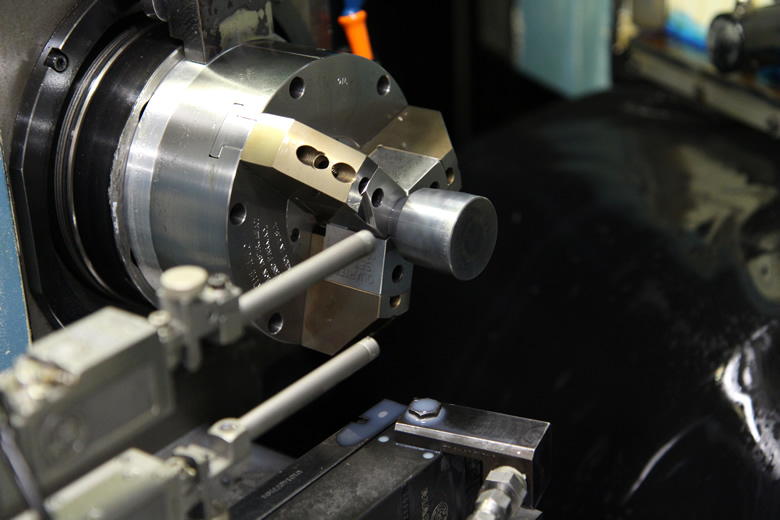
Larry Lamz inspects a hub. Gloves are necessary because any speck of dust or debris may cause defects. Hubbing is the process of impressing a positive or relief (raised) image of the coin onto a steel blank. A hubbing press is behind Larry. This Mikron CNC milling machine at the Philadelphia Mint creates master hubs. Shown at left is a Hubbing Press at the Denver Mint. To the right is a close-up of the press area where master dies are fitted along with die blanks to create working hubs and also where working hubs are fitted along with die blanks to create working dies. A newly hubbed 2014 Great Smoky Mountains National Park Quarter reverse die For coin dies to fit properly in coining presses, they have to be tapered. At left is a Presidential $1 Coin die straight from the Hubbing room. At right is a die after the tapering process. The Okuma LT2000 EX horizontal lathe is used to shape the dies to the proper size. The lathe operates using a die card (called a bar code) which is fed into the lathe. The card tells the lathe the correct program to use for each die denomination. A side view of the Okuma LT2000 EX horizontal lathe. Overlaid to the right are photos of scrap from the dumping hopper, shown center. The scrap is from dies that have been tapered.
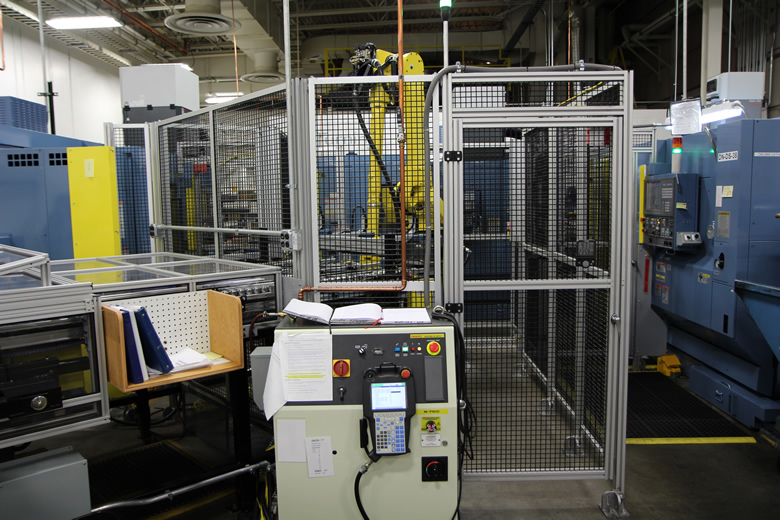
A photo of the front or “home” conveyor system
A photo of the center or “pitcher’s” area with the robotic arm
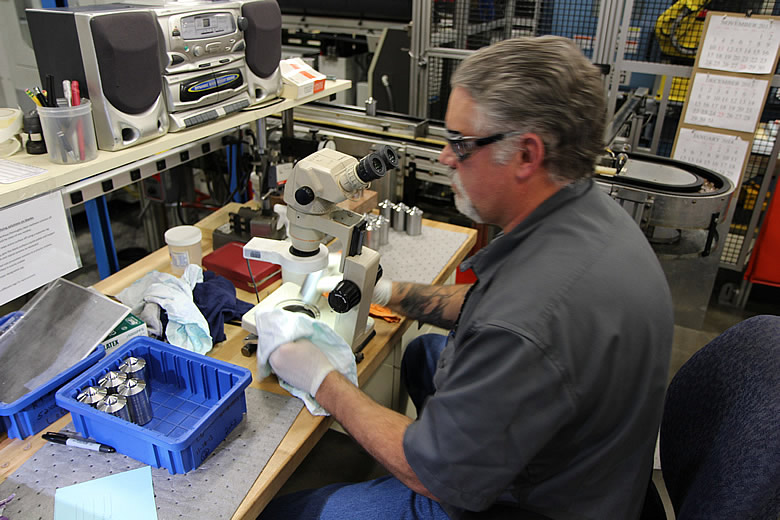
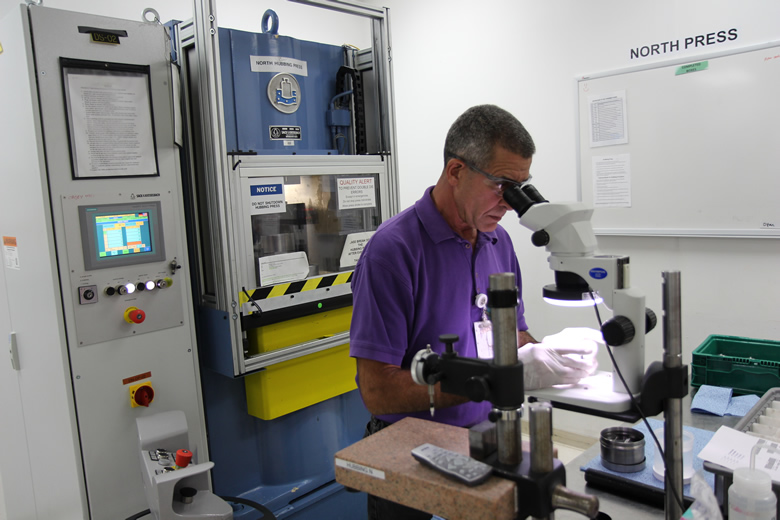
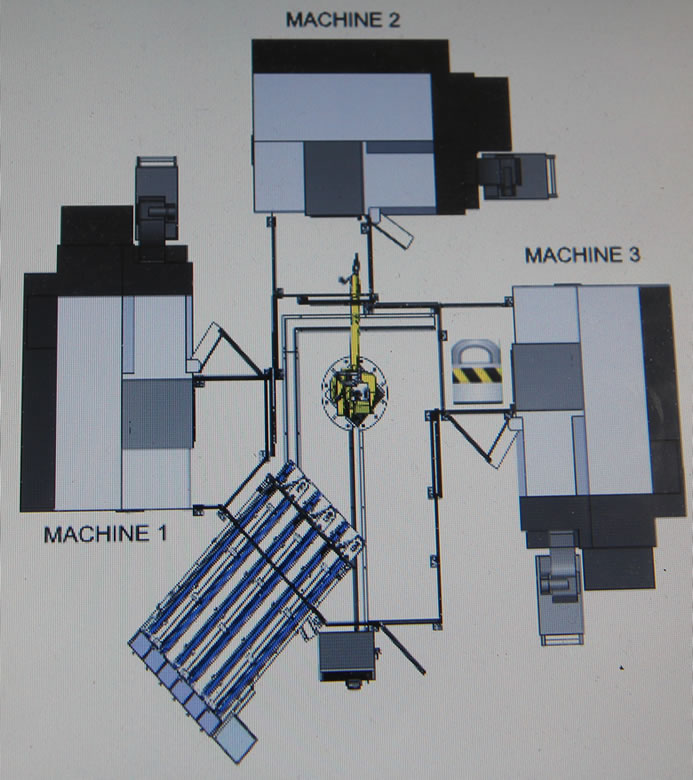
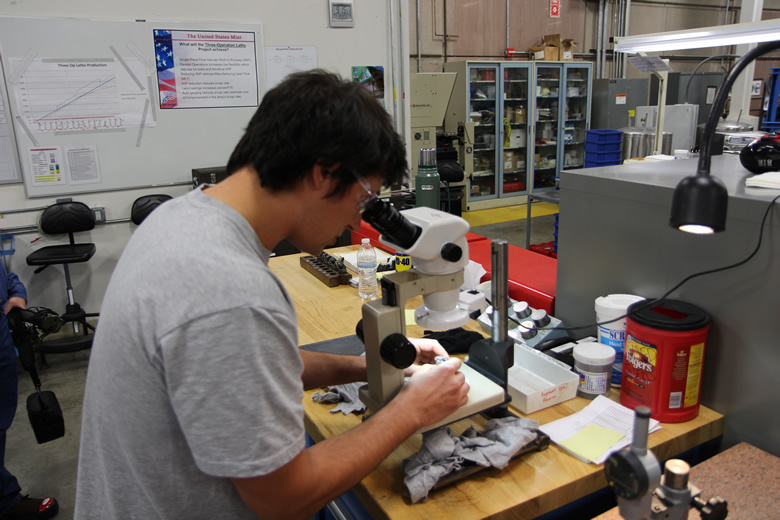
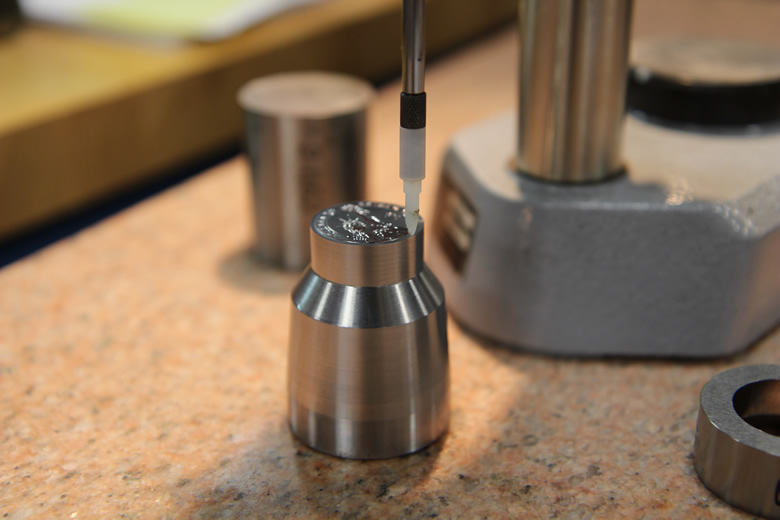
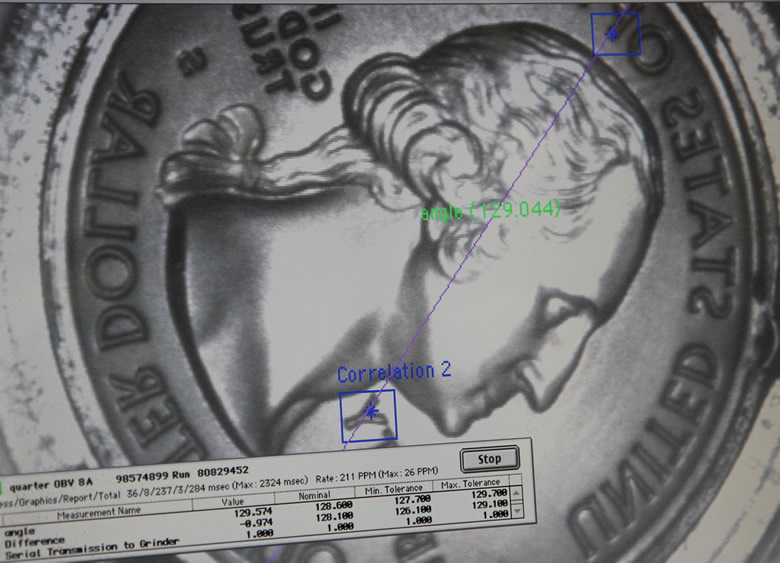
A diagram of the Three-Operation Lathe Cell Manufacturing Process Using a microscope, Eric Faler inspects a die that has been tapered. By taking several measurements, he’ll also verify that the die has the proper shape.
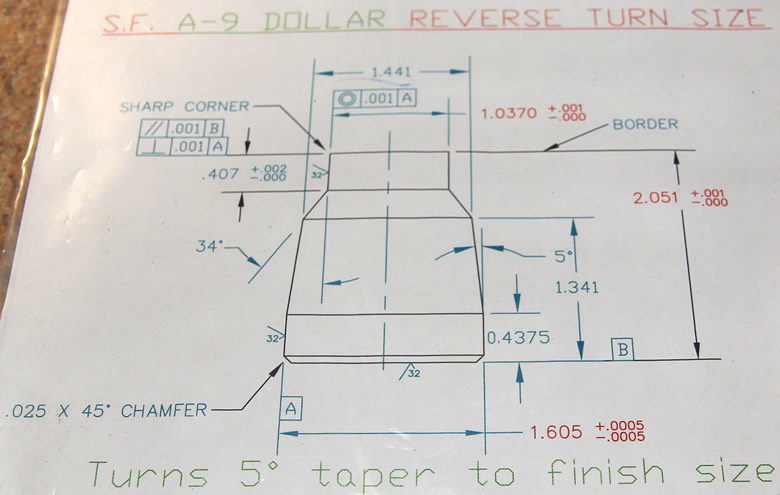
A sizing specification sheet for a Presidential $1 Coin reverse die
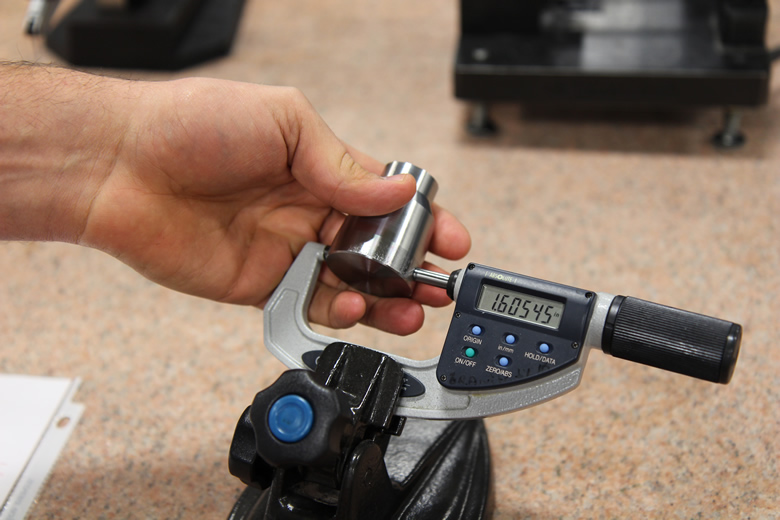
Measuring the base width of a Presidential $1 Coin reverse die
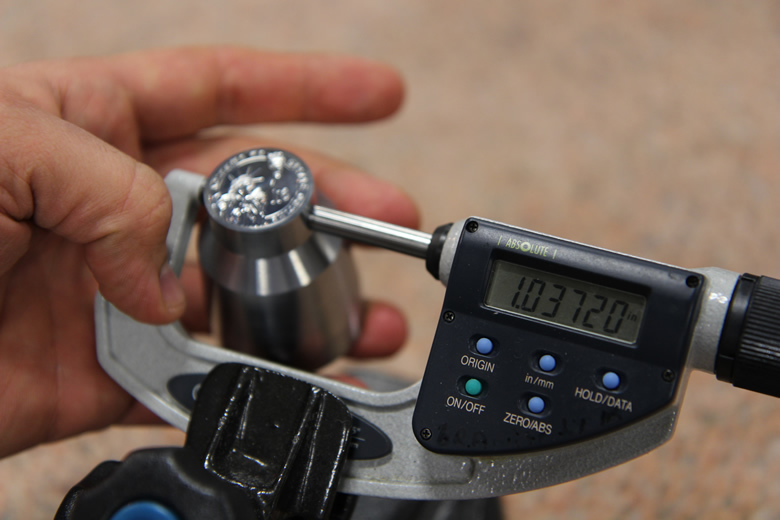
Measuring the neck width of a Presidential $1 Coin reverse die
Measuring the height of a Presidential $1 Coin reverse die
A laser machine is then used to burn serial numbers into the newly shaped coin dies.
Sean Calhoun Operating Laser Serializer Machine. The original article shows the machine burning serial numbers on the dies. A batch of 2014 Native American $1 Coin reverse dies with new laser engraved serial numbers
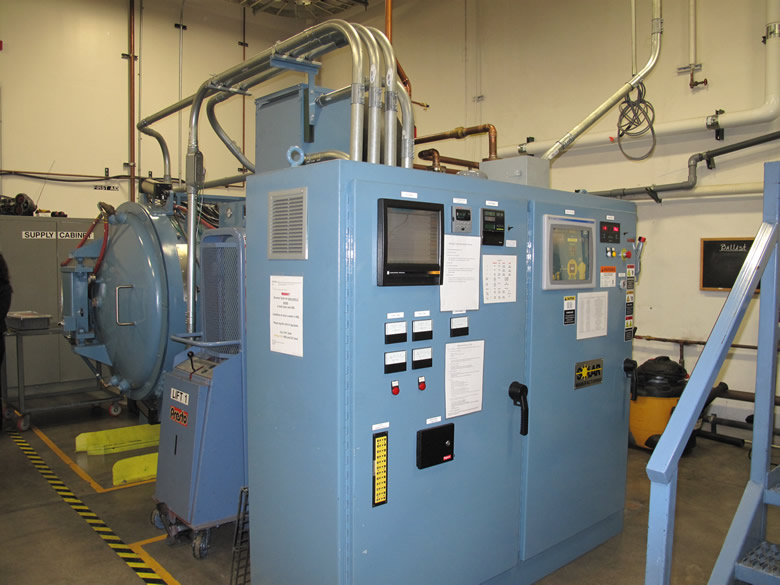
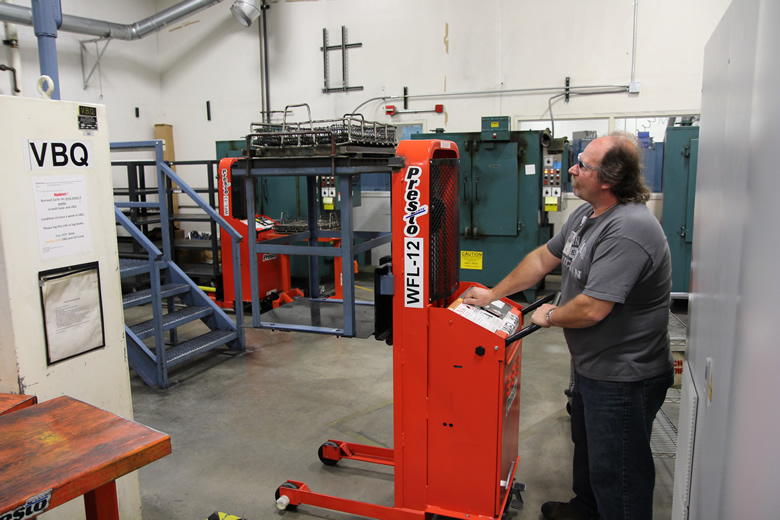
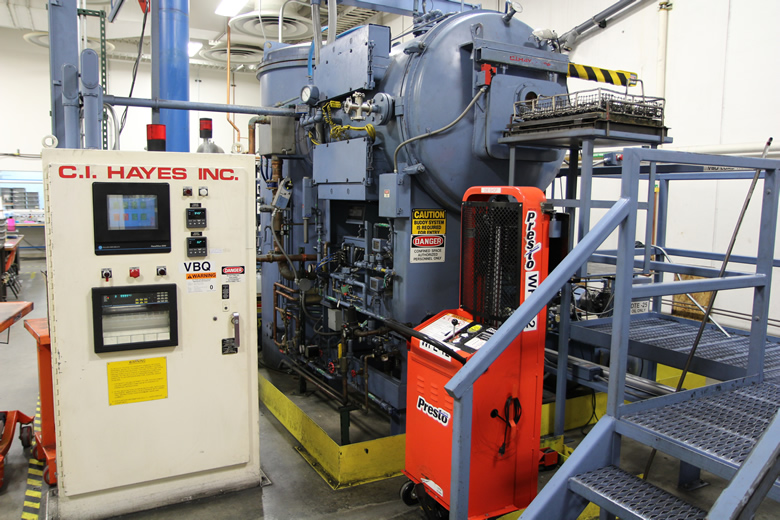
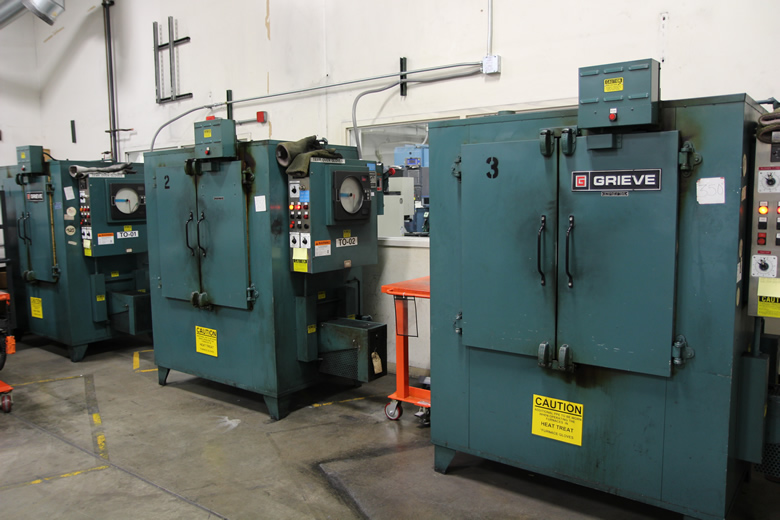
Coin dies then go through heat treatments to harden and improve their resiliency.
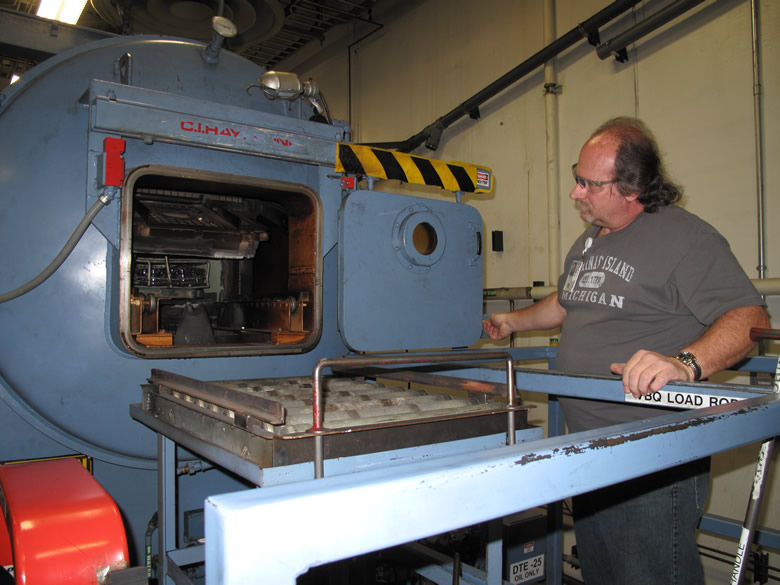
Atmospheric Vacuum Furnace Dennis Busnardo loads a tray of 50 single dies into the VBQ oil furnace.
Dennis raising the tray of dies to the furnace entrance
The tray of dies is now in position, readied for the VBQ furnace
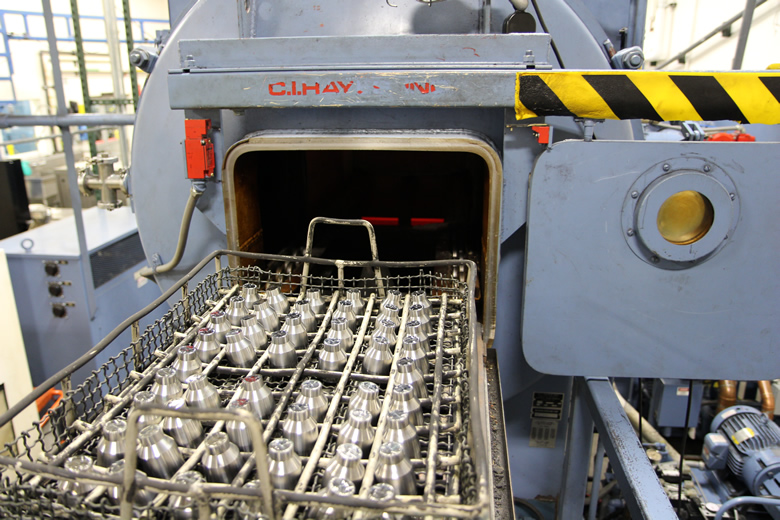
Notice the heat toward the back of the VBQ furnace
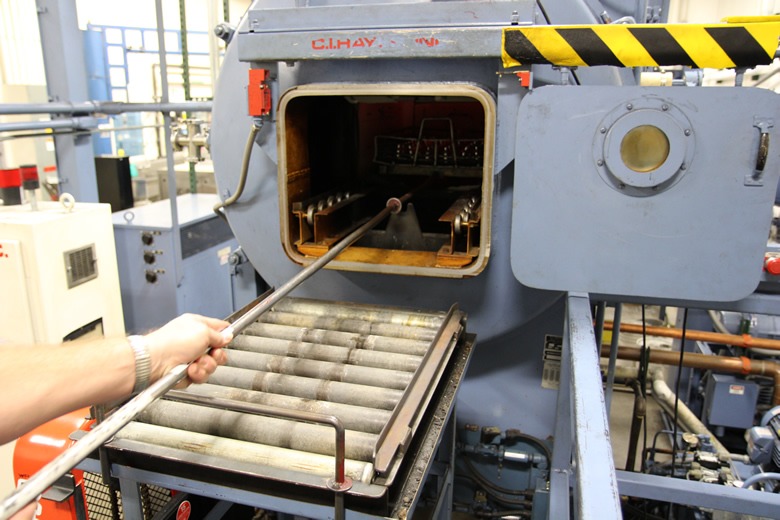
The tray of dies is pushed into the VBQ furnace
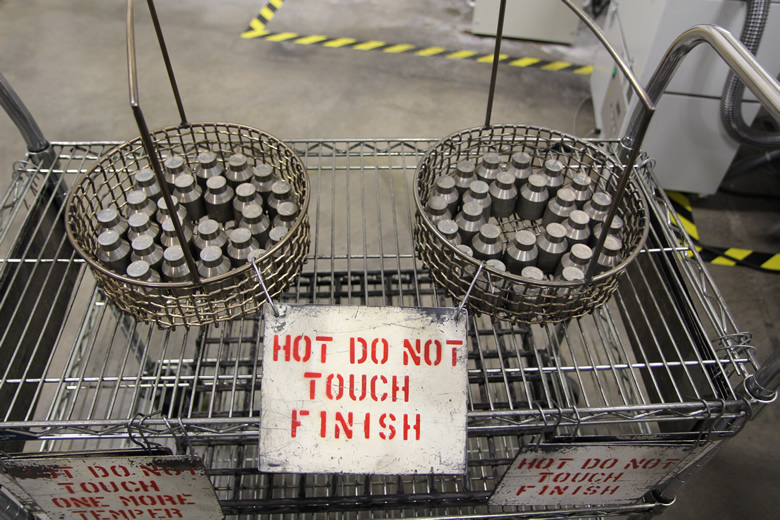
These tempering ovens temper dies after they are heat treated. Trays of tempered coin dies
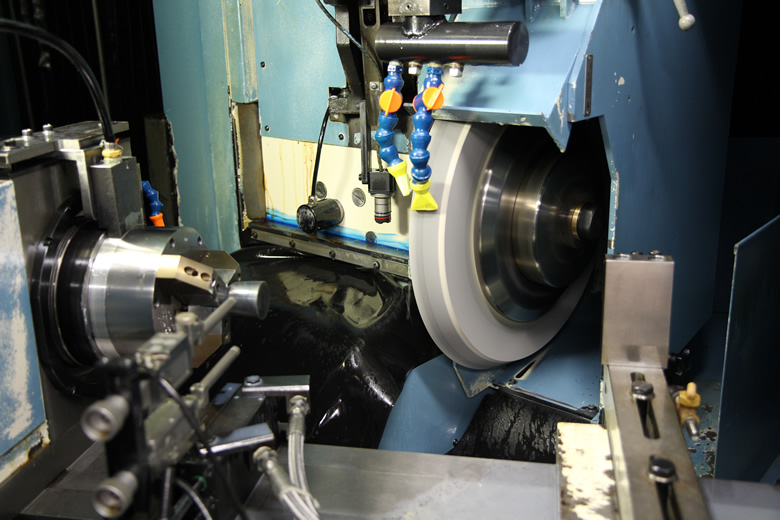
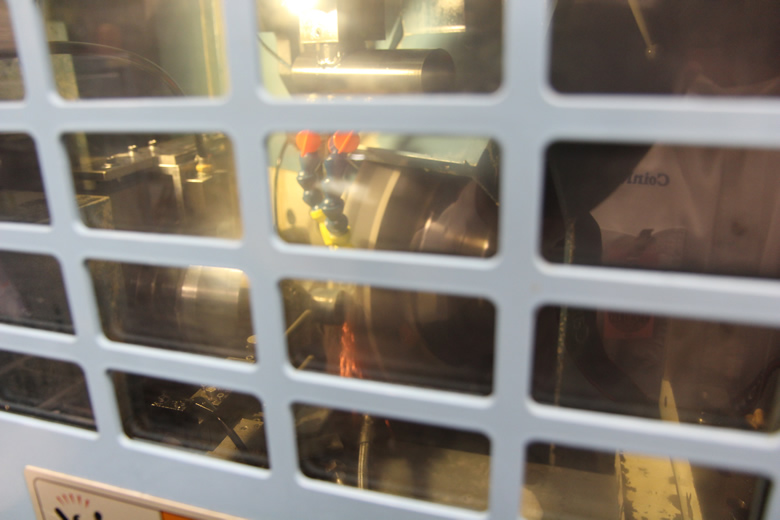
When dies are first shaped they have a small amount of extra material called grinding stock. This extra material is needed because dies swell and grow after hubbing and heating. A machine grinds dies after heat treating to their final shape and size.
Luis Cocha monitors the control panel for the Granger Die Grinder, where he checks and monitors the beam alignment of the dies. Inside of Granger Die Grinding Machine Here, grinding of a die is seen up close Camera view of die orientation on Granger die grinding machine Granger Die Grinding Machine with Die Attached Several die measurements are taken after the grinding process
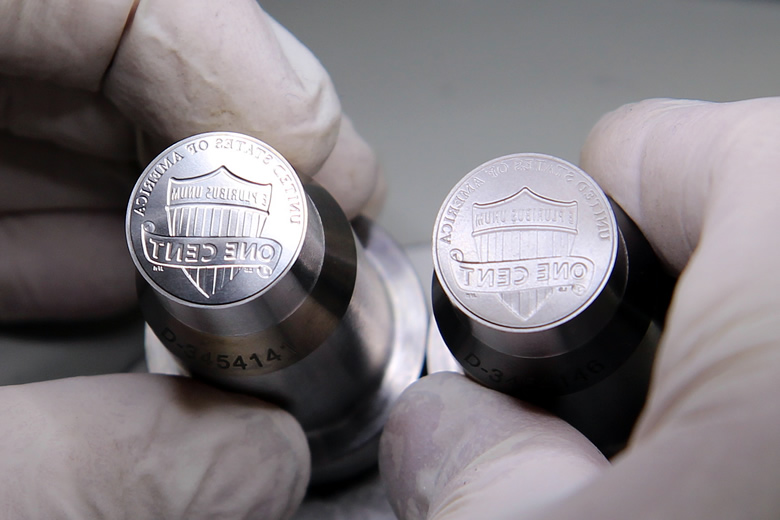
Another round of inspection is performed. The dies are also cleaned and polished. They are then ready for coining presses.
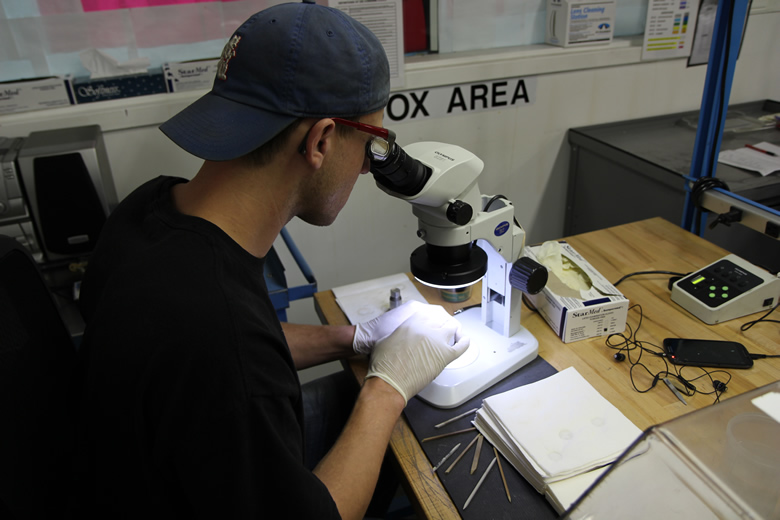
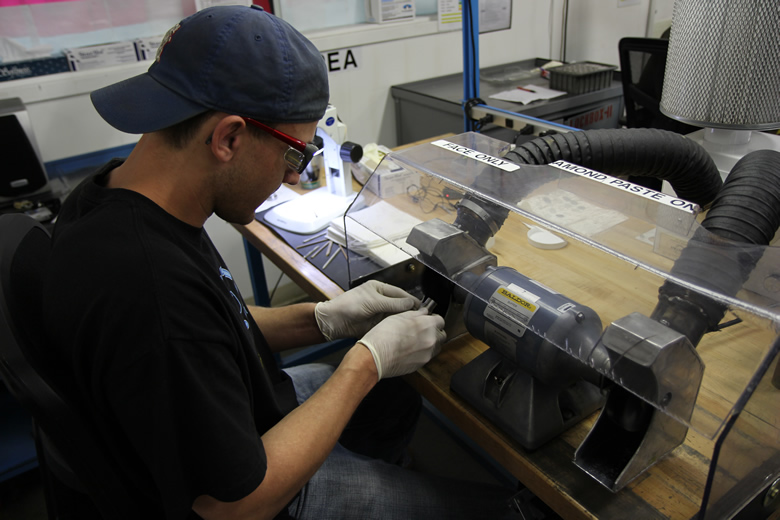
With the aide of a microscope, Evan Eagle cleans a die Special brushes are used to clean dies Buffing wheels provide a circulated die finish Shown at left is a 2014 Lincoln cent reverse die that has been cleaned and wheel buffed. Shown at right is a die that needs cleaning.
Our next article in the Denver Mint series showed how coins are produced for circulation. It described how blanks are cut from rolls of steel, how blanks are heat treated, cleaned and then go through machines to add rims and become planchets. Planchets are shown getting struck in coining presses to become coins. Finally, the article showed how the coins are packaged into bags for shipment to Federal Reserve Banks. The link above offers full details. Here are the photos that were in that article.
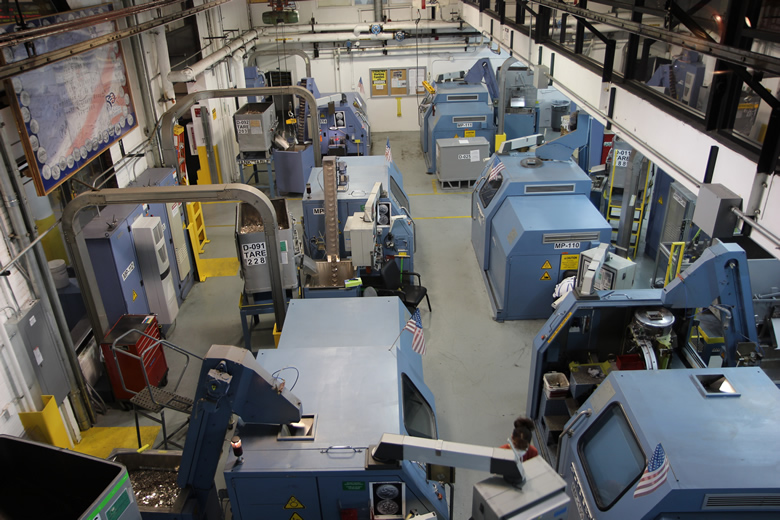
A photographic overview of the equipment and materials used by the Denver Mint to make coins for circulation
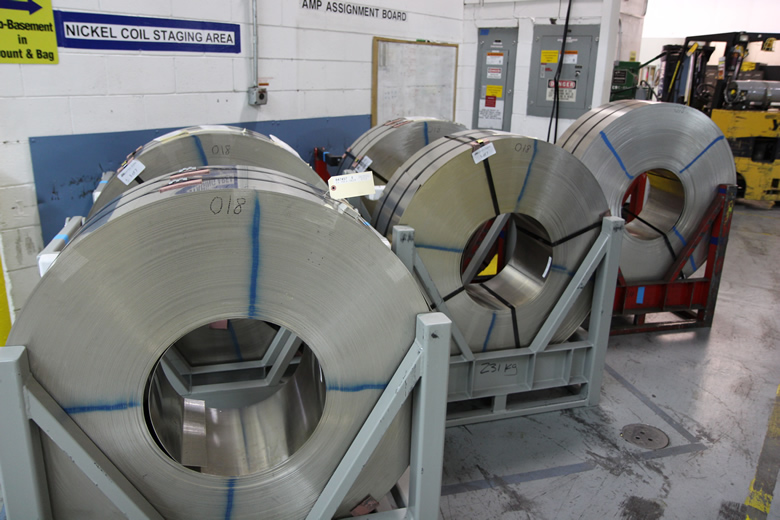
Coin production operations start where they will end, at the loading dock. There, pallets of metal coils are unloaded and then moved to short term storage on racks. It is these coils from which coins for circulation are made.
Staging area on the coin production floor for nickel coils
Staging area on the coin production floor for quarter coils
Large presses produce blanks by cutting them from coils of metal.
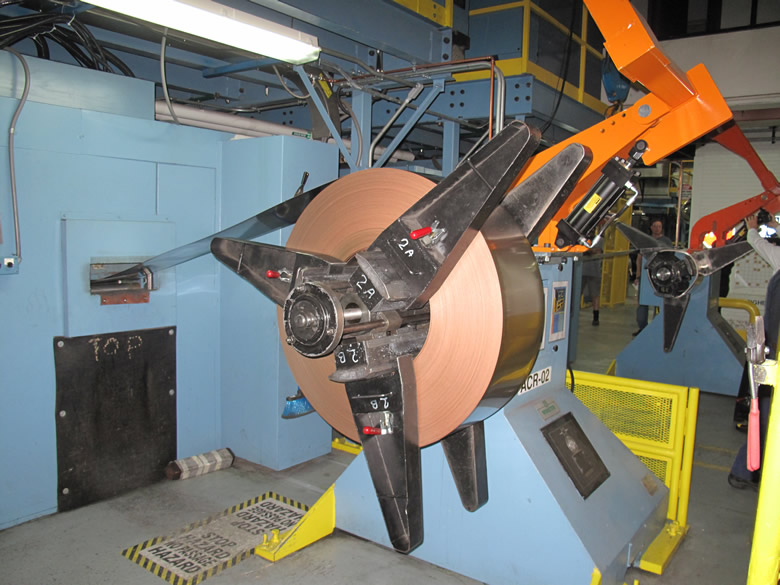
Left: A coil of metal that is fed into a blanking press. Middle: Cut coin blanks. Right: Leftover scraps called webbing. A metal coil weighing 10,000 pounds is fed into a Blanking Press. One stroke of the press punches out 22 blanks. It takes 45-60 minutes to finish one coil. A video in the original article shows how quickly the wheel moves. The sheet of metal is guided to the press. Again, a video in the original articles shows blanks cut from the sheets. Freddie Smith, holds the scrap metal from the coils used in the blanking process. The material will be sent back to the manufacturer for recycling. This photo shows leftover scrap coin webbing from Blanking Press
The next stage is for the coin blanks to go through annealing furnaces which both softens the metal and strengthens it.
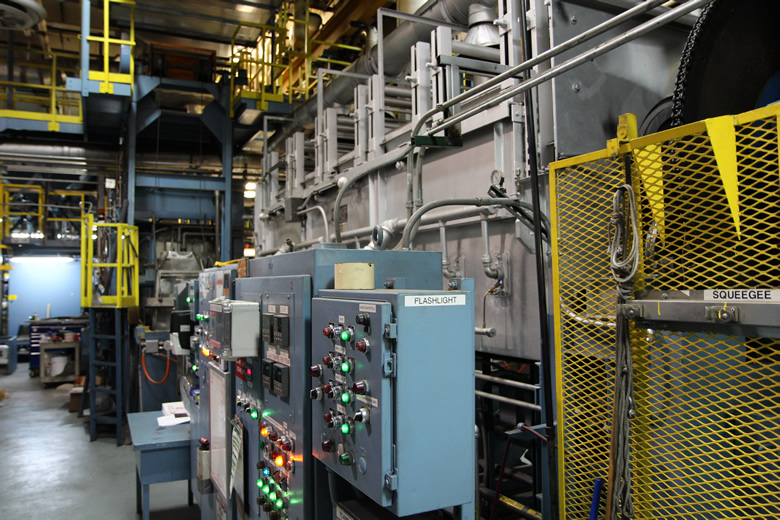
Three-story equipment height
Here are some photos of the annealing and washing stages.
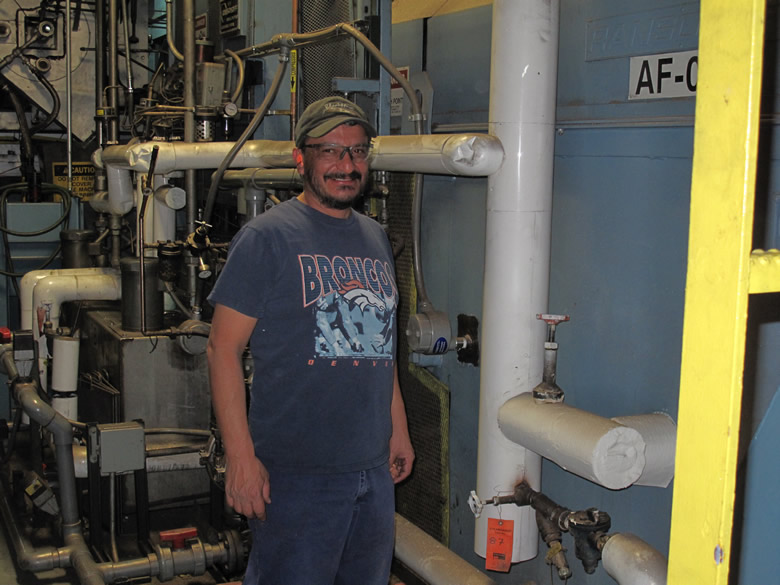
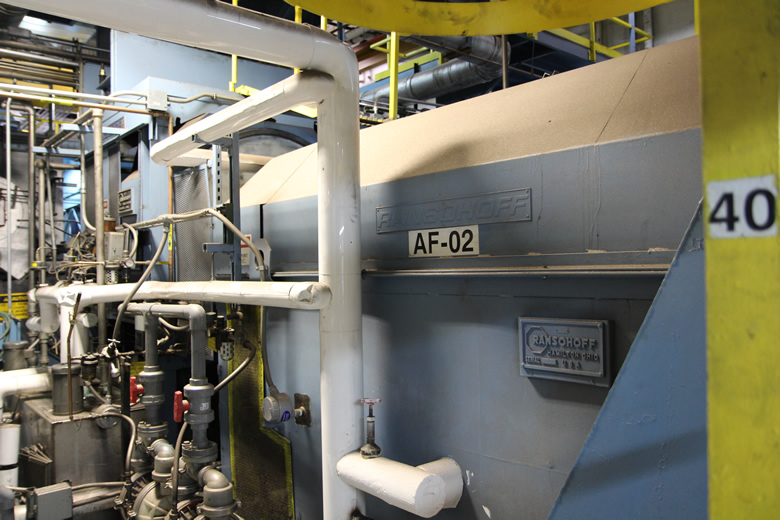
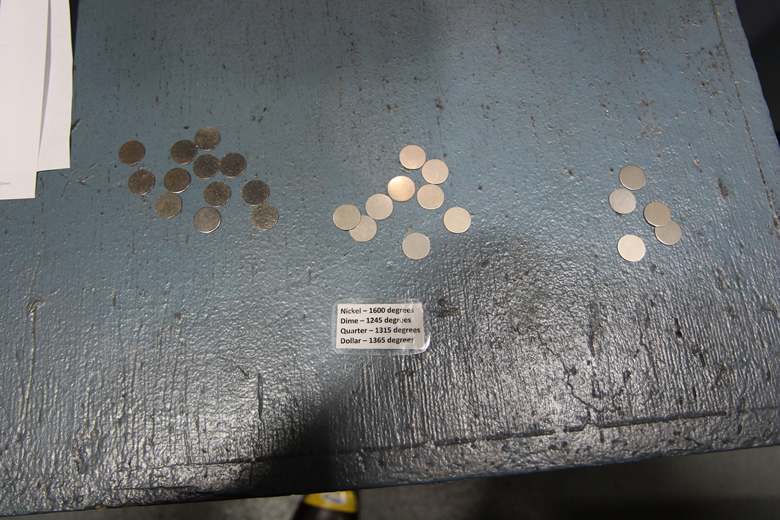
Gilbert Manzanares, operates the furnace in the automated materials processing area (AMP) on the production floor. This furnace AF-03 reaches temperatures up to 1600 degrees and anneals about 2800 lbs. of nickel blanks in an hour. This machine can dry up to 3000 lbs. of dime blanks every hour From left to right: Blanks after they are annealed, quenched and then washed. Each blank looks and feels different following each stage.
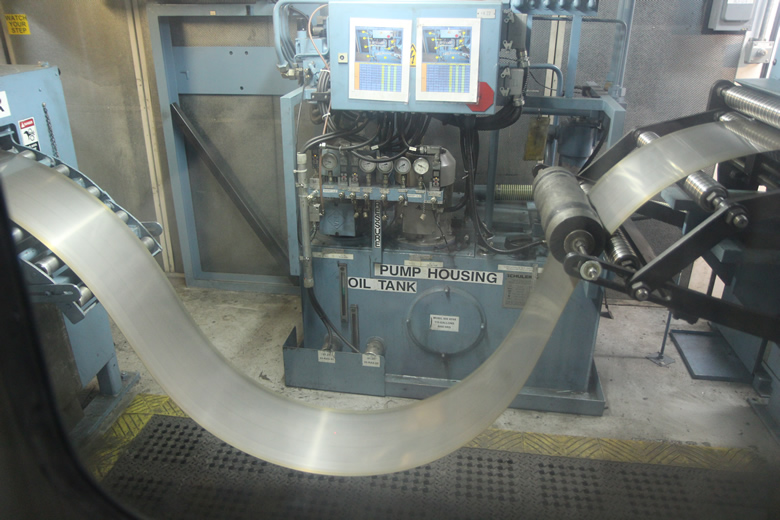
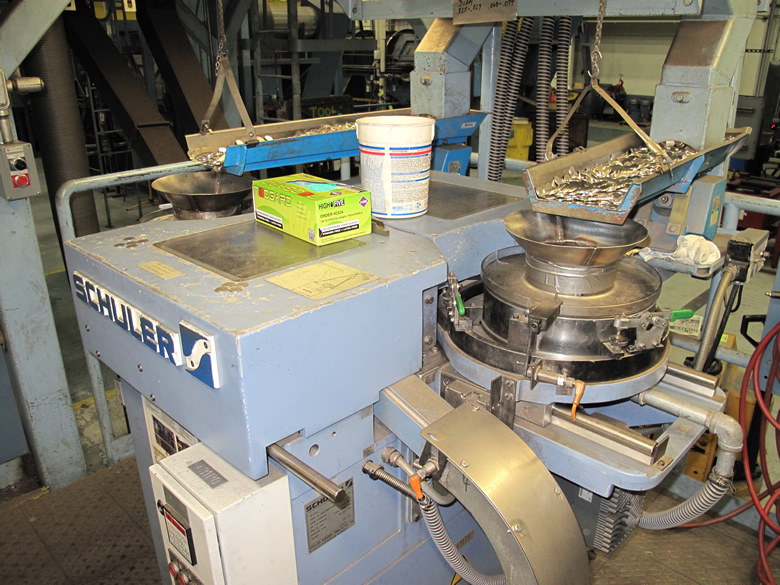
Next in the process, the blanks need to be run through the upsetting mills to get rims. We walked quickly through these areas at the Denver Mint because the machinery was exactly like those of the Philadelphia Mint. The following photos, therefore, are those we took during our private tour of the Philadelphia Mint.
Schuler Upsetting Machine at Philadelphia Mint. This machine places an edge or rim on blanks.
Shown here are the vibrating feeder bowls for the upsetting mills.
A closer view of the vibrating feeder bowls for the mills.
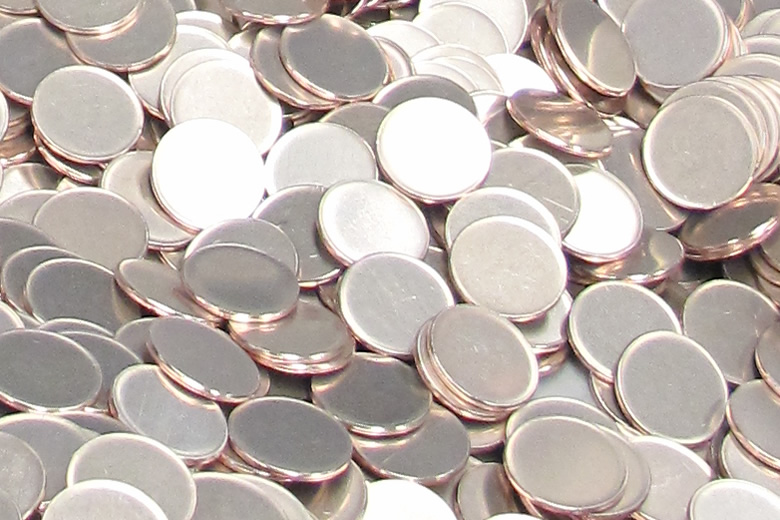
Schuler Upsetting Machine. This spinning disc quickly forces blanks against a stationary segment which causes the edge to slightly rise. Planchets created from blanks running through an upsetting mill. Notice these metal discs now have edges or rims.
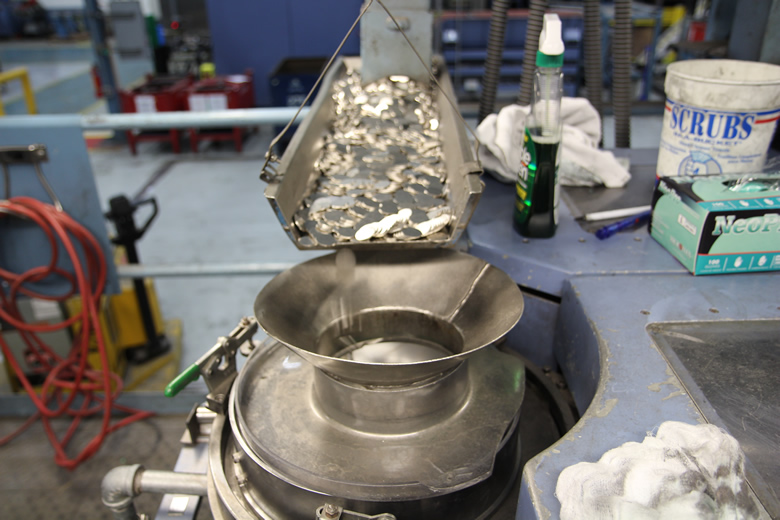
United States Mint facilities do not create blanks and resulting planchets for Lincoln cents. Those are outsourced. Bins of planchets for cents are delivered to the Denver Mint.
Bins of Lincoln cent planchets at the Denver Mint A closer view of the cent planchets
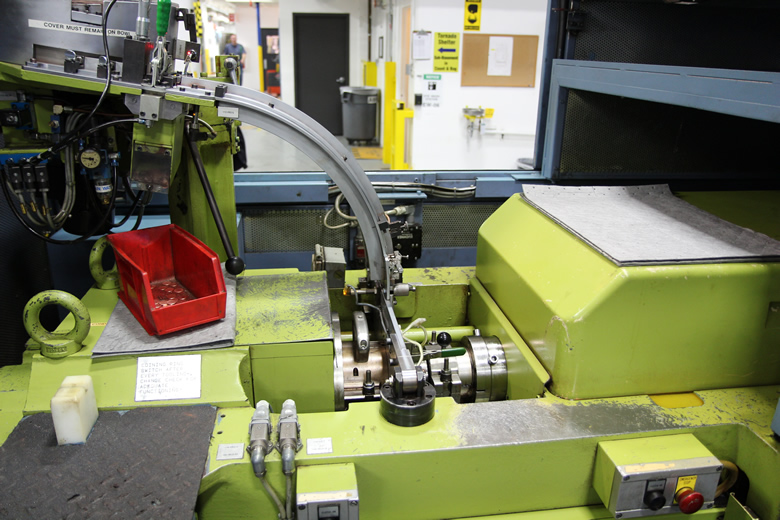
Planchets that are made or received, move to Coining Presses on conveyors. Planchets are fed on demand into the presses.
This photo taken from the public tour gallery shows a section of the Denver Mint’s coin production floor and a few of its Coining Presses. Photos of inside the presses are below. A video of how fast the presses work is in the original article.
The main, internal area of a Coining Press
The “pressing” area of another Coining Press
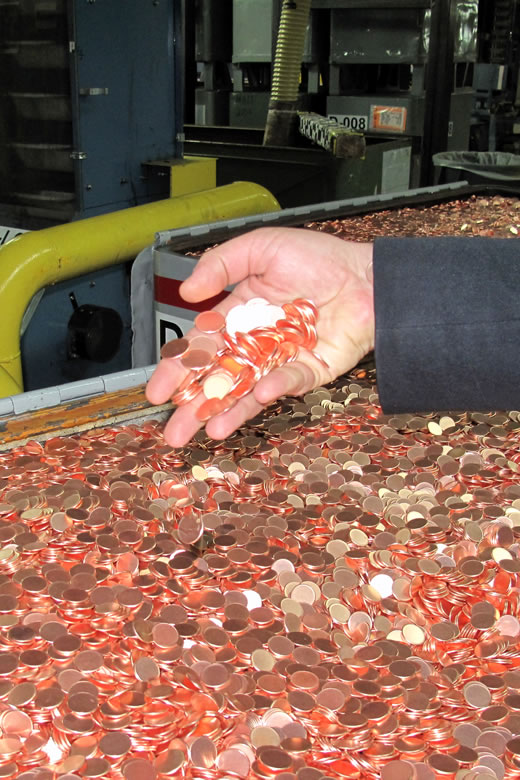
After pressing, the coins drop into a catch box to await manual inspection.
Finished Lincoln cents in catch box of Coining Press
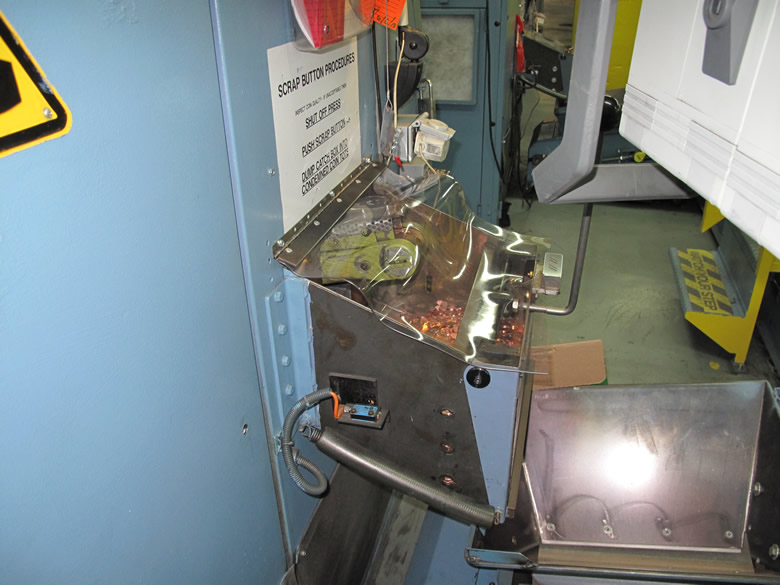
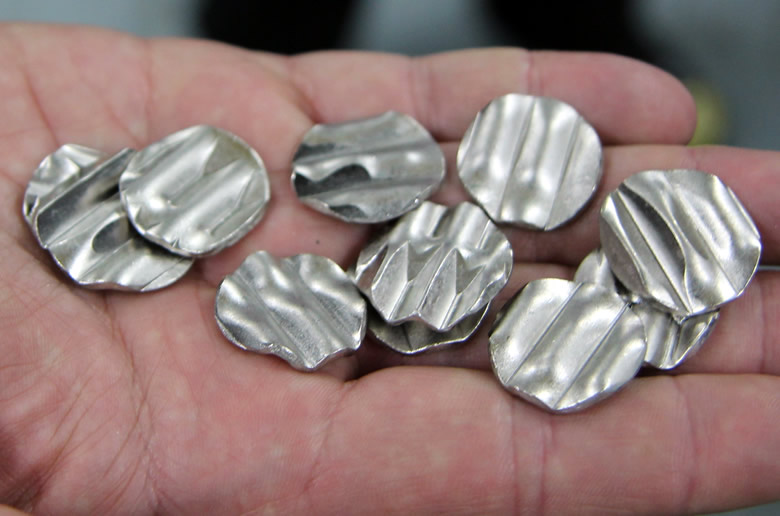
One coin in the catch box from each production run is checked for flaws before the batch is let loose for packaging. If the coin has an error, the entire lot is scrapped. They end up in a waffle machine, which destroys their designs.
These waffles were once coins.
If the coin passes inspection, the press operator pulls the trap on the catch box and the coins fall onto a conveyor and travel to rooms for counting and packaging. Mitch Salzman operates a count and bag machine. Fed from the automatic cent line through a conveyor, coins are dumped into the tops of the counting machines where sturdy bags are automatically filled with coins. The original article includes videos of machines counting and bagging coins. It takes about 23 minutes to fill a bag. Filled bags can weigh between 2206-2677 lbs. and are moved with forklifts once filled.
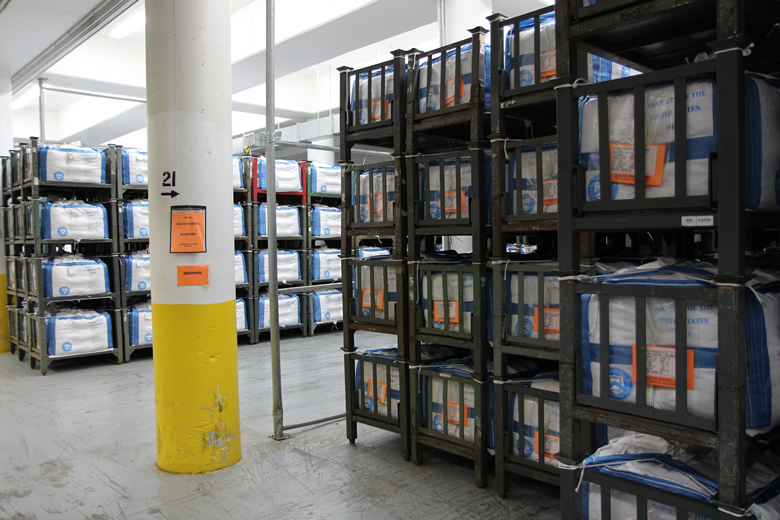
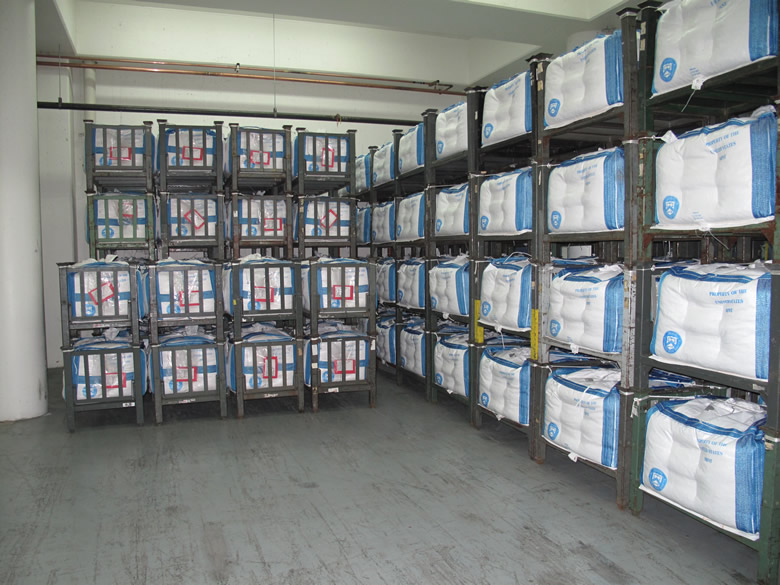
Bulk bags go into storage in the vault, readied for shipping.
Racks of bulk bags with quarters
Racks of bulk bags with quarters
Racks of bulk bags with quarters
Racks of bulk bags with quarters
The next stop is the loading docks, which is where the process all started. What came in as rolls of metal now goes out as coins and scrap. The coins eventually make their way to Federal Reserve Banks and finally to financial facilities around the country.
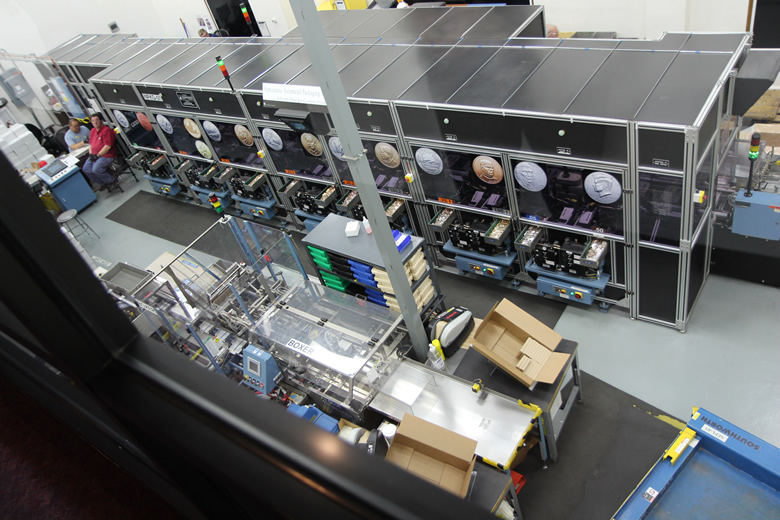
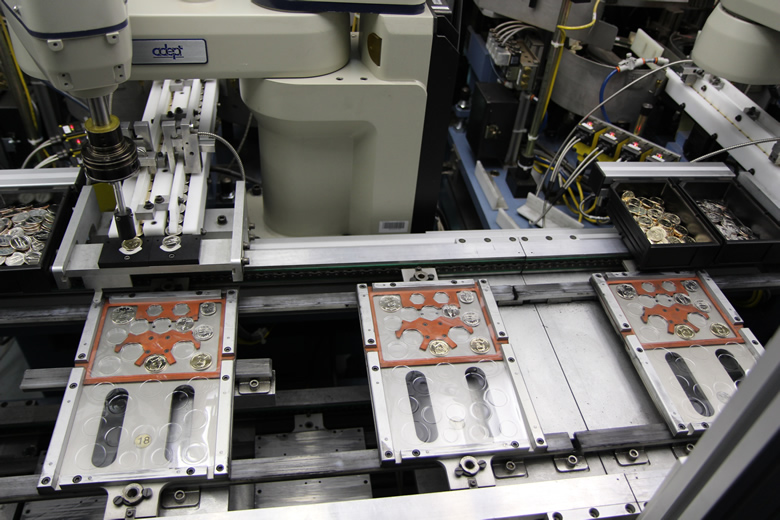
Our next article described how the U.S. Mint at Denver makes annual Uncirculated Coin Sets, or Mint Sets.The title above offers full details, here are photos with summary information.
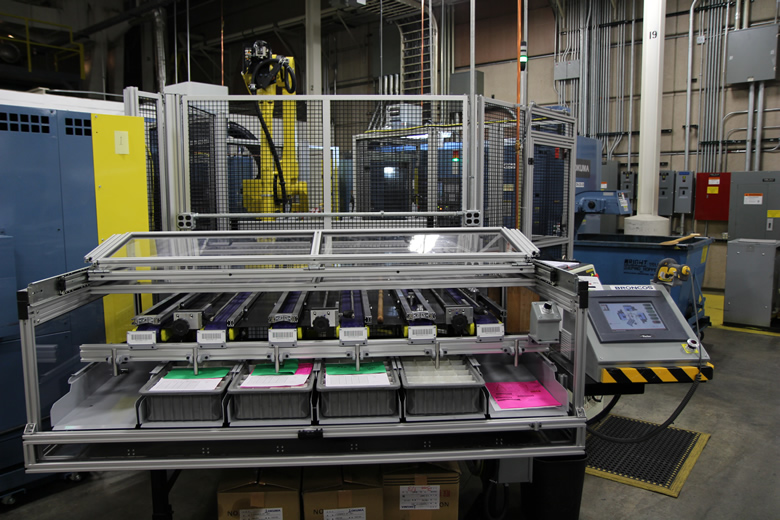
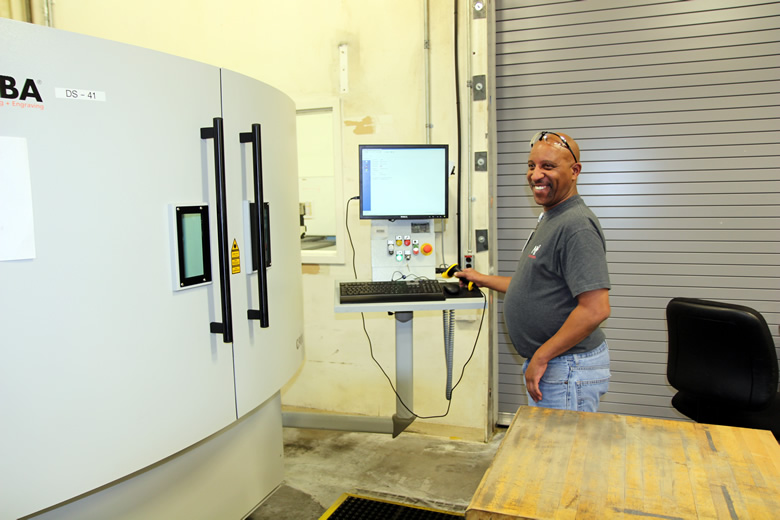
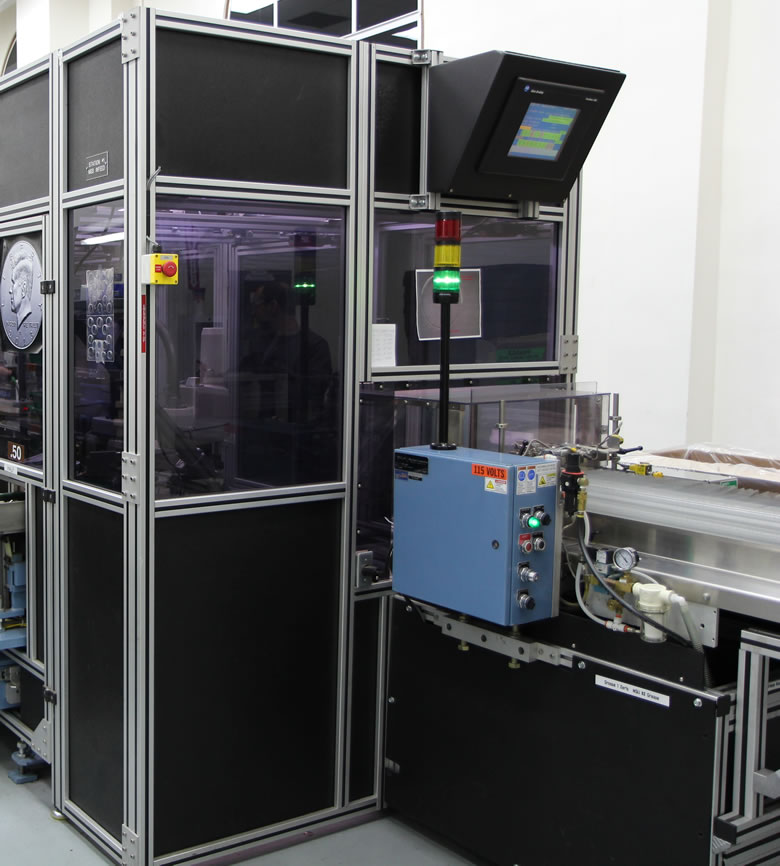
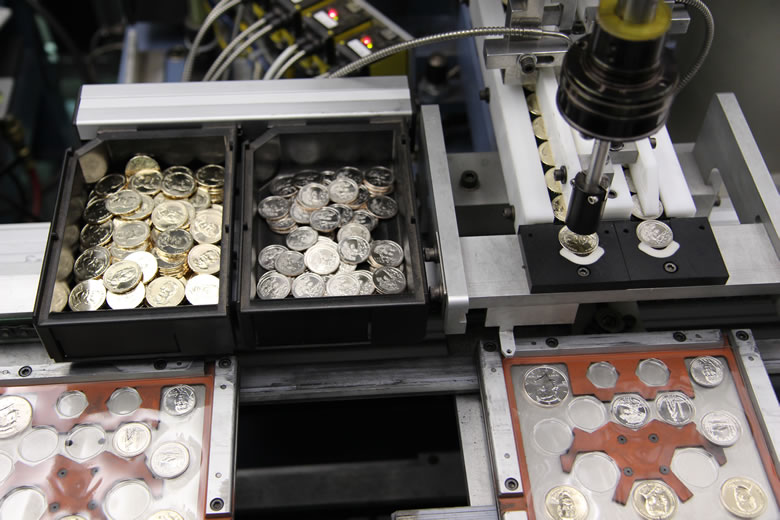
This machine uses robotics to place collector coins into blister packages. Donald Bush, seen toward the back, makes sure everything runs smoothly. The 2013 United States Mint Uncirculated Coin Set and its 28 uncirculated coins that are split into two folders. The folder accented in red holds the 14 coins from the Denver Mint, and the folder accented in blue holds the 14 coins from the Philadelphia Mint.
Clear blisters are used to hold coins in place and protect their surfaces.
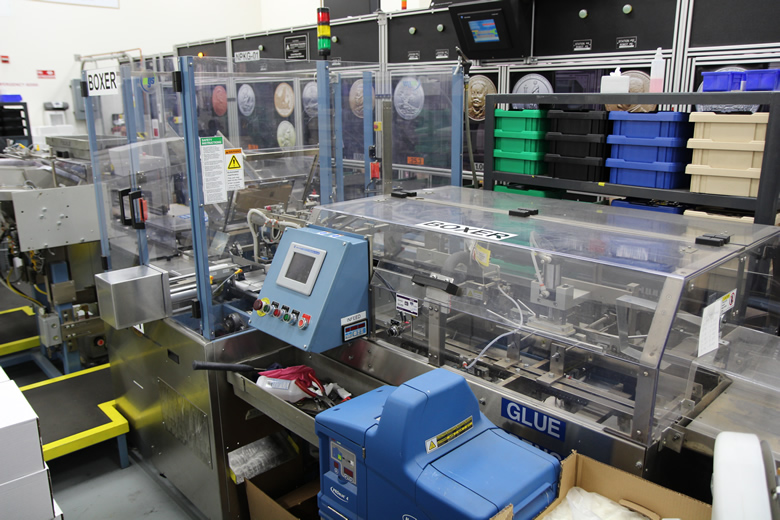
This photo shows the beginning of the packaging line where empty blister packs are fed. The display panel at top includes information on speed, how many blisters have been packaged, and identifies locations of any problems. This photo shows a top view of the blister packaging machine, as seen from a section of the Denver Mint’s Public Tour. It gives a better scope of the machine’s length and width. Overlaid at left is a closer view of a back section of the packaging machine. It shows boxes of uncirculated coins that get fed into the blister packs.
A stop and go conveyor system moves the packs to coining stages that are identified by denomination.
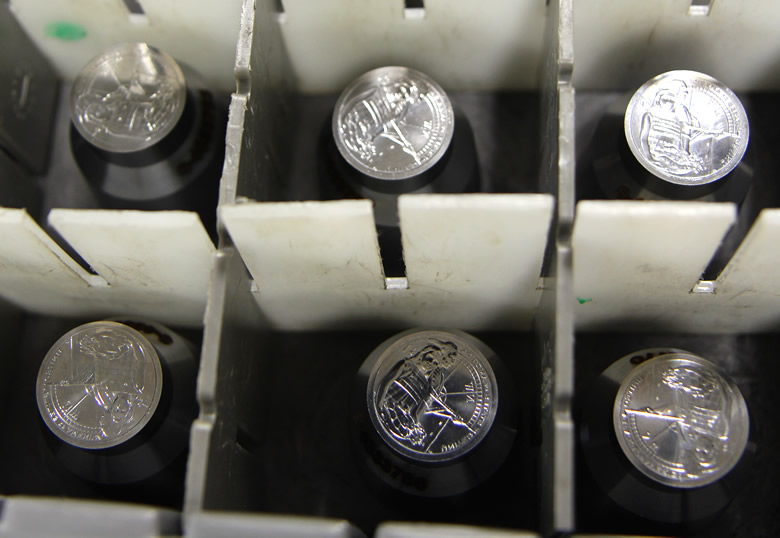
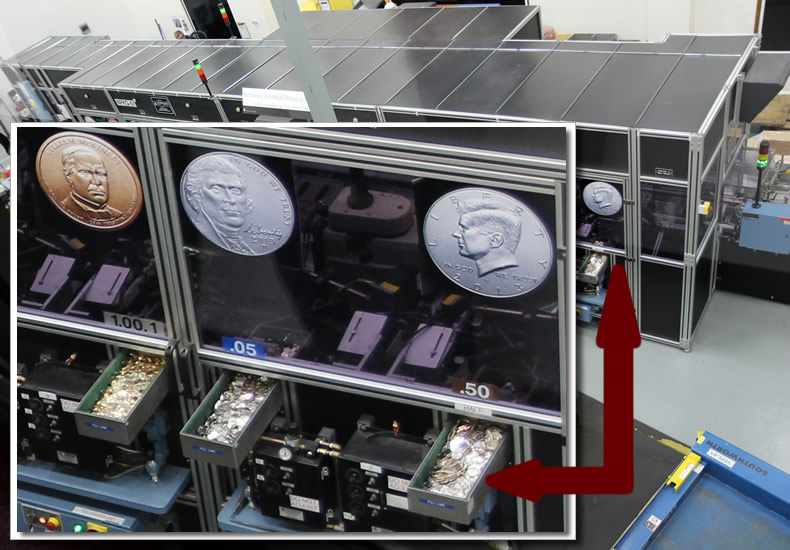
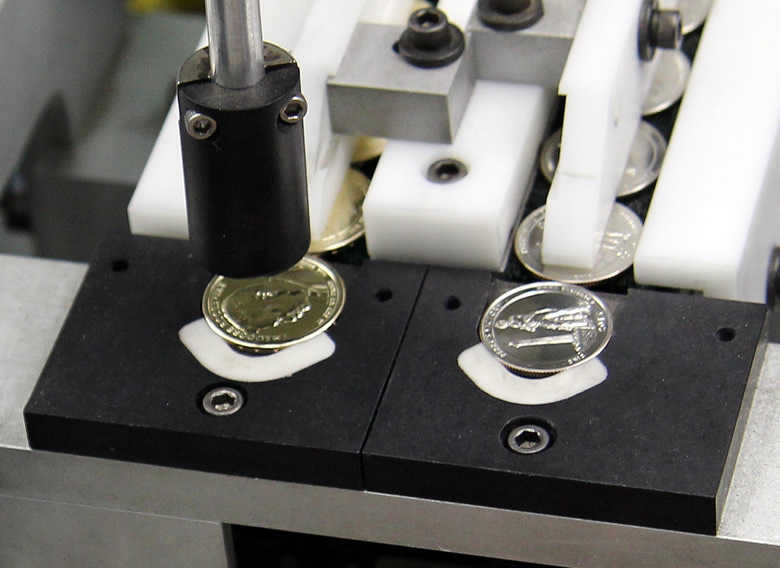
Inside view of a very small section of the packaging machine. The original article includes a video of the inside machine. A small robotic arm is about to place one of the uncirculated coins on an open blister package. Again, the original article has a video of the robot placing coins onto blisters. Notice the two coin bins by the robot arm. They hold uncirculated coins that failed camera inspection. Usually, such failures are the result of coins that are wrong side up since the robots are not designed to flip them. This photo shows a close-up view of a robot that is about to grab an uncirculated Theodore Roosevelt Presidential $1 Coin
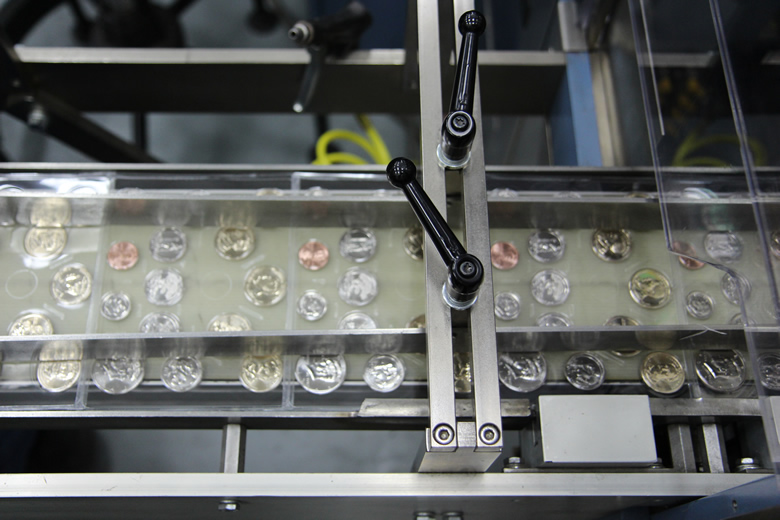
Blister packs must be flipped shut and sealed after all 14 uncirculated coins are set into position.
Sealed blister pack of uncirculated coins produced at the Denver Mint. The original article has a video showing how the blister packs are closed.
Each sealed blister pack is inserted into a red folder that includes artwork, Denver labeling, specification of the coins and a U.S. Mint Certification of Authenticity. This happens automatically, as seen in a video from the original article.
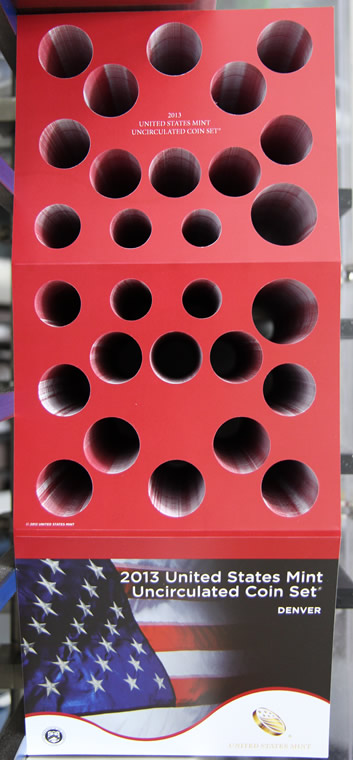
Unassembled Denver Mint folder for United States Mint Uncirculated Coin Set
At the end of the line, uncirculated coin sets are inspected and placed into boxes for temporary storage.
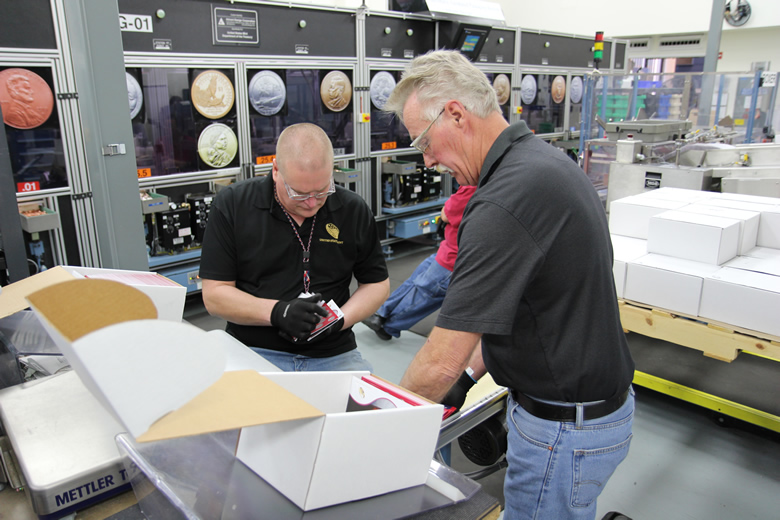
Nathan Wittstruck (left) and Bob Luethje (right) inspect completed folders of Denver uncirculated coins. They check to make sure that all the coins are all properly rotated, the artwork is centered on the blister pack, and everything is glued down well The automated boxing machine combines the Denver and Philadelphia uncirculated coin sets.