It was definitely an unforgettable experience, the Philadelphia Mint tours, per Mike and Darrin Unser of CoinNews.net. From the beginning to the end, there was something exciting happening, and the guys caught it on camera.
They dished about everything they could, enough so that they were able to publish seven unique articles that described their eye-witness account. Darrin and Mike offer some final thoughts, and then the photos they’ve taken follow.
Final Comments
Darrin: Recollecting on our tour of the Philadelphia Mint, I can honestly say that it was overwhelming. The massive size of the facility and the myriad of operations that occur within its walls left me in a sort of glazed state as we departed. That being said, the one thing that really keeps bubbling to the surface of my memory is the level of expertise, dedication and pride in their work portrayed by every individual we encountered throughout the day. These people are truly professionals in their respective fields and take ownership of their responsibilities. I am grateful we were allowed to witness the operations of the Mint, but was more personally rewarded with the interaction we made with those who work there. Thank you!
Mike: Ditto. Every U.S. Mint facility is unique, yet common to the three I’ve visited is the pride and dedication exemplified by Mint employees. It’s all very impressive, an enviable culture that is rare within a workplace.
In gathering all the photos into one article, I noticed we forgot to mention Paul Zwizanski, Numismatic Division Chief. The big coining press for the America the Beautiful Five Ounce Silver Coins was down for a break when we stopped by. Paul and crew were kind enough to jump in, show us the operation and strike some new five ouncers for us. Also, I’d like to thank Tom Jurkowsky, U.S. Mint Director of Public Affairs, and Tim Grant, Exhibits & Public Affairs, for all the help and making our trip possible.
Philadelphia Mint Photos
Immediately below are all of the Philadelphia Mint photos that we’ve presented in our prior articles. If one of the photos catches your attention and you want more information, I suggest clicking on the link to the article itself since they offer so much more. The photos are categorized with their section titles linking to the original articles.
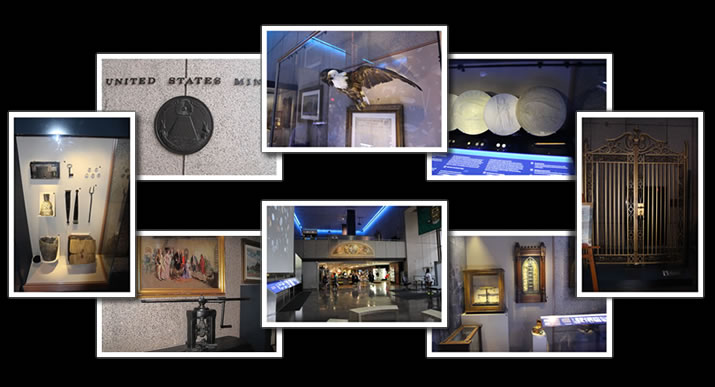
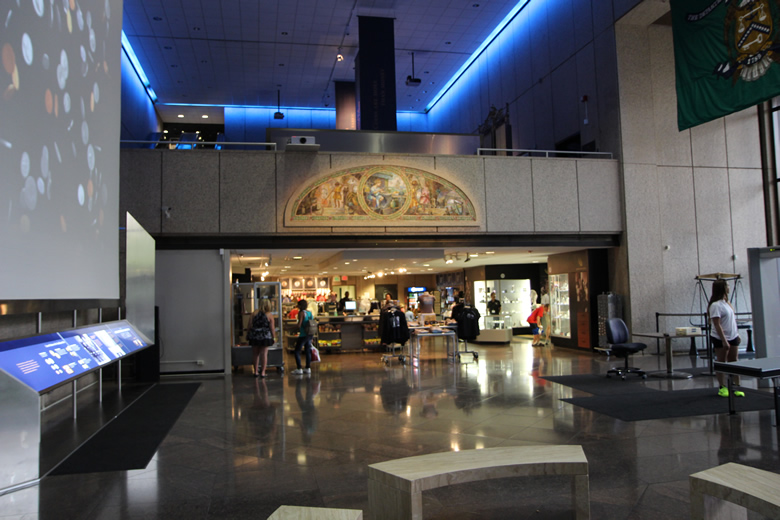
Our first major article that is linked directly above talked about the Philadelphia Mint tour that is free and open to the public. It included some of our own tips. We went through the public tour twice, one time on our own and another time with U.S. Mint officials. The following photos show just a few of the highlights.
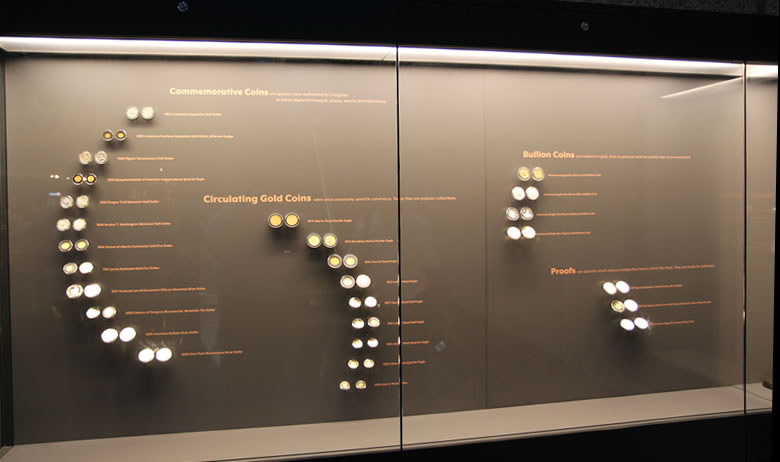
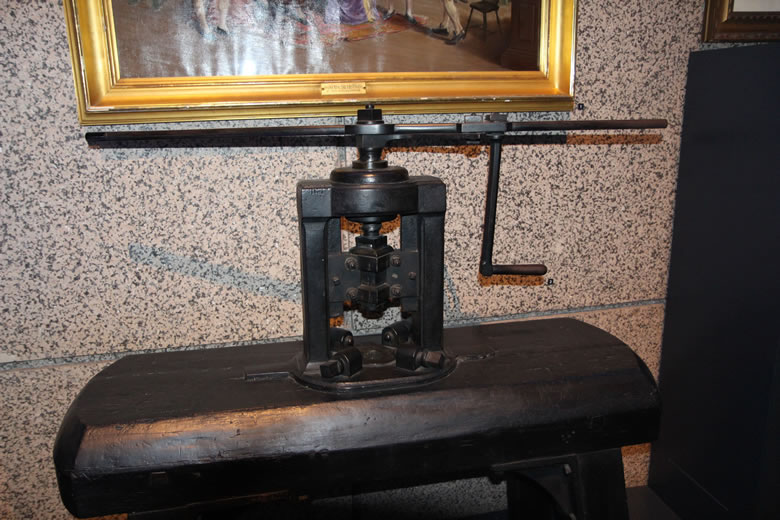
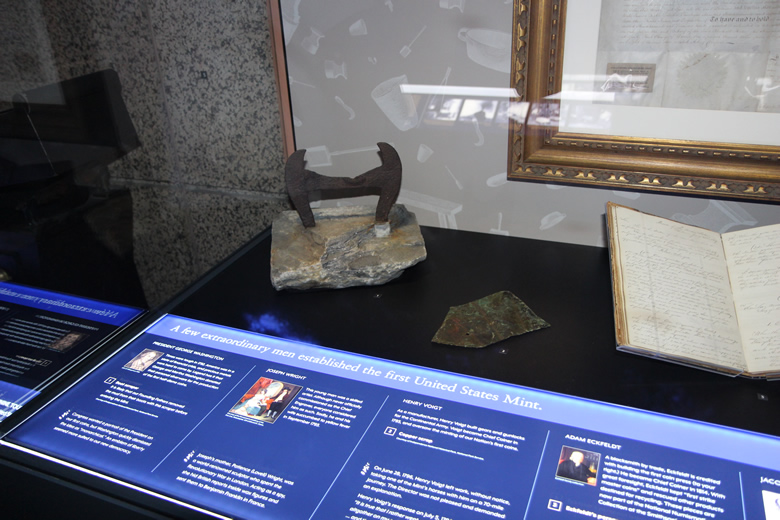
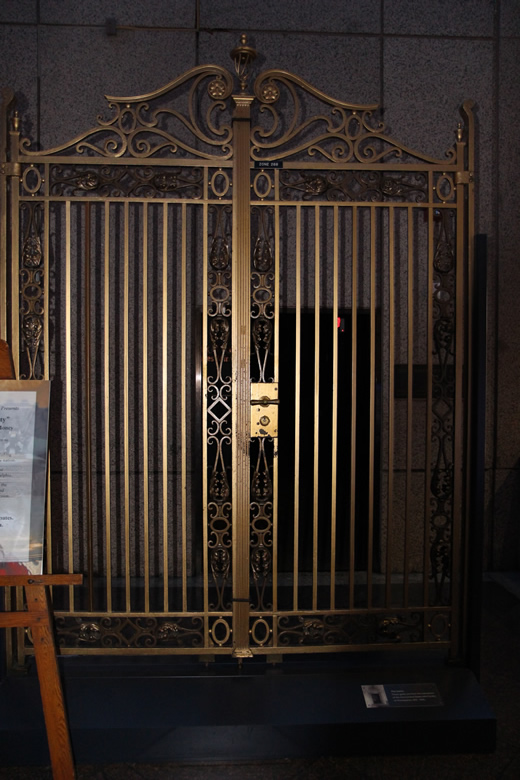
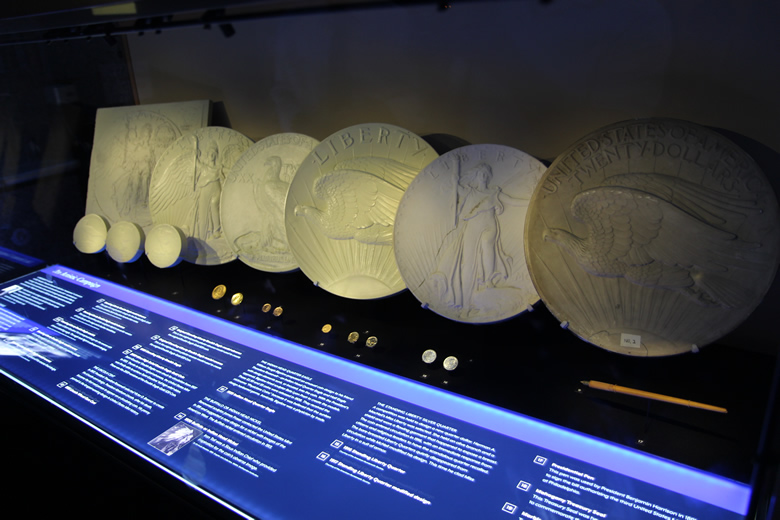
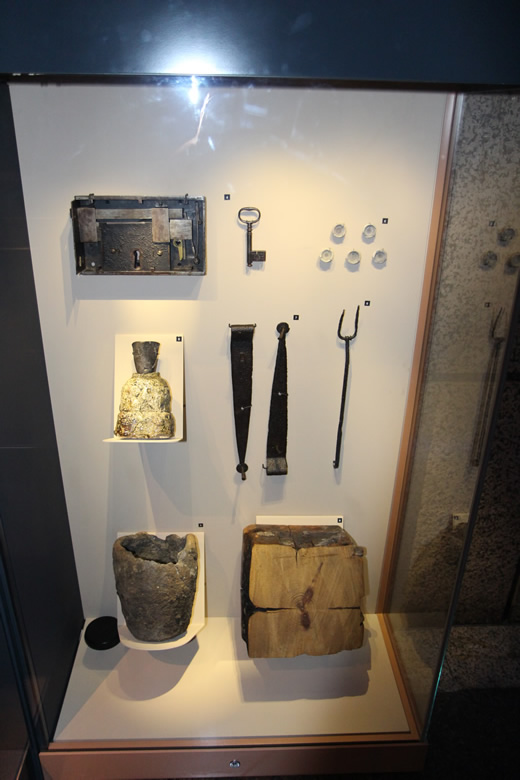
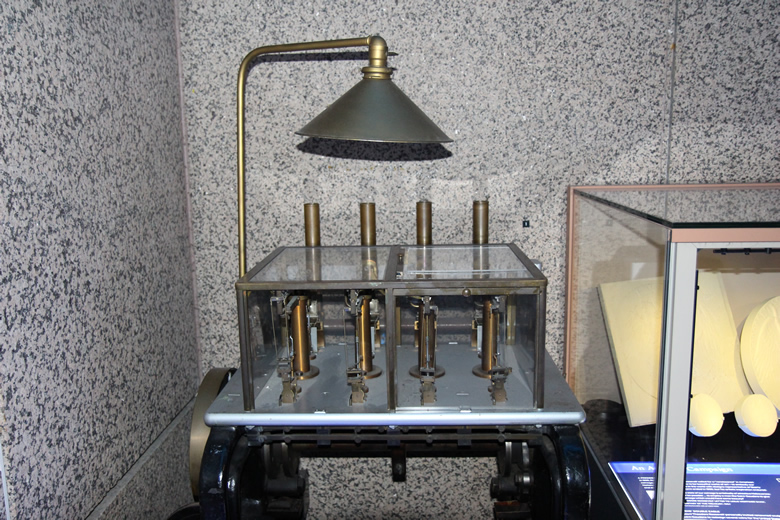
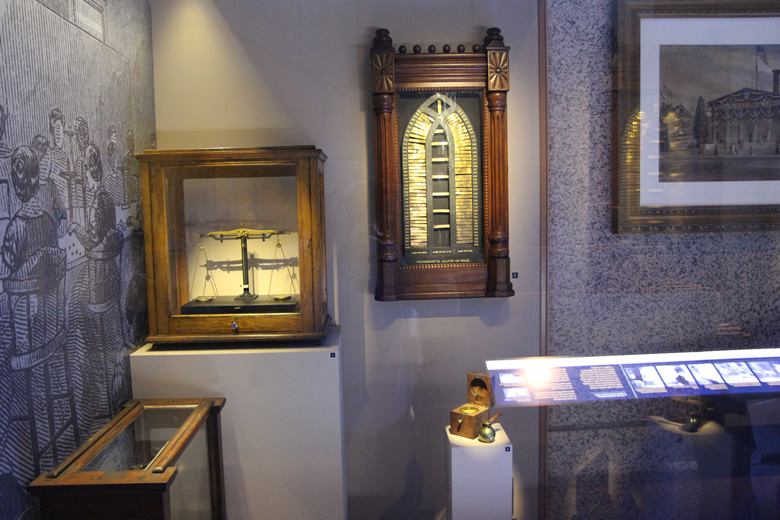
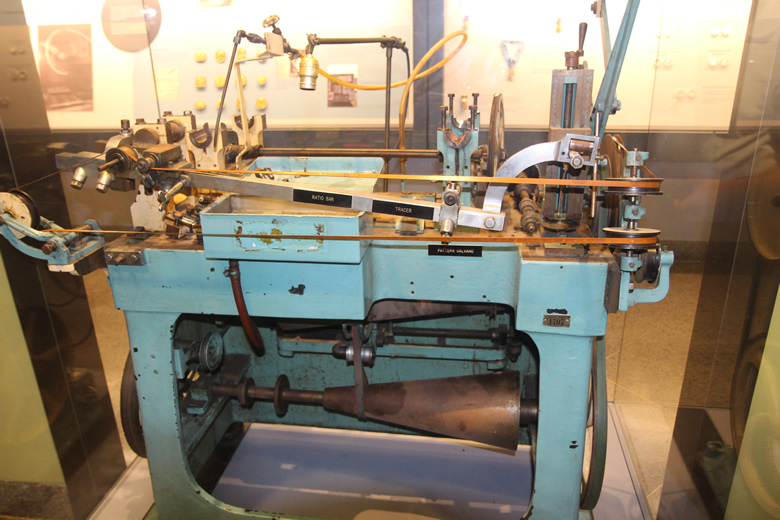
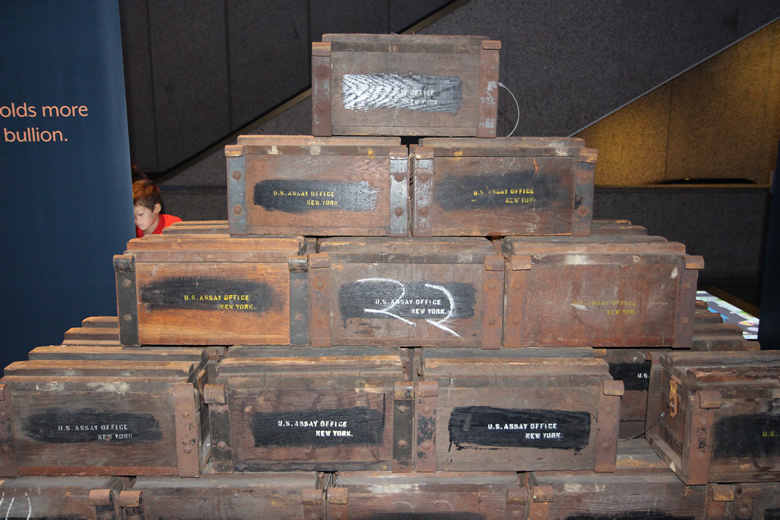
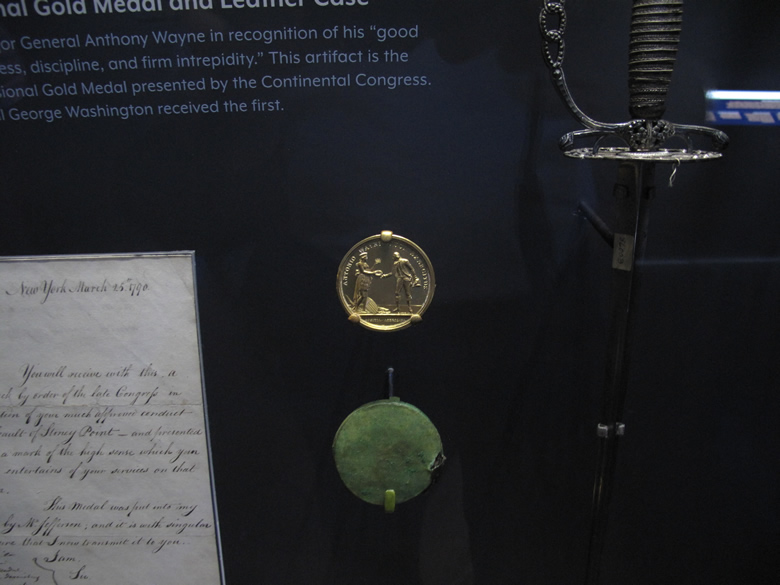
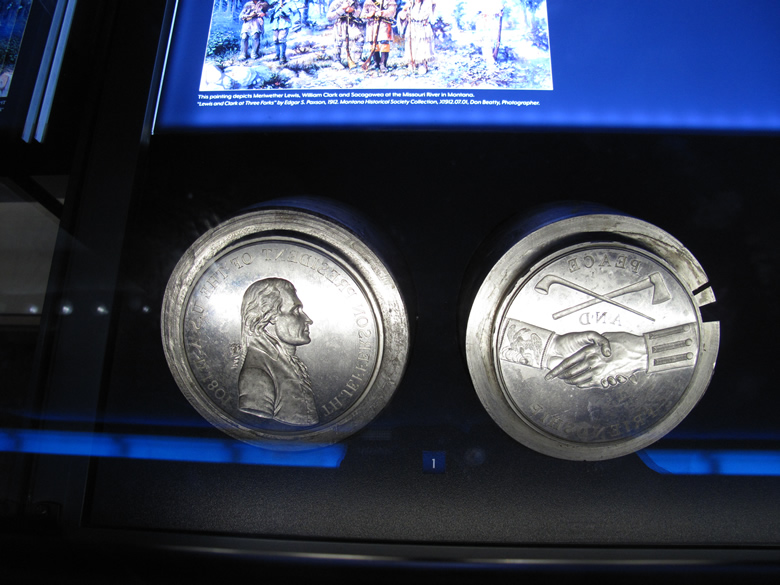
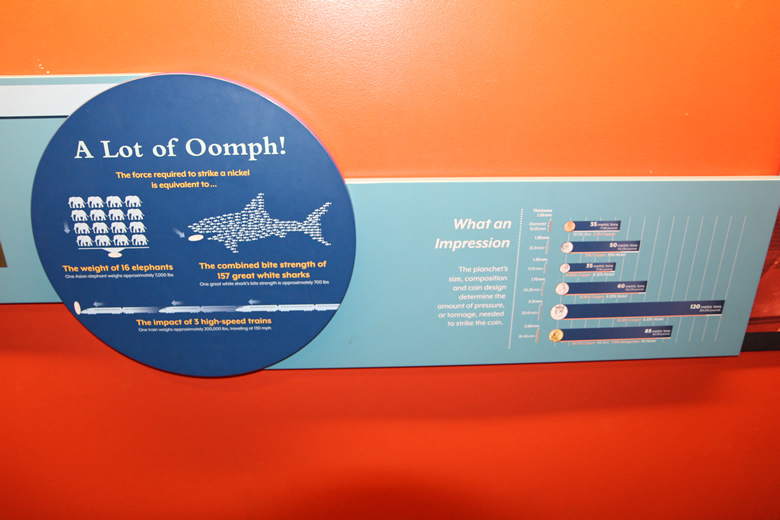
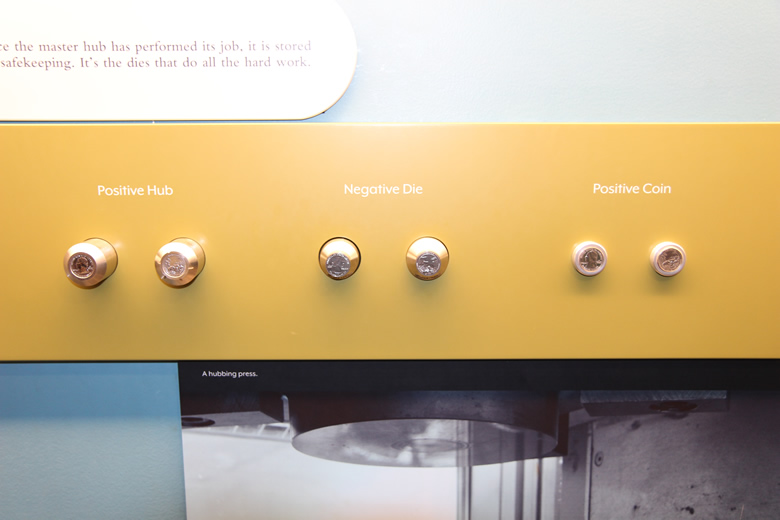
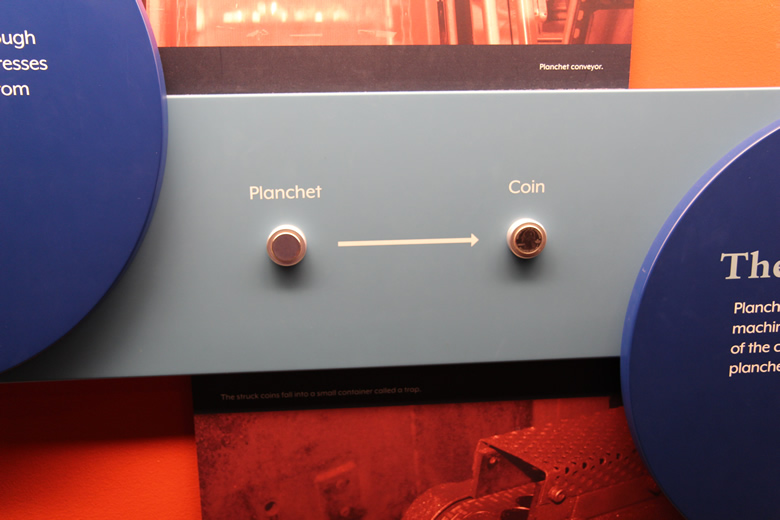
An overview of some of the exhibits. An exhibit with examples of coins produced at the United States Mint. A photo of the first coining press used at the United States Mint. It was built by Adam Eckfeldt who became the Chief Coiner of the United States in 1814. The famous Peter the Mint Eagle who was befriended by Mint employees. U.S. Mint artists for over 180 years have studied Peter when designing eagles for coins and medals. Current Mint employee Jerry Burdsall helped clean Peter and return him to his original perch. This boot scraper was probably used by the Founding Fathers to remove mud from their boots before entering the Mint. These gates once graced the entrance to the third United States Mint facility in Philadelphia at 17th and Spring Garden Streets. This display features the work of Augustus Saint-Gaudens, one of America’s greatest sculptors. He helped redesign America’s coins in the early 20th century. Artifact collection from the first United States Mint. It was established in 1792 when Philadelphia was still the nation’s capital. United States coins were once based on their precious metal content. This early automatic weighing machine enabled hundreds of blanks to be weighed in minutes. Light blanks were recycled and heavy blanks adjusted and struck into coins. These are some artifacts from the second U.S. Mint facility in Philadelphia where coins were produced from 1833 until 1900. Shown here are five of the seven Tiffany Glass Mosaics that were removed from the Third Philadelphia Mint. This is the original Janvier machine purchased by the Mint in 1907. It reduced artists’ models in plaster and cut coin dies from steel. These bullion transport boxes were used from the mid-1800s to the early 1900s to transport gold between the U.S. Mints and the Assay Office in the West. They were also used in the 1930s to ship gold bullion to Fort Knox. The Philadelphia Mint also strikes medals, including Congressional Gold Medals. This is the gold medal presented to General Anthony Wayne for recapturing Stony Point during the Revolutionary War. These are the original, hand-cut medal dies used to produce the large Jefferson Indian Peace Medals that were taken by Lewis and Clark on their 1804 expedition from the Mississippi River to the Pacific Ocean. These dies were secured in the Mint’s vault for over 200 years. The Gallery portion of the public tour, where you can walk above and watch coins produced, includes descriptive panels describing the production process. This panel shows how much tonnage is used to strike various denominations. Example of hubs, dies and resulting coins. A planchet and a coin with surrounding panels describe how planchets become coins. The Philadelphia Mint’s gift shop.
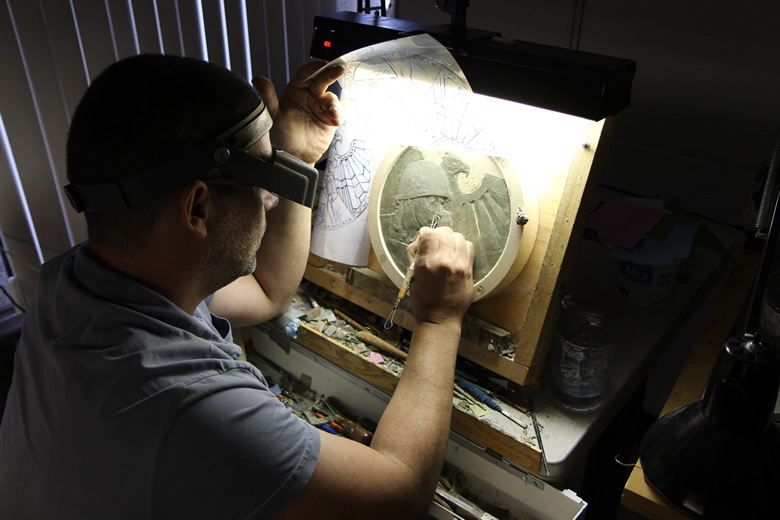
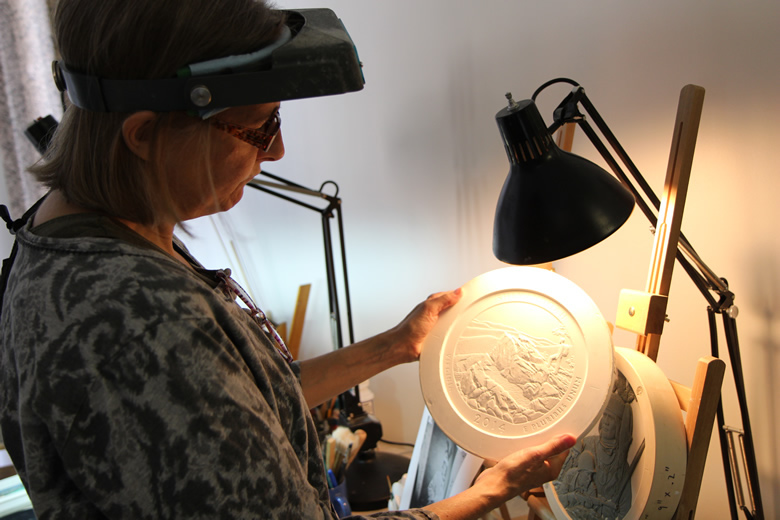
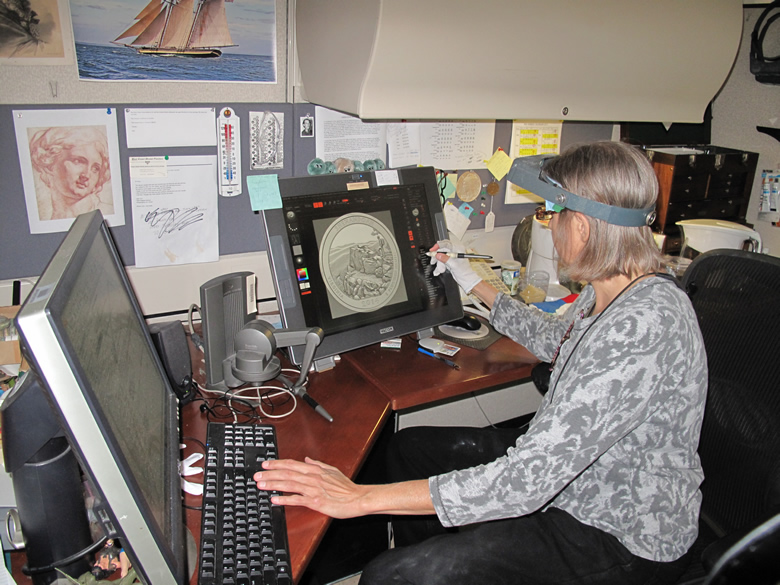
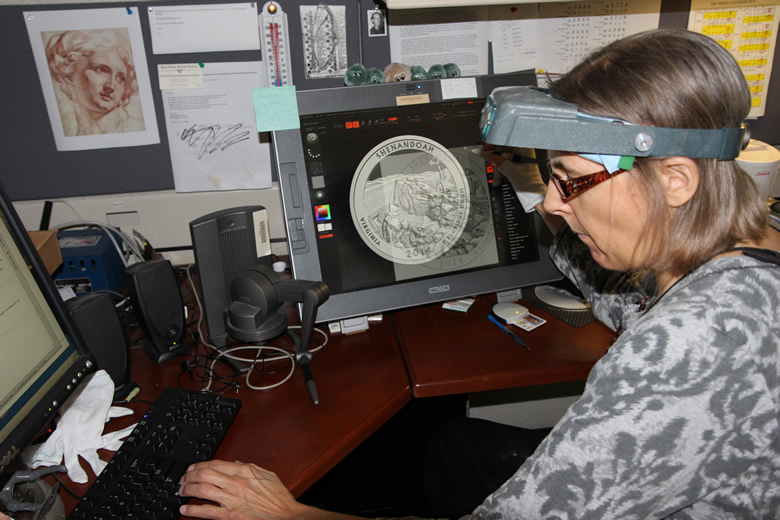
The very first thing we did in our private tour of the Philadelphia Mint was visit with United States Mint artists. They showed how they sculpt in clay and digitally. Click the link above for the entire article, here are some photos.
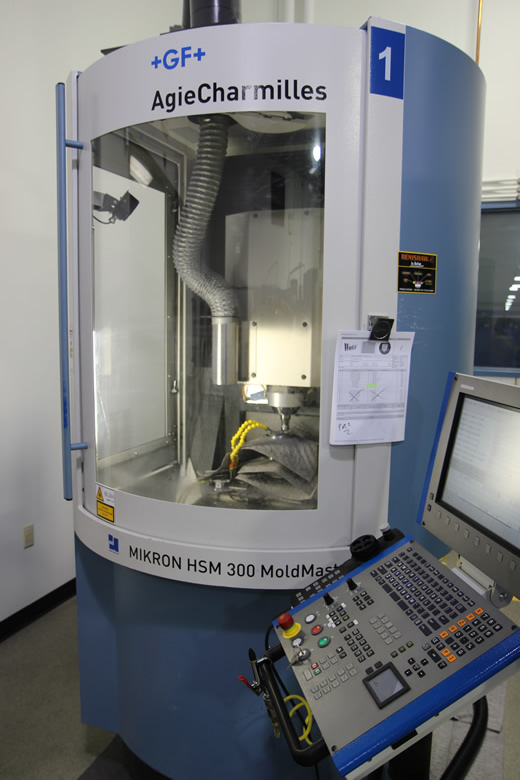
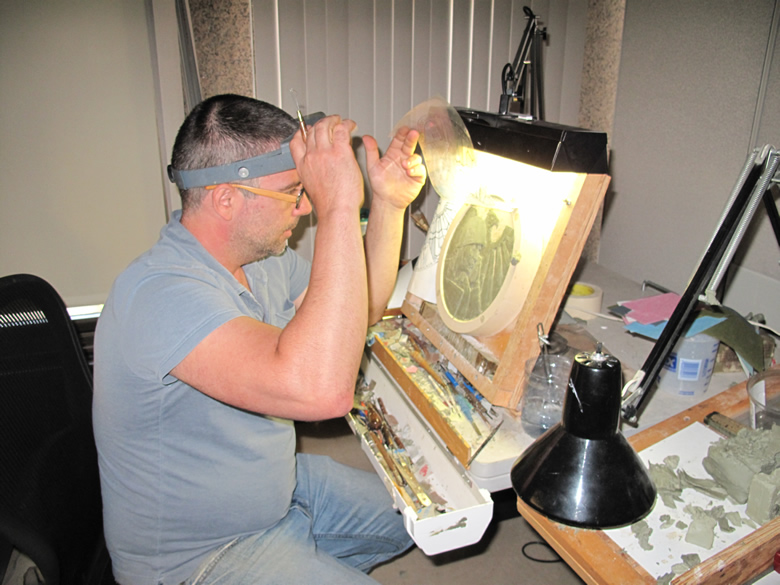
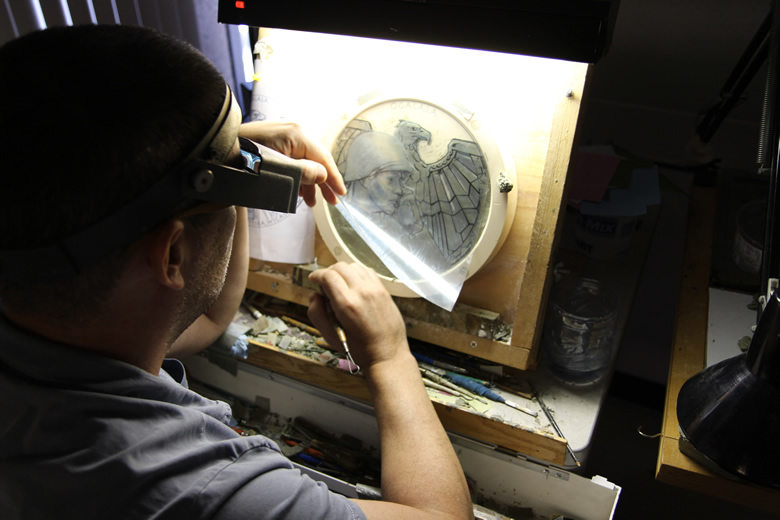
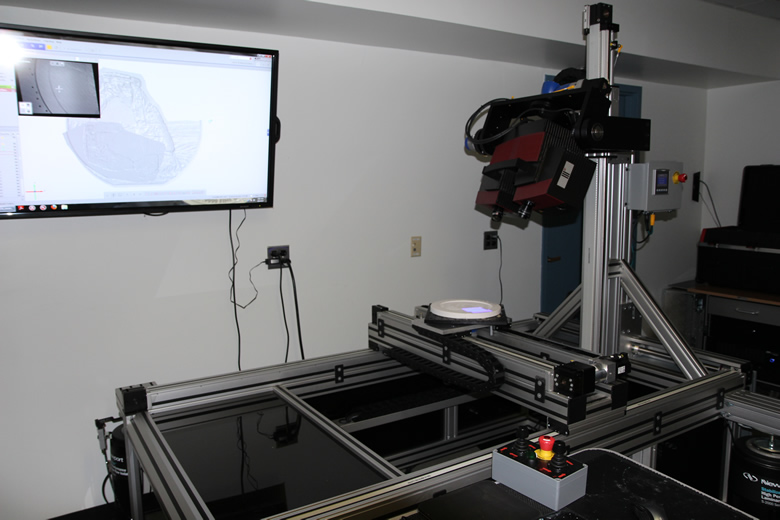
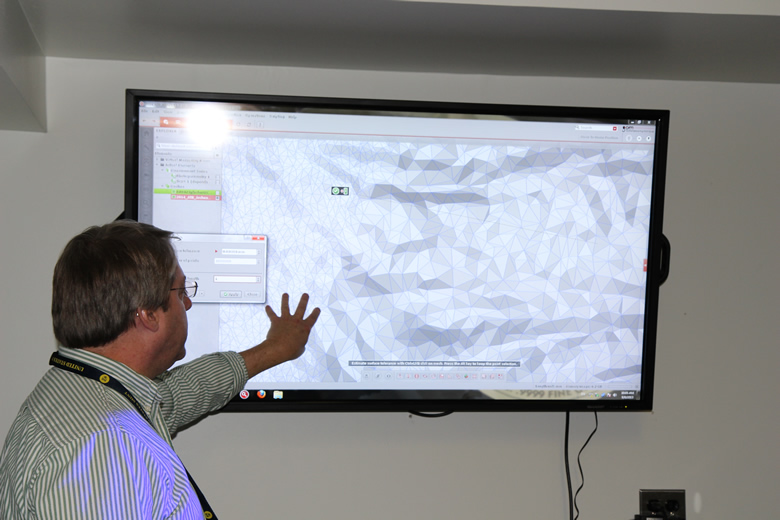
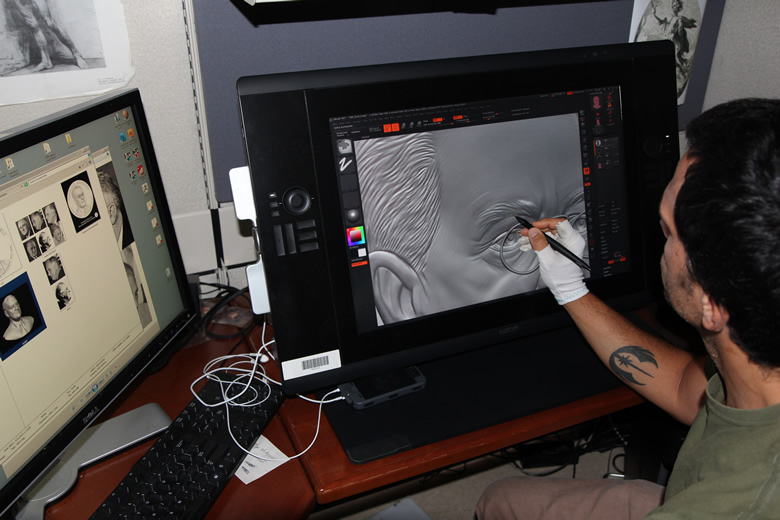
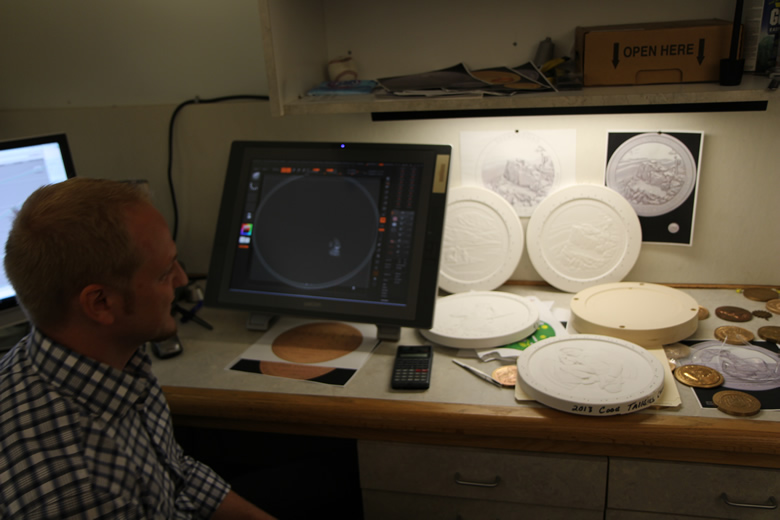
Mikron CNC milling machines that takes digital information from artists and automatically cut hubs, three-inch dies and Ren templates. This machine not only cuts hubs and dies but it also cuts RenShape template models, with one shown above, for artists who sculpt with clay. Artists add layers of clay as they sculpt the design on top and within the rim of the Ren template. Here, United States Mint artist Michael Gaudioso, Medallic Sculptor, is doing exactly that. When finished, the clay model is captured in plaster and then scanned for digital processing to create hubs and dies Gaudioso sculpting his Code Talker Congressional Gold Medal. Here, Gaudioso lifts the transparency to make refinements to the clay model. This scanner captures relief information from artists’ plaster model. Here, one more view of the scanner as it maps data points from a plaster model. Stephen C. Antonucci describes how the scanner captures relief information from artists’ model. Following processing. Antonucci describing the quality of detail on a high resolution scan of a coin model. This scanned digital information is sent to the Mikron CNC milling machine which cuts hubs and three-inch dies that strike and create coins. US Mint artist Joe Menna, Medallic Sculptor, sculpts primarily using digital software. Here, Joe explains how he digitally sculpted the obverse of the Franklin D. Roosevelt Presidential $1 Coin. Another closer view as Joe shows how quick changes can be made to digital models. United States Mint artist Phebe Hemphill, Medallic Sculptor inspecting a plaster model. Phebe sculpts traditionally in clay but also uses computer software to make refinements. Here, she is using ZBrush, a sculpting software program, to modify her quarter design. Another view of Phebe using the ZBrush software. Eric Custer, Product Design Specialist. Eric has several plaster models that have been inspected for misaligned letters, incorrect or missing design elements and manufacturability.
Out next article described and showed how the U.S. Mint at Philadelphia makes hubs and dies. To learn about how hubs and dies are used, we recommend reading the actual article that is linked directly above. Here are photos from the story.
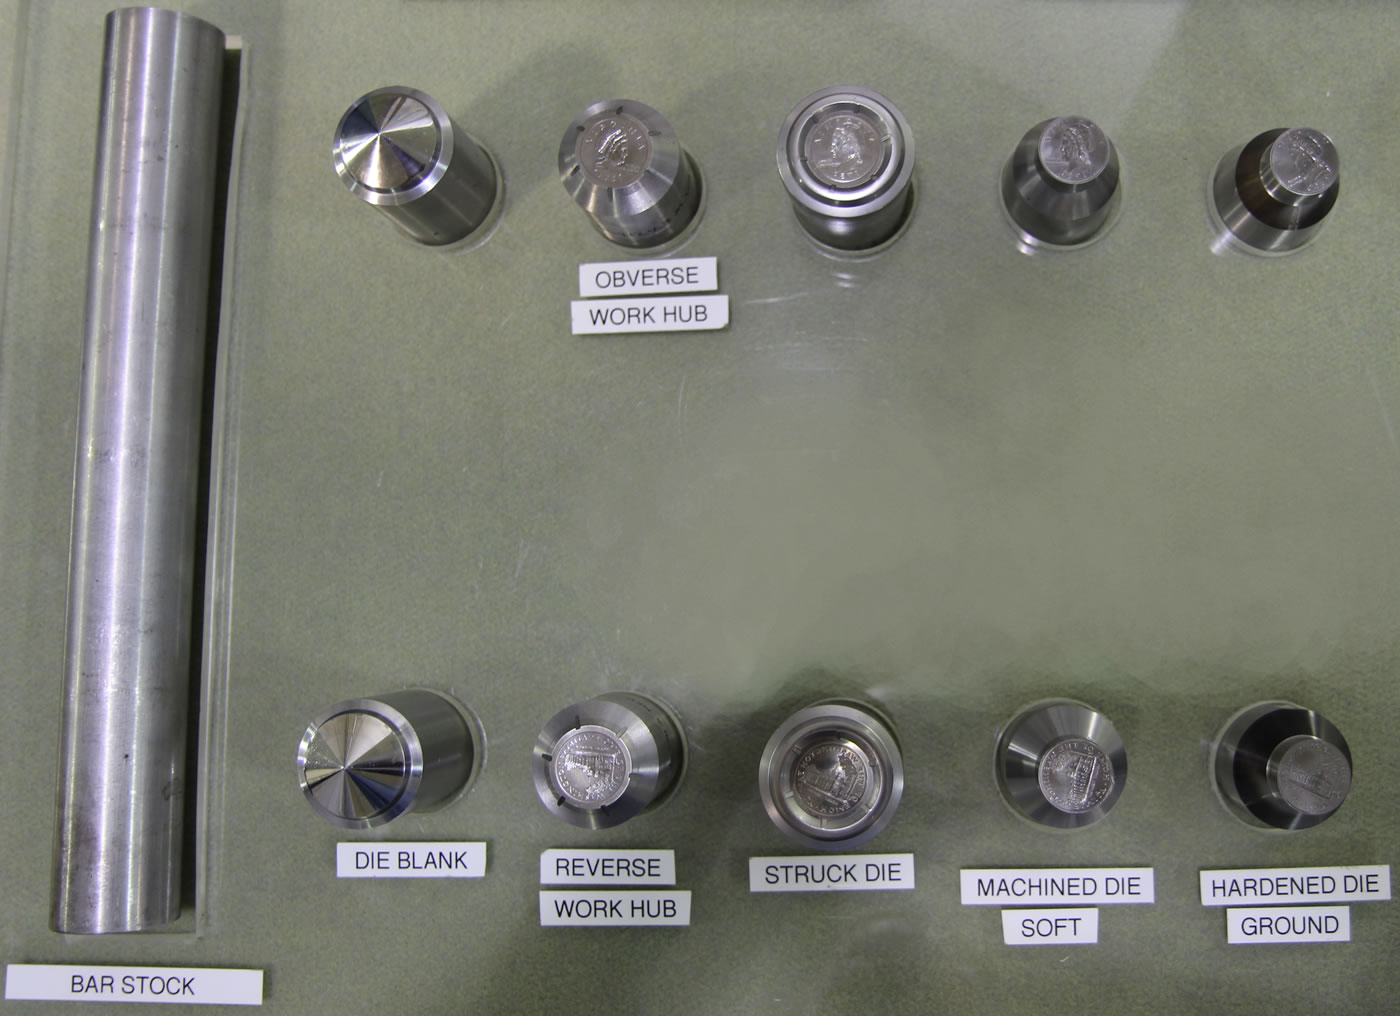
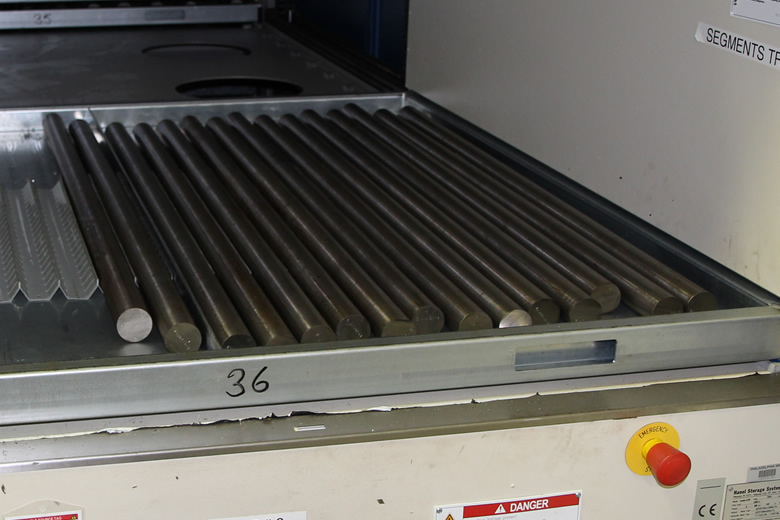
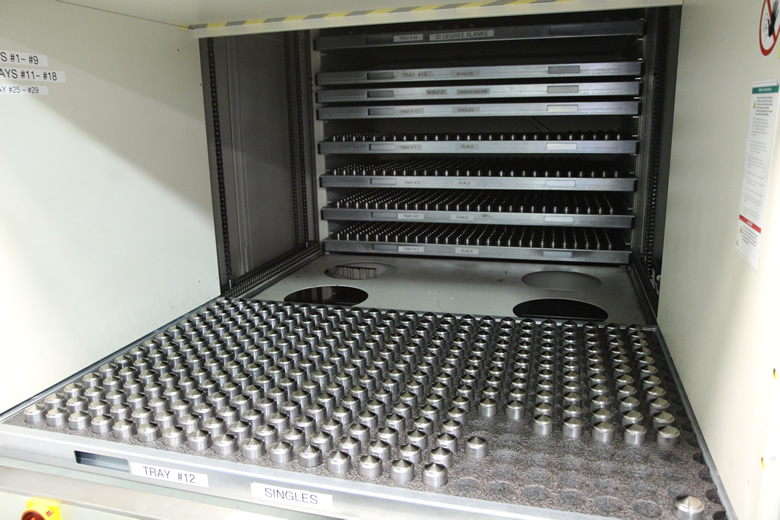
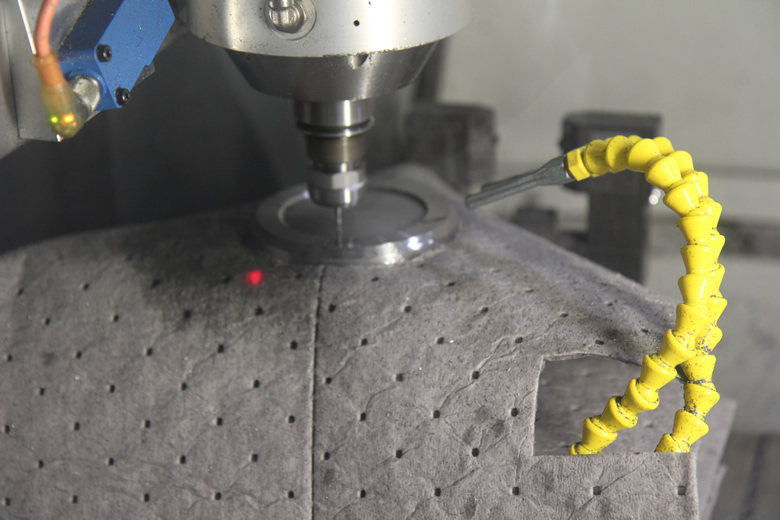
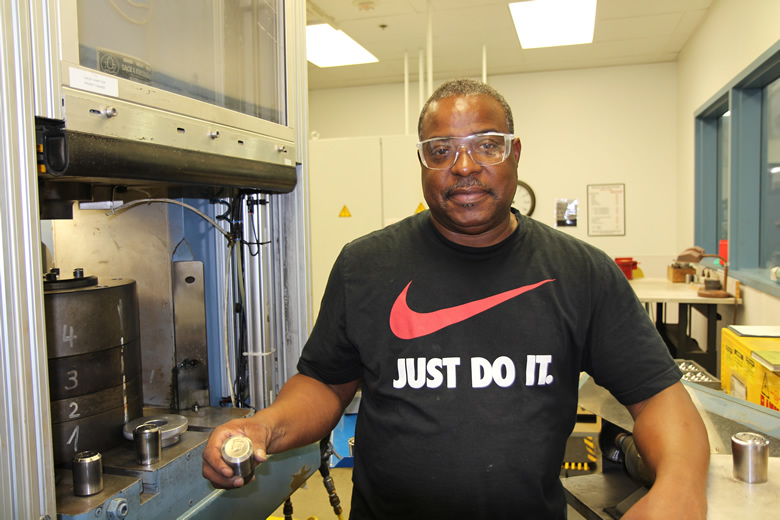
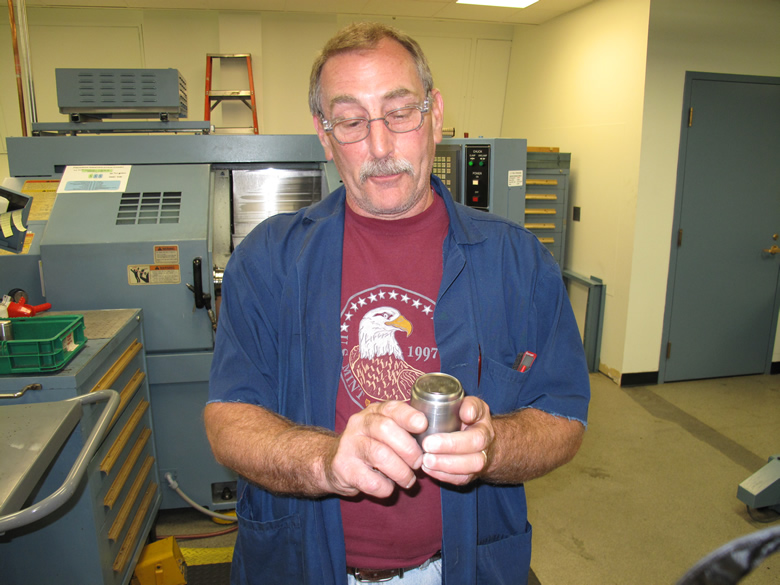
This photo shows the progression of getting from a steel bar to hubs, to working dies for producing coins. A working hub and die. The hub has a positive image and the die has a negative image. Steel bar stock used for cutting hubs and dies. This CNC machine is used to cut the steel bars and create coned die blanks. Storage unit for the coined dies. Shown earlier, the Mikron CNC milling machine cuts the hubs and dies. It generally takes 15-20 hours to cut a coin hub and 25-30 hours to cut a three-inch die. Here, the Mikron CNC milling machine is cutting a three-inch die. A Hubbing Press is used to transfer the design from a positive hub to a die blank, creating a negative die. Here, Steve Jones displays a 2014 Kennedy half-dollar positive hub he just made. In the background is the four-segmented collar of the Hubbing Press. In the foreground sits a Kennedy half-dollar positive hub and the created negative die
Kennedy Half-Dollar Hub – Obverse
Kennedy Half-Dollar Hub – Reverse
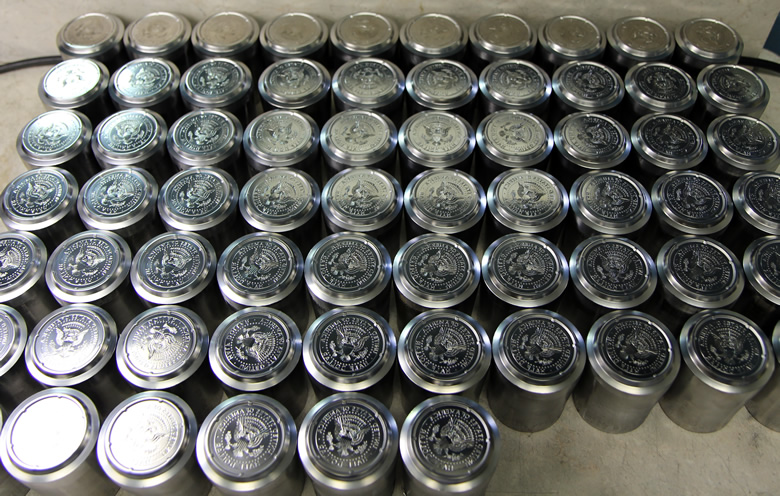
2014 Kennedy Half-Dollar Dies (Top View)
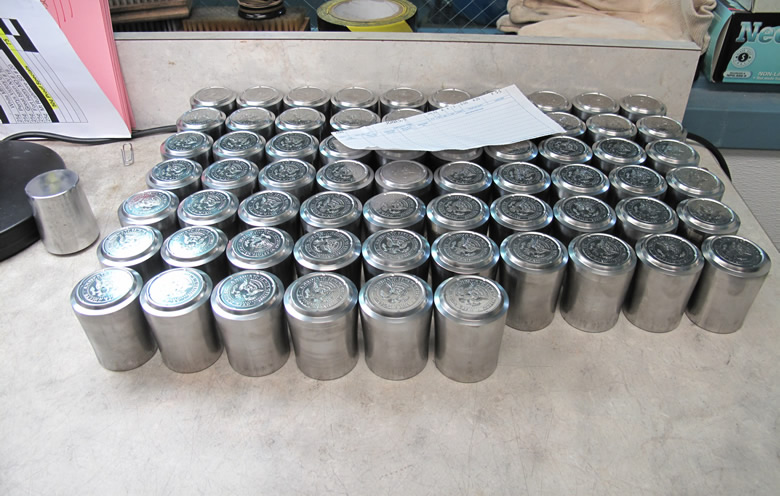
2014 Kennedy Half-Dollar Dies (Side View)
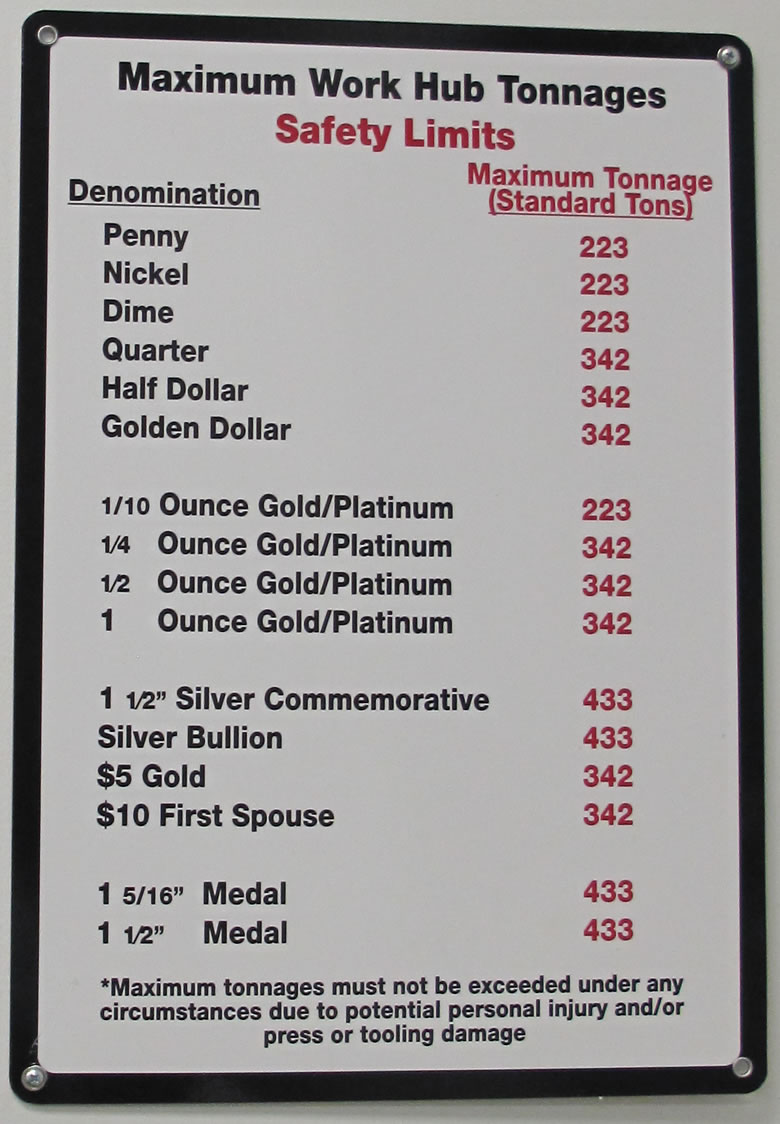
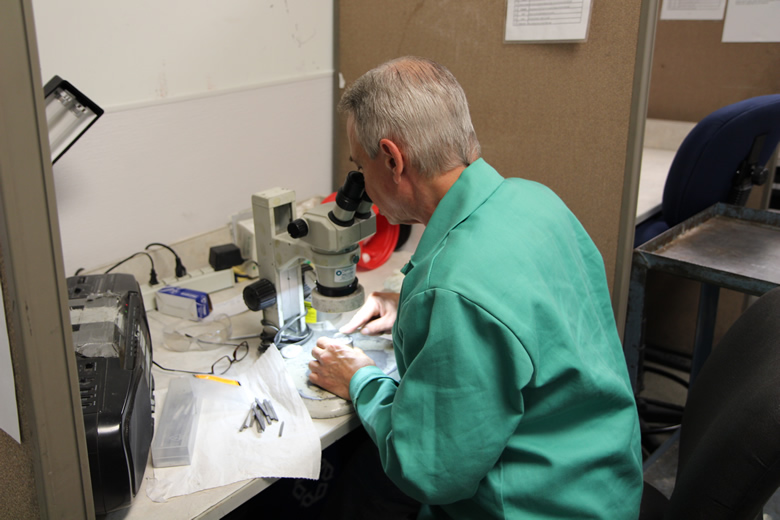
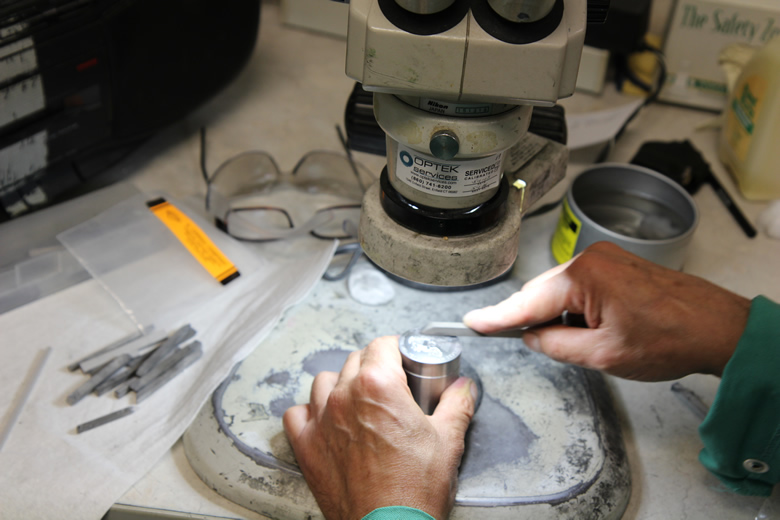
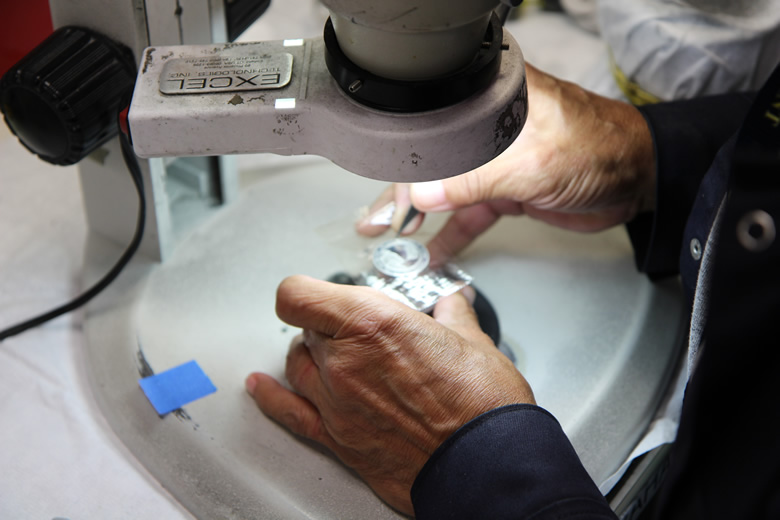
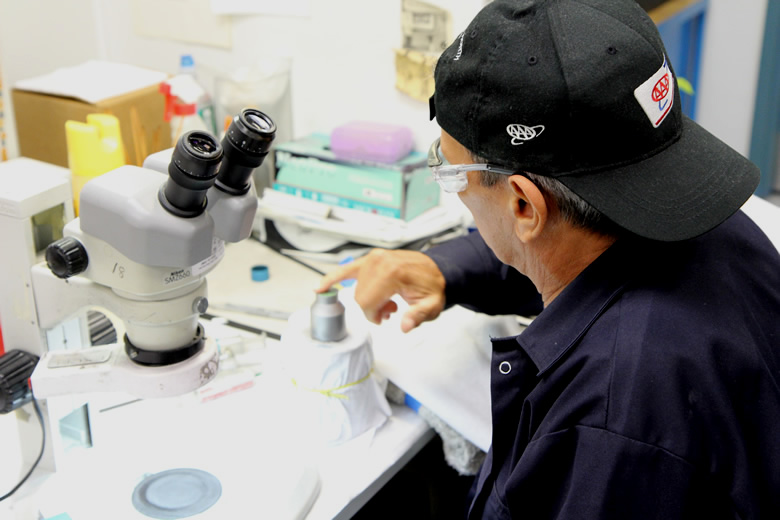
A display at the U.S. Mint facility in Philadelphia that shows the maximum work hub tonnages In this photo, U.S. Mint. Buffer-Polisher Tom Larizzio is seen using a stereo microscope to inspect and clean a coin die.
Coin dies that need buffing and cleaning
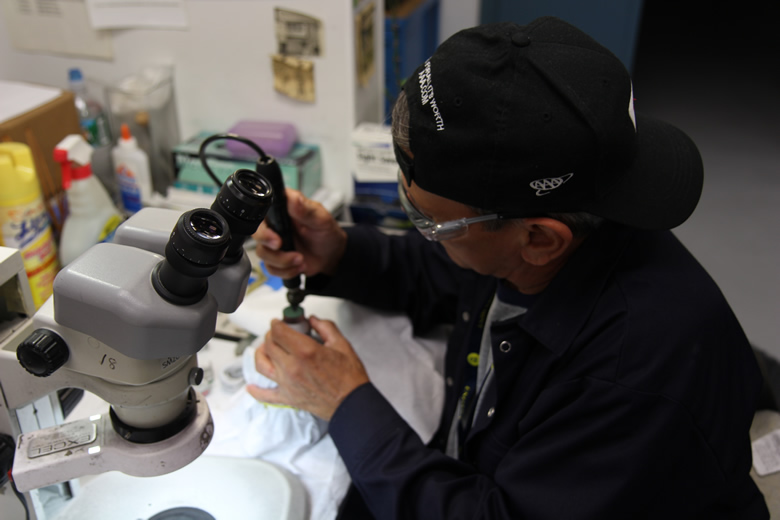
A coin die getting buffed
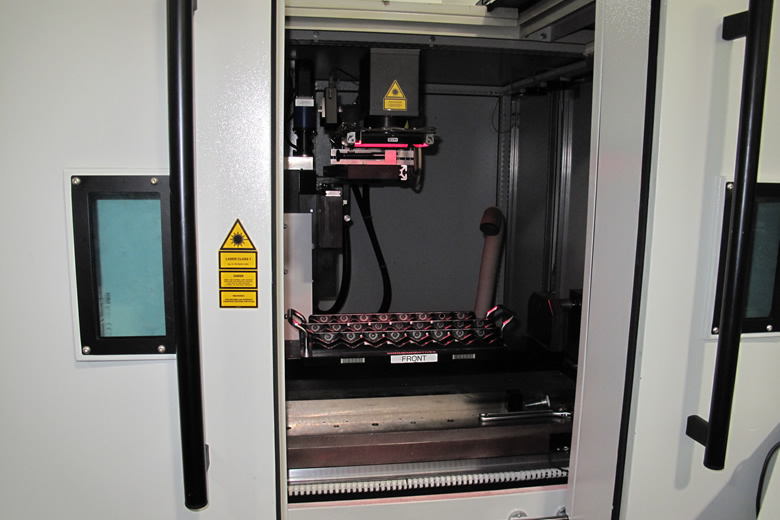
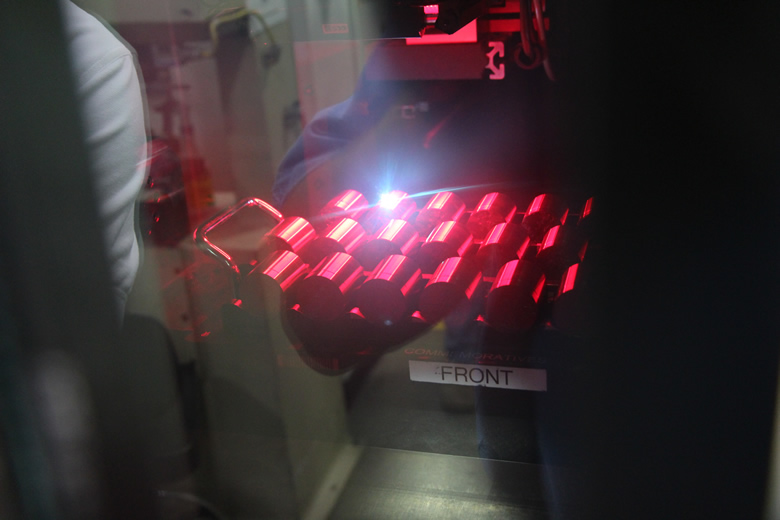
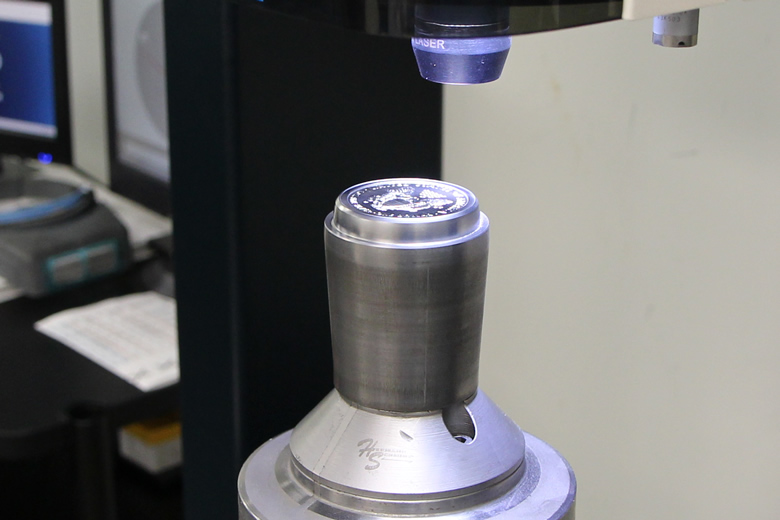
Tom using a soft bristle wire wheel to provide a “circulated” die finish to the die surface. Every coin die is given its own unique serial number. This laser machine at Philadelphia Mint imprints die serial numbers
Laser machine getting prepped for coin dies.
Laser machine imprinting die serial numbers.
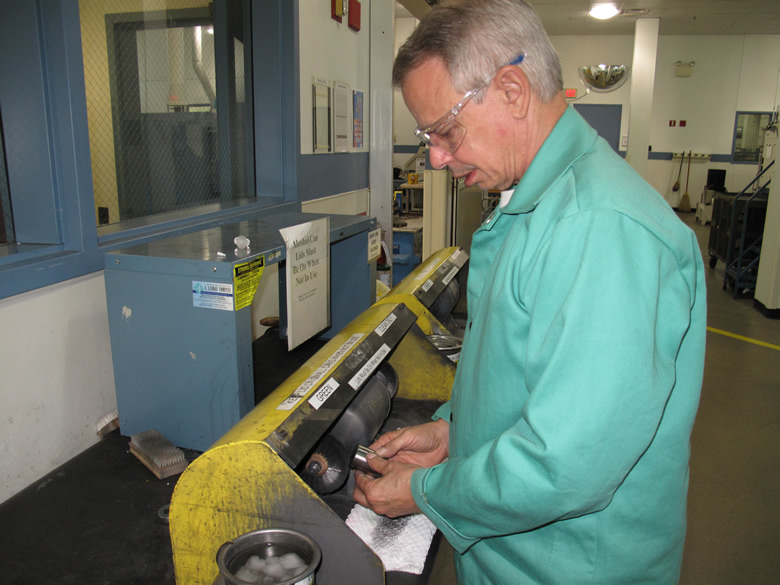
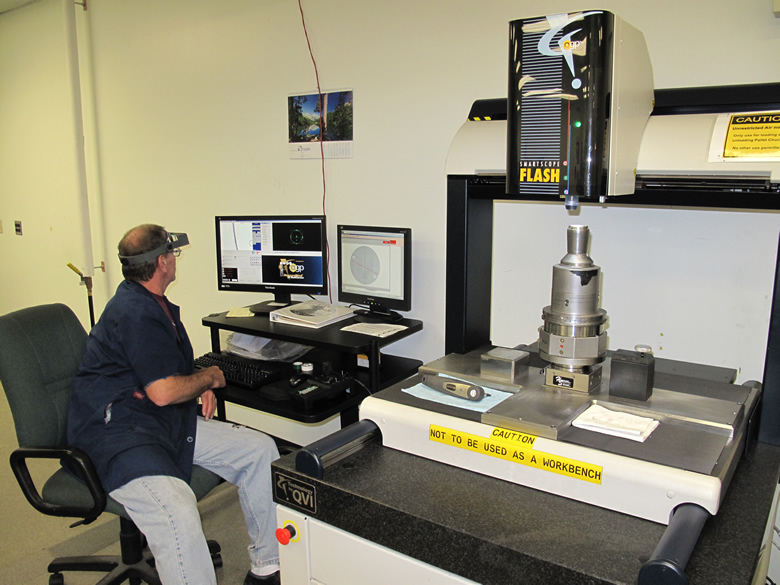
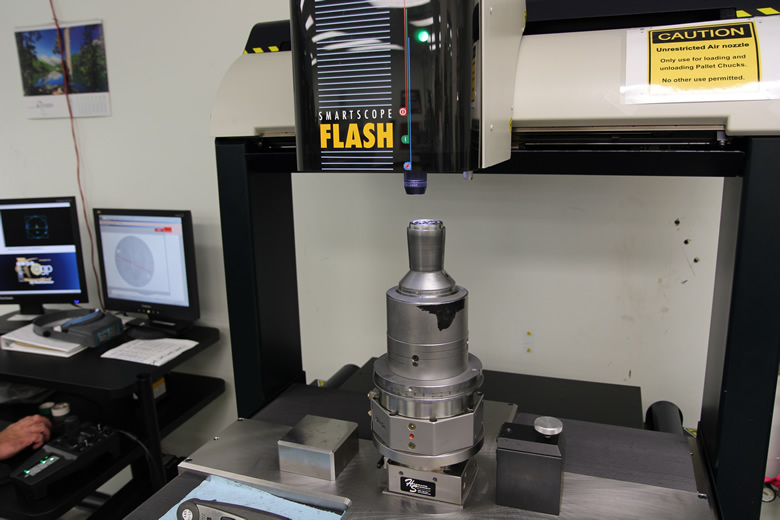
Here, Earl Sandt, Tool Maker, Digital Process & Development Division, operates the OGP Flash 500 optical microscope to scan tooling dimension information. This data is shared with the S-21 CNC machine (shown further below). Later, a cylindrical grinder is used to automatically shape hubs and three-inch dies.
OGP Flash 500 at Philadelphia Mint
OGP Flash 500 at Philadelphia Mint (c)
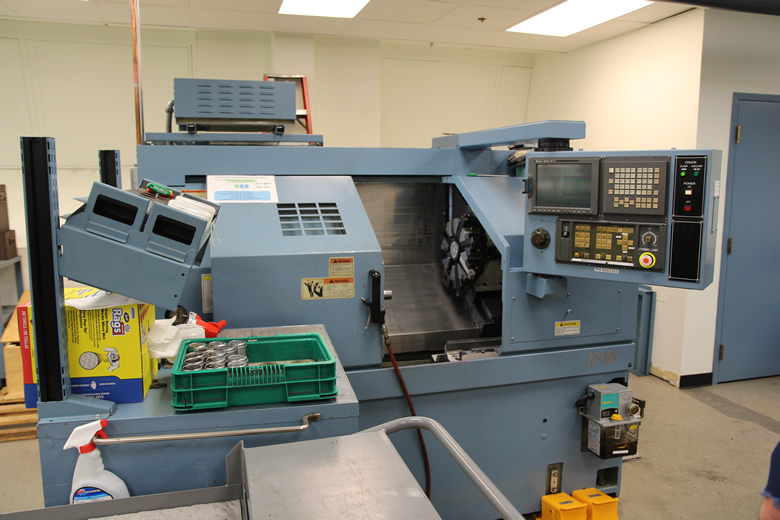
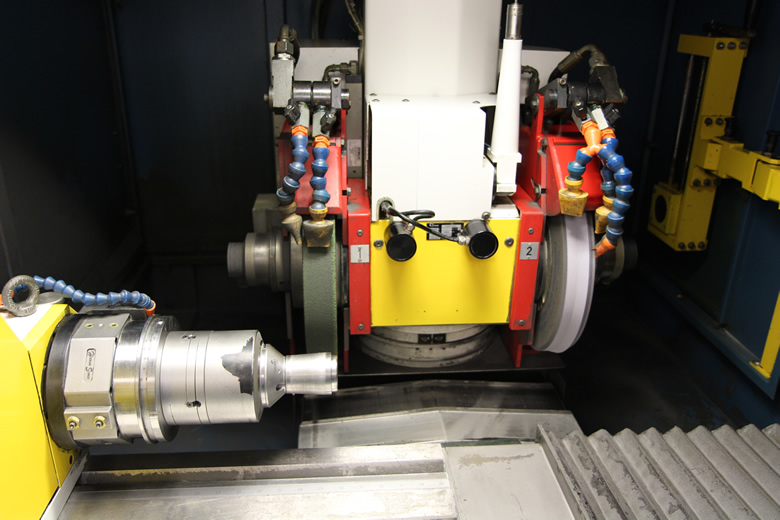
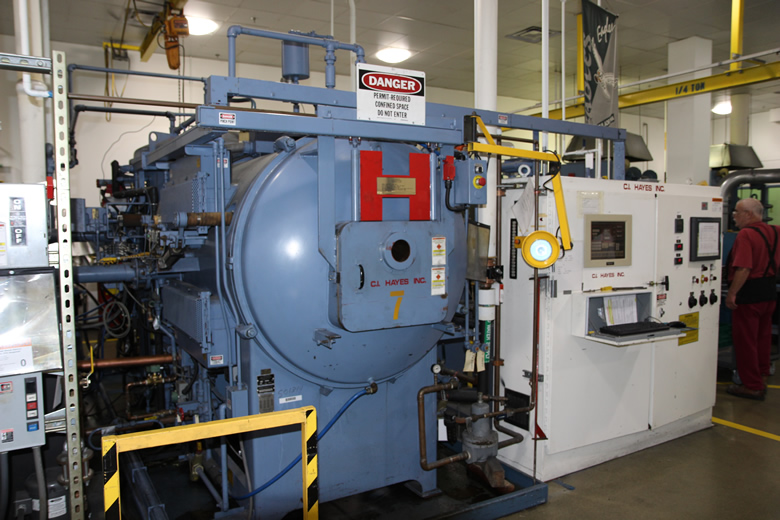
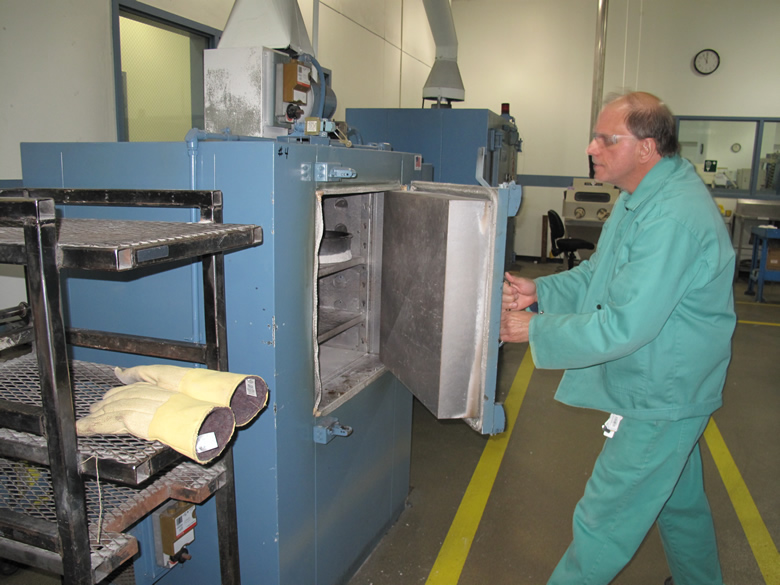
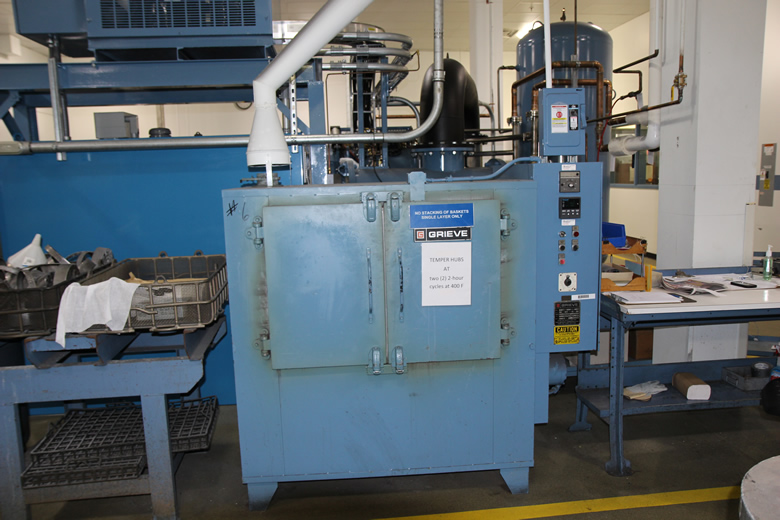
This Okuma Lathe Turning Center pre-shapes hubs and dies. One more photo of the Okuma Lathe Turning Center. In this photo, Earl is seen holding a hub that was recently machined in the Okuma Lathe Turning Center. This S-21 CNC machine precisely shapes hubs and dies with high accuracy. Here, a closer view of the machine and its two grinders, as well as an attached die. Dies must be hardened to withstand the high amounts of pressure used to strike coins. This oil-quench, vacuum hardening furnace is used to harden most dies. Heat Treater Joe Mitchell loads a tray of heat treated dies into a tempering furnace. Tempering reduces the internal stress in coinage dies.
Our next article in the series was about the production stages for minting circulating coins. This one covered the five lines of blanking, annealing and upsetting machines, and nine production lines of seven coining presses, and everything around them. Click the title above to view the in-depth article on making coins for circulation. Here are the photos.
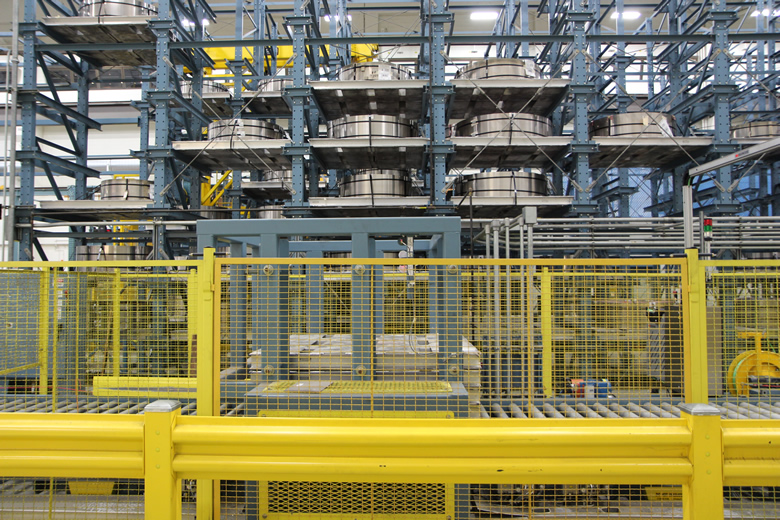
Here, a series of photos and videos show the production process in detail. In the first photo is a monster rack containing coils of metal that will be used to make blanks for coinage. The rack can hold up to 300 coils at a maximum of 10,000 pounds each.
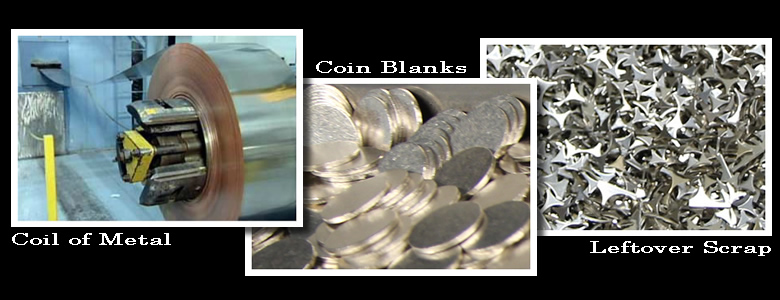
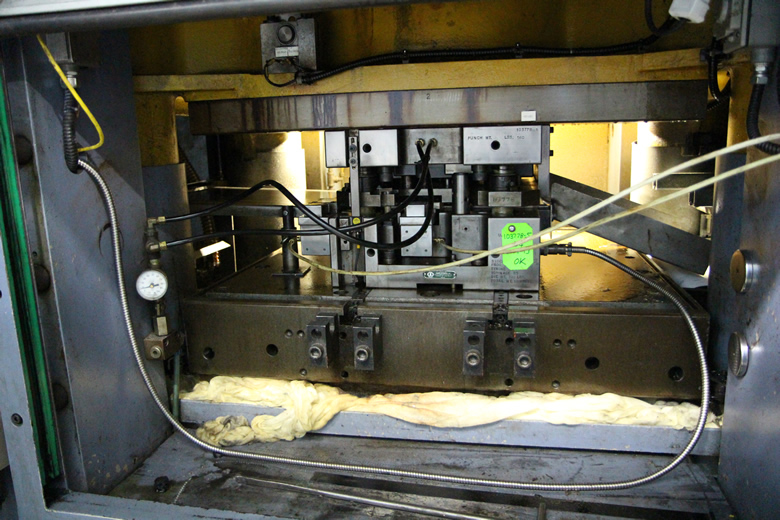
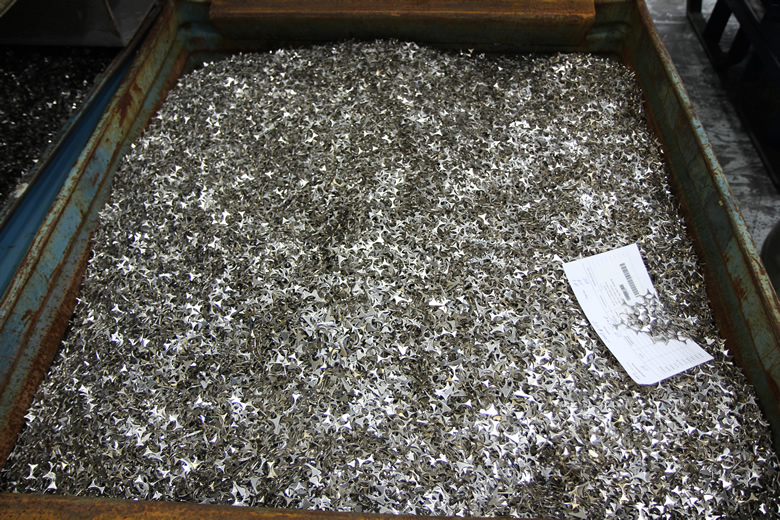
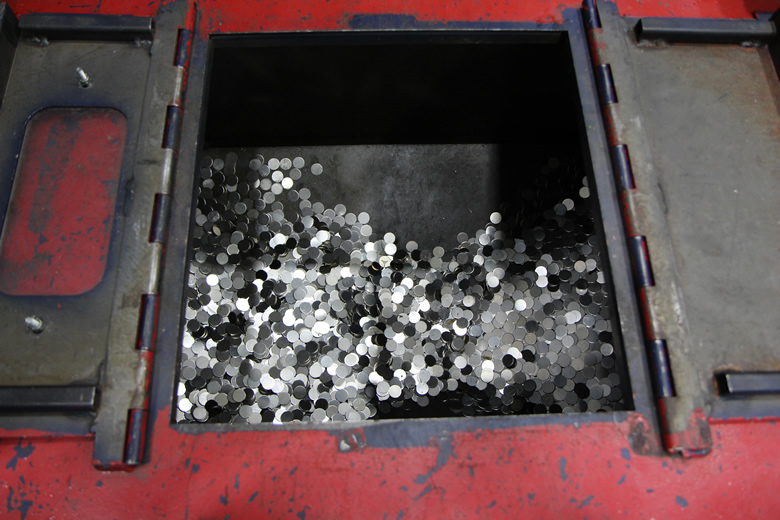
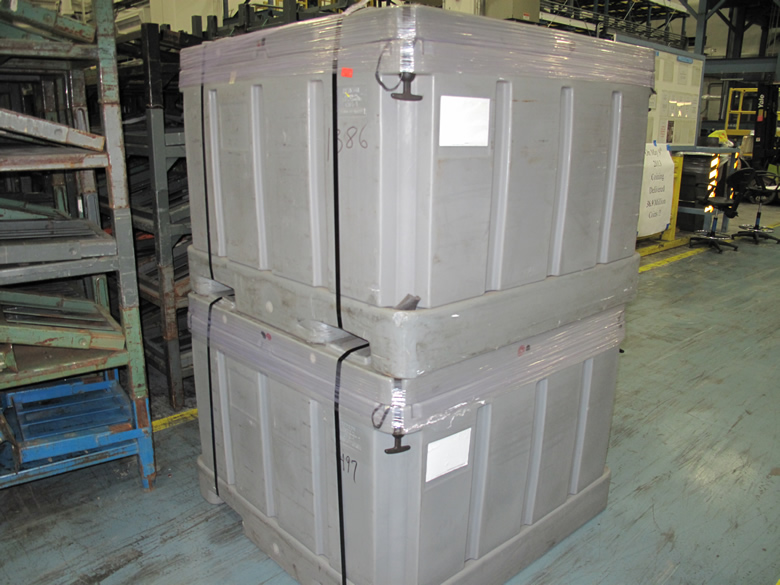
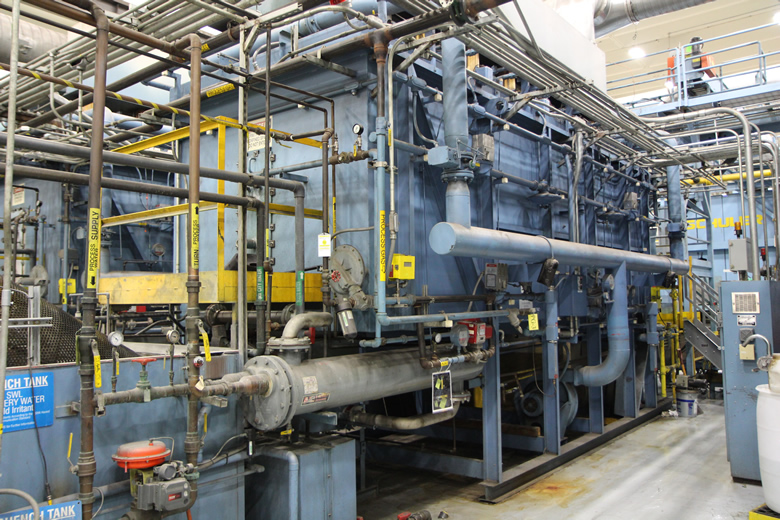
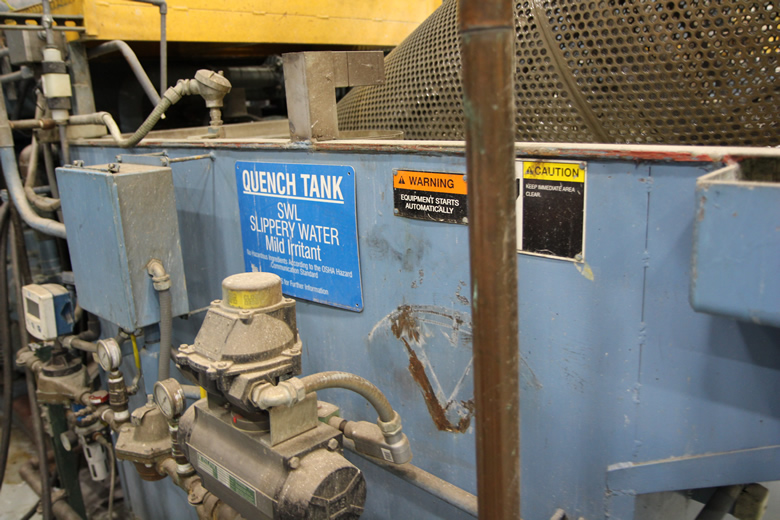
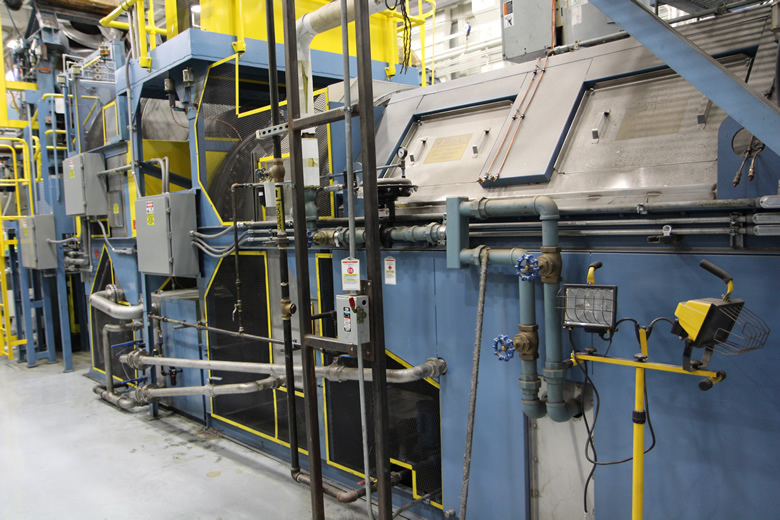
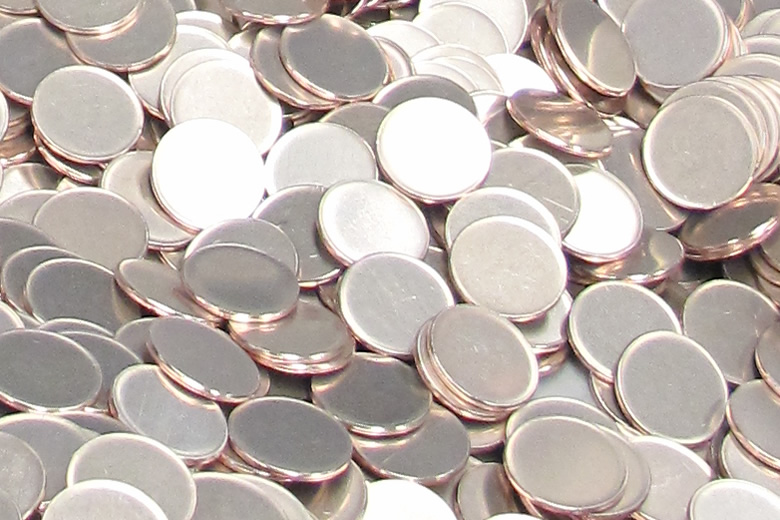
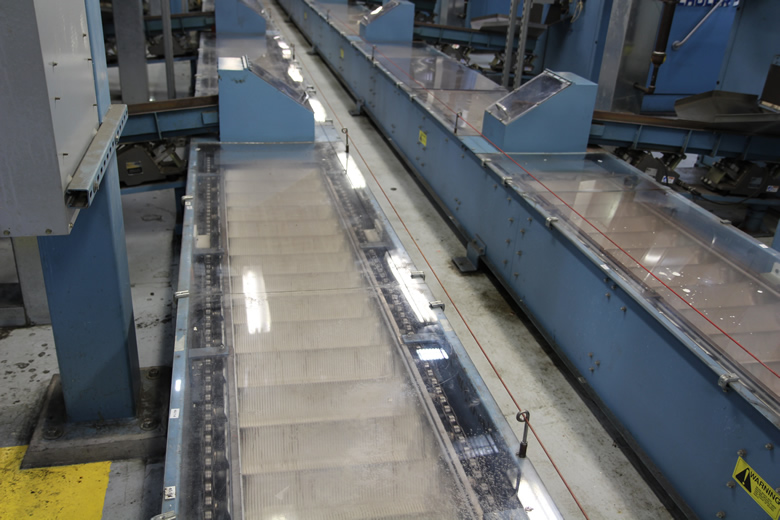
The coils of metal on these racks are pulled as needed and fed through a blanking press to stamp out round discs called blanks. Left: A coil of metal that is fed into a blanking press. Middle: Cut coin blanks. Right: Leftover scraps called webbing. Inside photo of a blanking press on the production floor of the Philadelphia Mint. The leftover metal, called webbing, is chopped up, stored and eventually returned to the manufacturer for recycling. The first 12 seconds of blanks cut from the press are discarded as a quality control measure. Here is a red condemned tub where they are temporarily stored until reclaimed. Blanks for Lincoln cents are not cut by the Mint but instead per-ordered. They arrive in these Remcon plastic containers. After blanks are cut from the coils, they travel to annealing furnaces for softening. They would otherwise be too brittle and break under the high tonnage coining presses. Blanks are then cooled by this quench tank. Blanks then move up a whirlaway to remove excess water and get dropped into a washer and dryer. Here, a small section of the whirlaway is shown. This barrel-type burnishing operation washes the blanks and dries them. Chemicals are applied during the washing stage for brightness and anti-tarnishing. Blanks then travel to a rotary type dryer. After they are dried, blanks move by conveyor to an upsetting machine, like this one, and get an edge or rim.
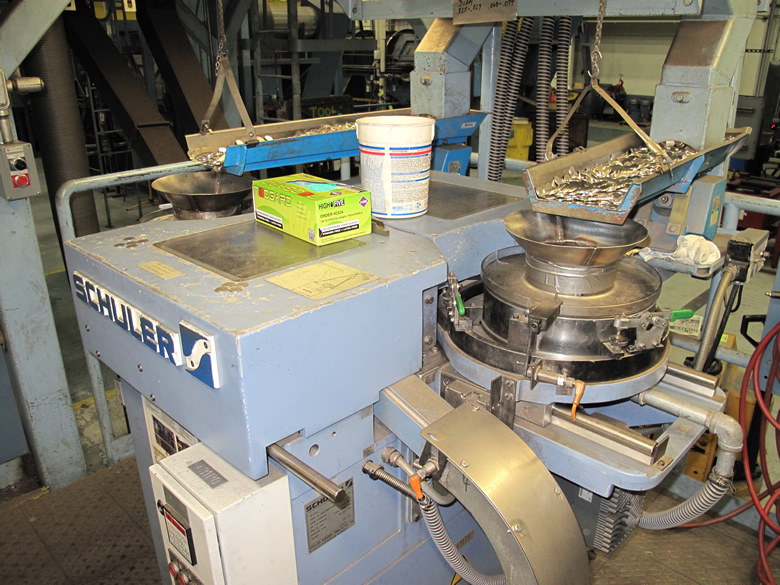
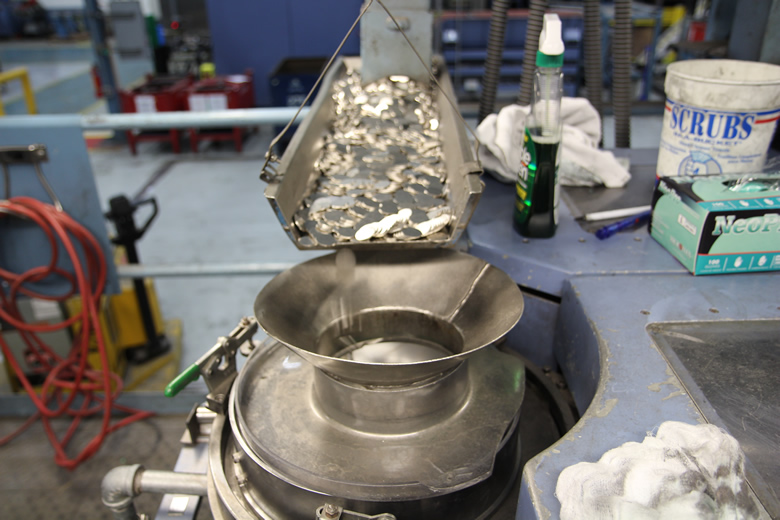
Shown here are the vibrating feeder bowls for the upsetting mills.
A closer view of the vibrating feeder bowls for the mills.
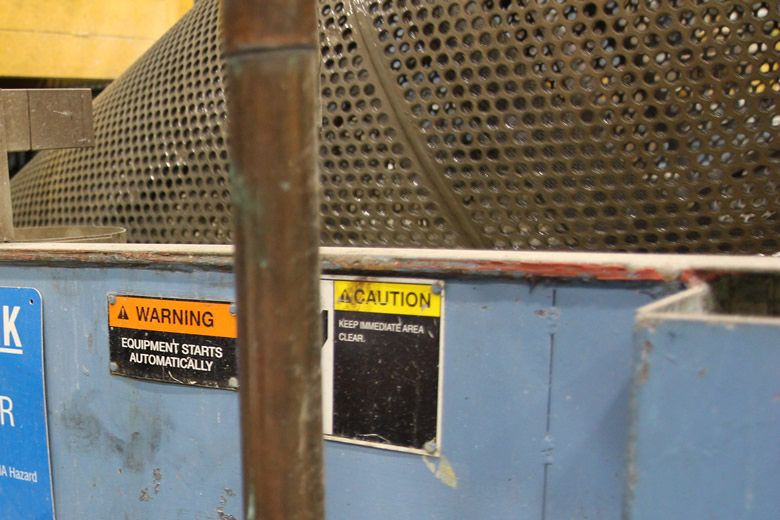
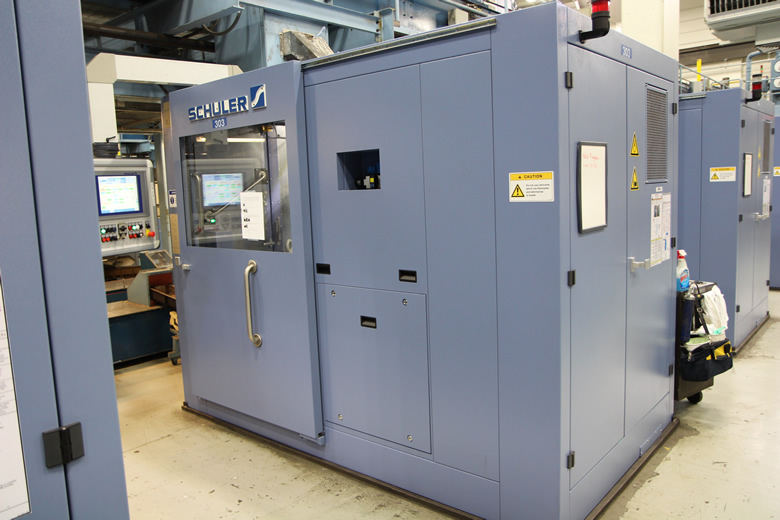
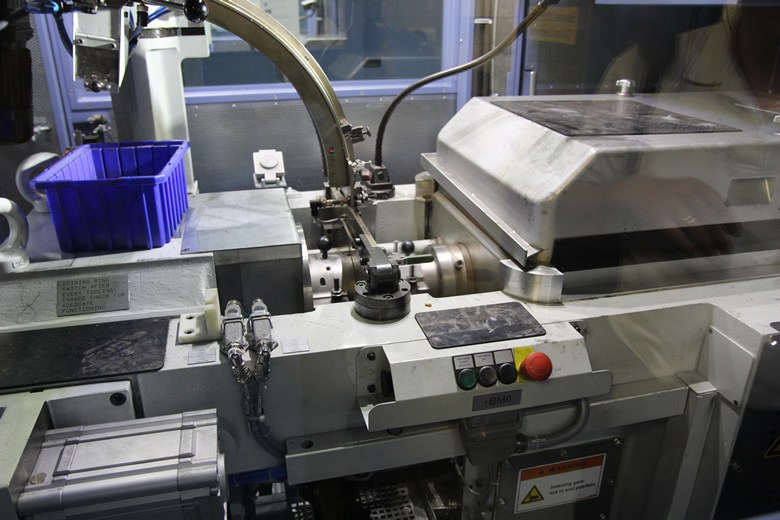
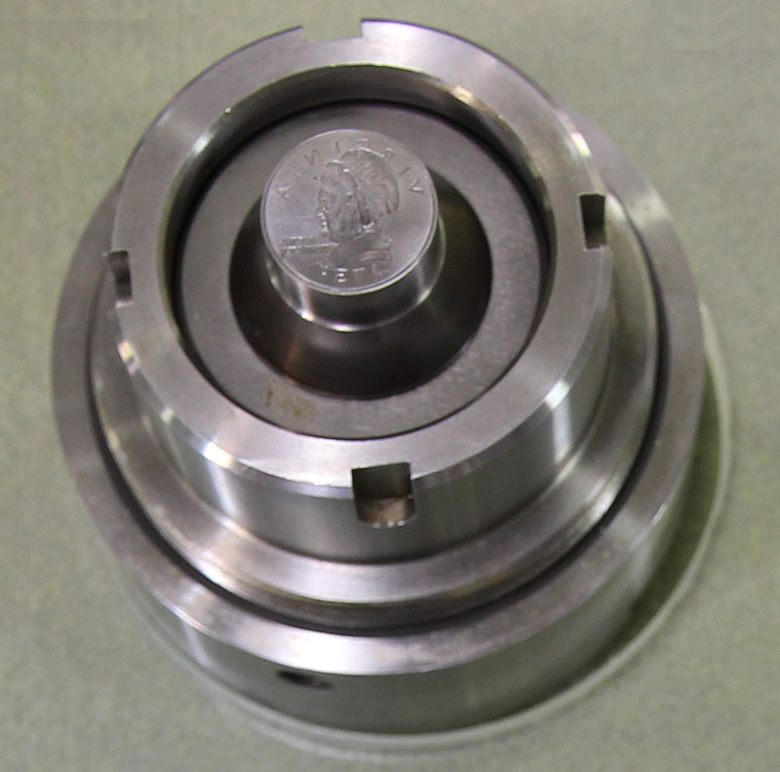
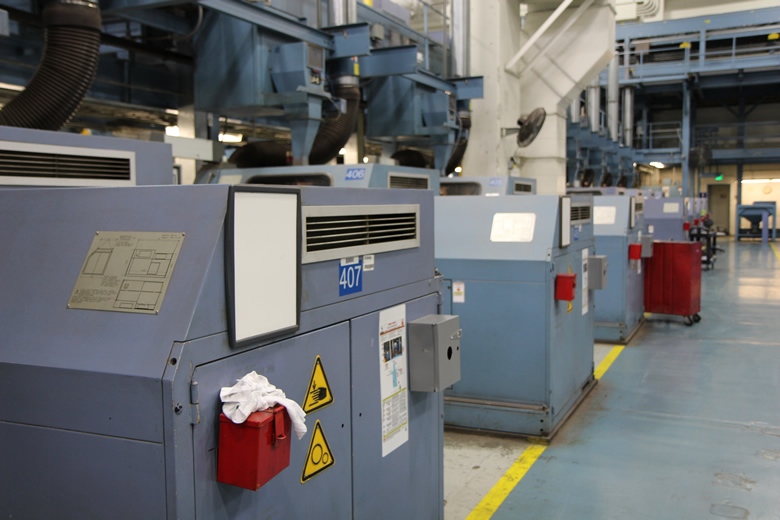
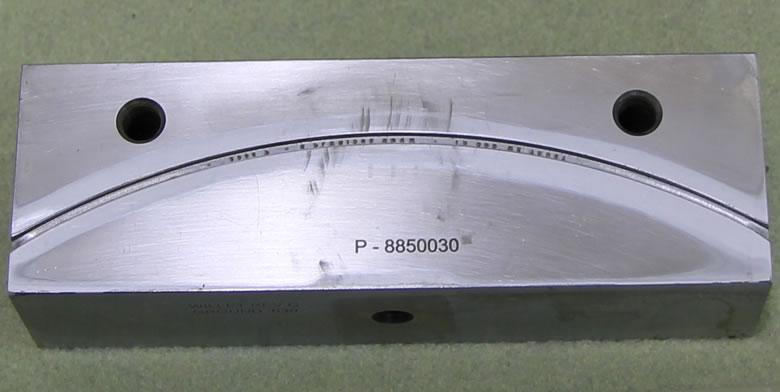
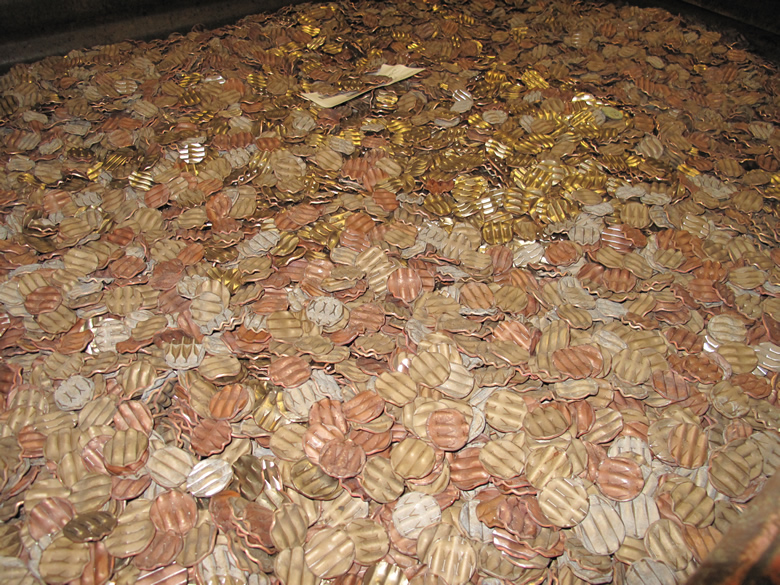
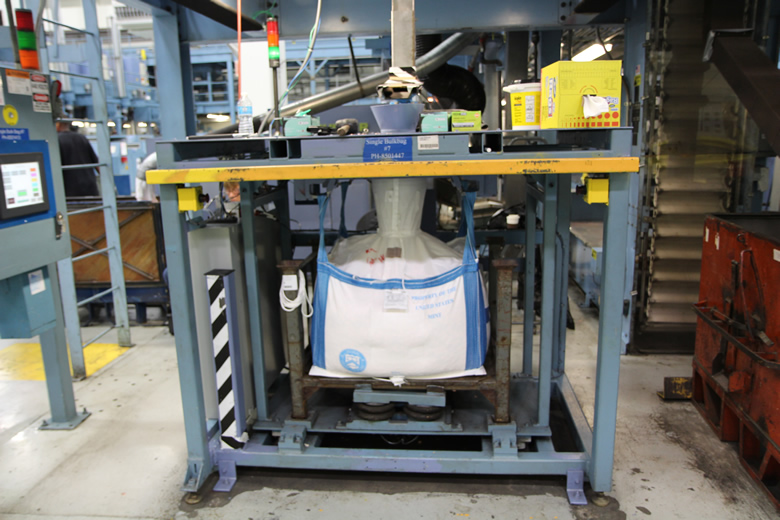
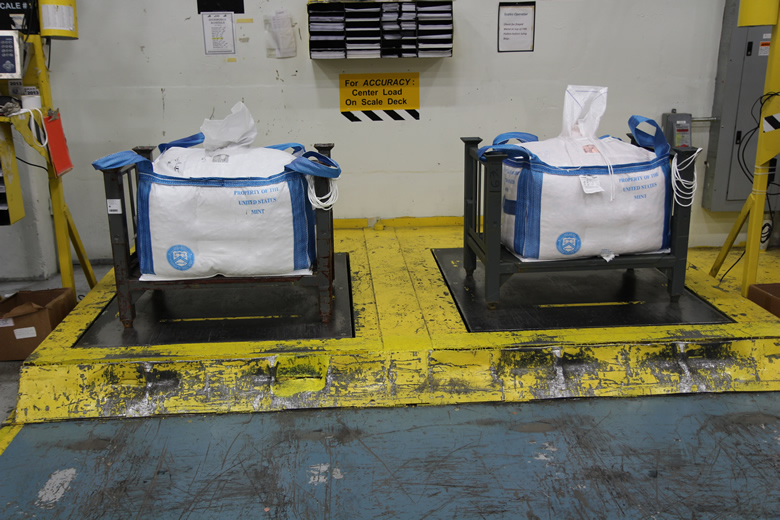
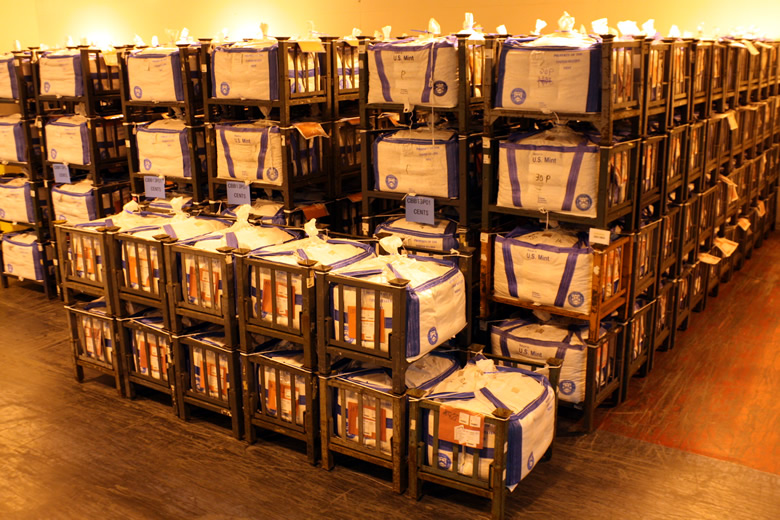
This spinning disc in the upsetting mill quickly forces blanks against a stationary segment, which pinches them, and creates the edge. This photo shows how the metal discs look after running through an upsetting mill. They now have edges and are called planchets. The newly created planchets move by conveyor to a coin press, like this Schuler MRH 150 Coining Presses. The press uses up to 60 tons of pressure to strike the planchets and make coins. They can produced 750 quarters for circulation every minute. Inside photo of a Schuler MRH 150 coin presses at Philadelphia Mint (a) At the Philadelphia Mint, horizontal presses are used to strike coins. These means a reverse coin die and an obverse coin die, like the one above and inside its holder, lay horizontal. A blank is slid between the two dies and the coining press uses up to 60 tons of pressure to transfer the dies’ designs and make a coin. Here, is a section of one of the 9 production lines with 7 coining presses. Dollar coins are processed through an extra step. After striking, they are quickly fed through a RS 50 machine for edge lettering. A die segments, like the one above, is inside the machine. Each coin is rolled over the lettered-groove on the die segment at a pace of 1000 coins per minute. This adds edge letterings of year of minting or issuance, "E Pluribus Unum," and the Philadelphia Mint ‘P’ mint mark The holding box of a coining press. A batch of new coins stay in the box until one of them is inspected. Here, Robert Wasner, Metal Forming Machine Operator, inspects one of the new coins, a fresh Lincoln Cent.If the coin has an error, all of them in the box are condemned. They later go through waffler machines to destroy the designs. This photo shows some resulting waffles. If the coin is okay, the machine operator pulls the box trap lever and the coins drop onto a conveyor and travel to the counting and bagging area. Coins move from coining presses by conveyor to automatic bagging stations. When filled, this bag will weigh over one ton. Bags of circulating-quality coins getting weighed at the U.S. Mint facility in Philadelphia. From there, they are racked. Racks of bulk cents bags prepped for shipment to the nation’s Federal Reserve Banks.
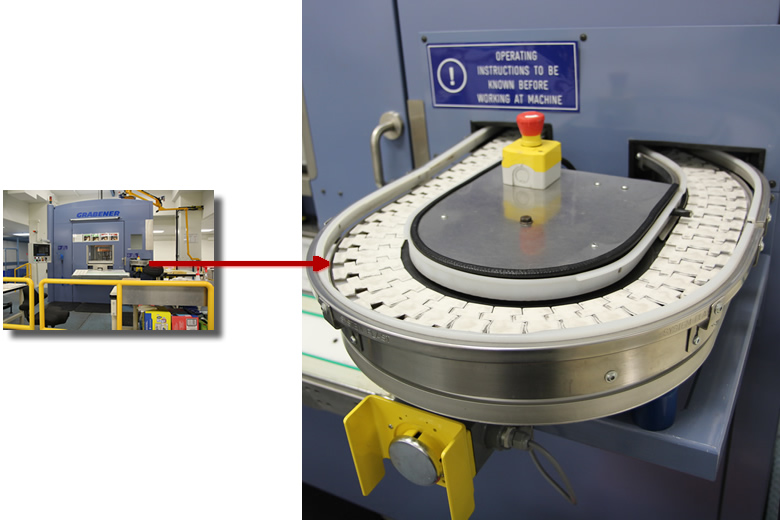
Our next articled described how the U.S. Mint at Philadelphia makes the three-inch America the Beautiful Five Ounce Silver Coins. The link above offers full details, here are photos with summary information.
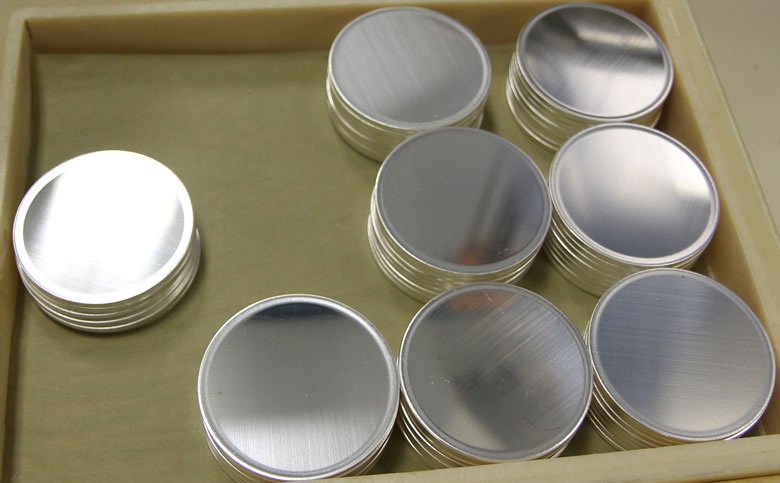
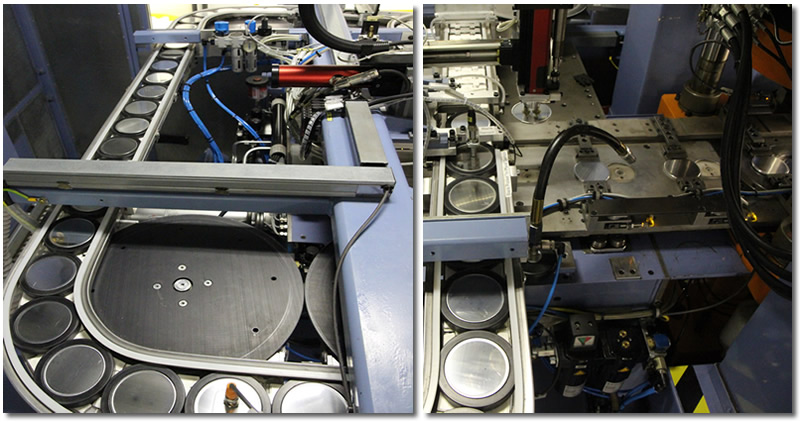
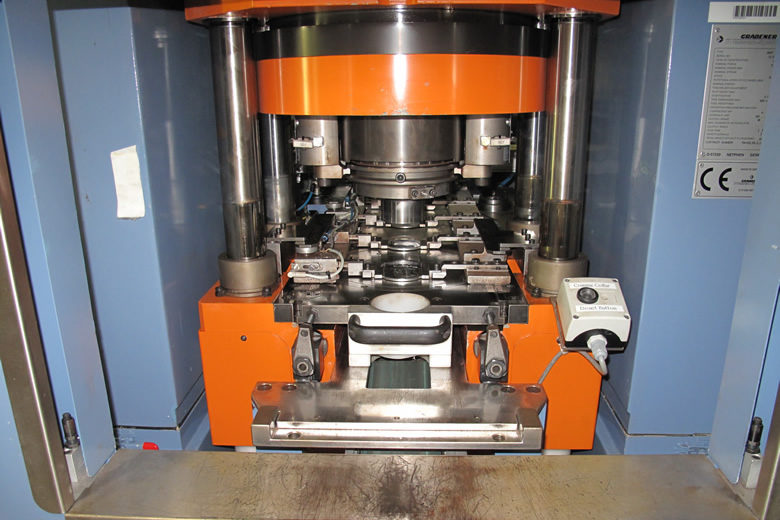
This Grabener 1000 ton press makes America the Beautiful bullion and uncirculated silver coins. It takes three operators to run. The press can strike up to 40 coins a minute with up to 1000 tons of pressure. To kick everything, ready-to-strike planchets, shown above, are manually fed on the presses’ conveyor, shown below. Three-inch planchets are hand-placed onto coining press. Inside the press, planchets move continuously on the conveyor just like luggage on an airport’s baggage carousel. The press will grab one of the planchet as needed. When the press needs a planchet to strike, a robotic arm with two suction cups, shown left, plucks one from the continuous conveyor. It moves the planchet to a ready track for striking.
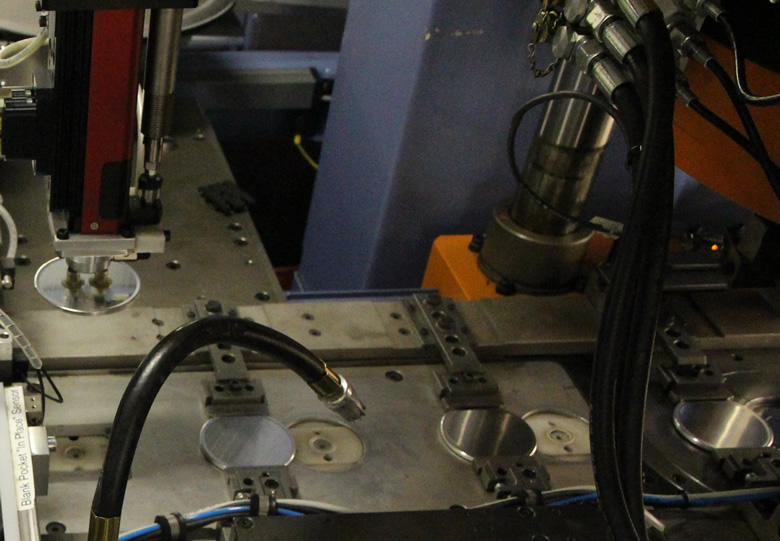
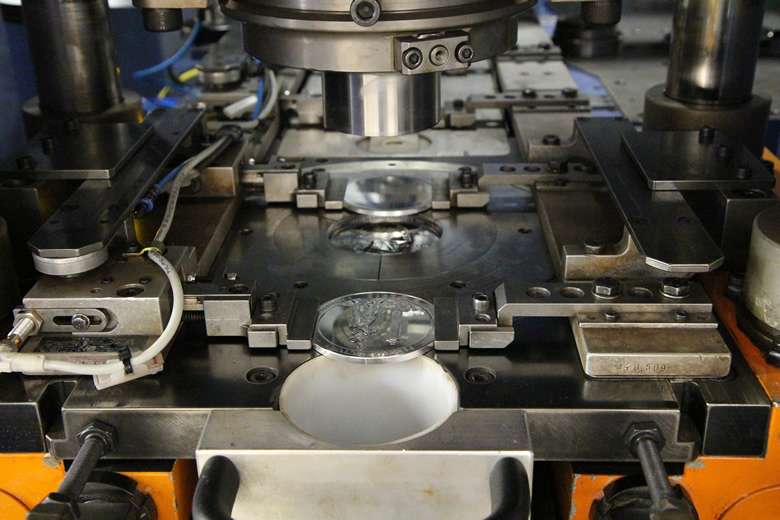
In the coin pressing area, a heads or obverse die is anchored. The obverse die serves as the anvil or stationary die. In vertical alignment to the obverse die is the moving reverse hammer die. These dies have the negative designs so they can create the positive coin image. As a blank planchet is fed through and into a three-piece collar (with one of them including edge letterings), the reverse hammer die is driven down toward the obverse anvil die. The metal from the trapped planchet flows between the two dies and collar, transferring the designs, edge letters and creating the coin.
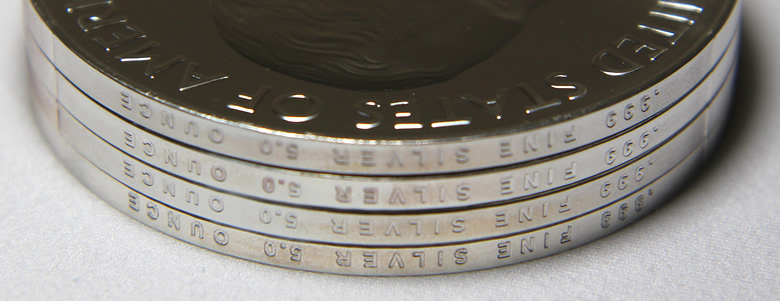
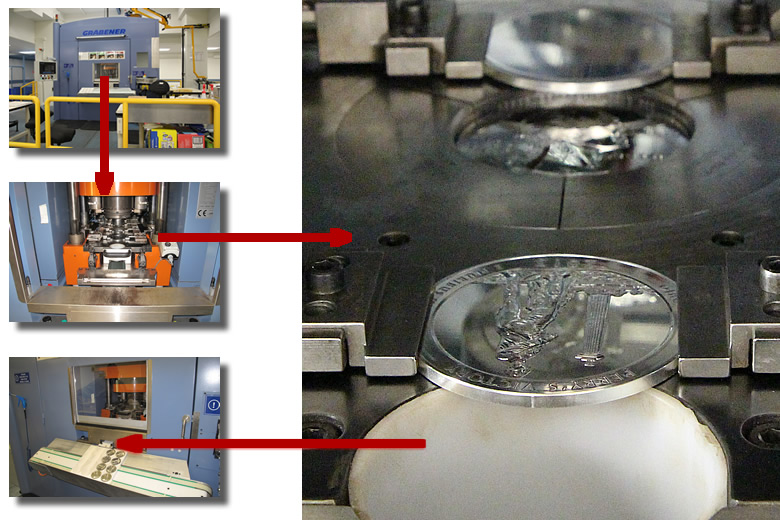
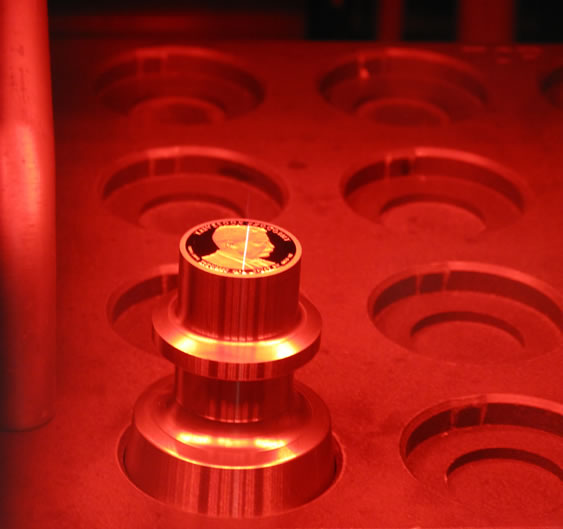
Here, a photo showing incused edge letterings that are on all America the Beautiful Five Ounce Silver Coins. They read .999 FINE SILVER 5.0 OUNCE.
Striking and die area of Grabener press.
Here, a closer view of the pressing area.
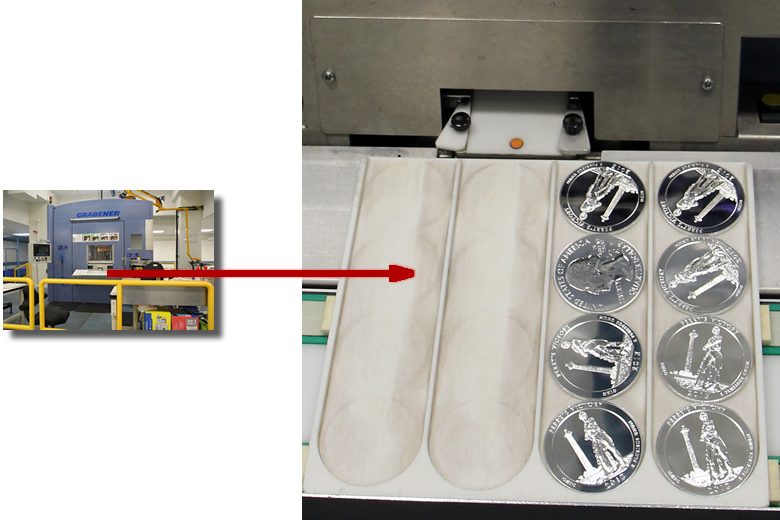
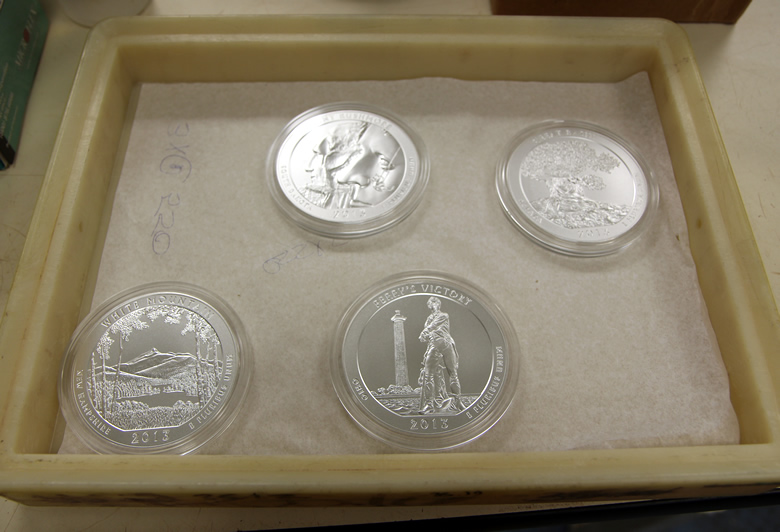
A new Perry’s Victory coin is about to drop down a chute and on a tray while, at the same time, a fresh planchet is fed for striking. Three-inch America the Beautiful Five Ounce Silver Coins slide out from the Grabener press. Here, a photo shows one of the 2013 Mount Rushmore America the Beautiful Five Ounce Silver Uncirculated Coins. Unlike the bullion coins that are taken straight from the coining press for shipping, these collector versions after pressed go through a vapor blasting machine. The vapor blasting process removes the brilliant finish typical of the bullion coins and imparts an uncirculated finish as seen in the photo. A few more 2013-dated America the Beautiful Five Ounce Silver Uncirculated Coins.
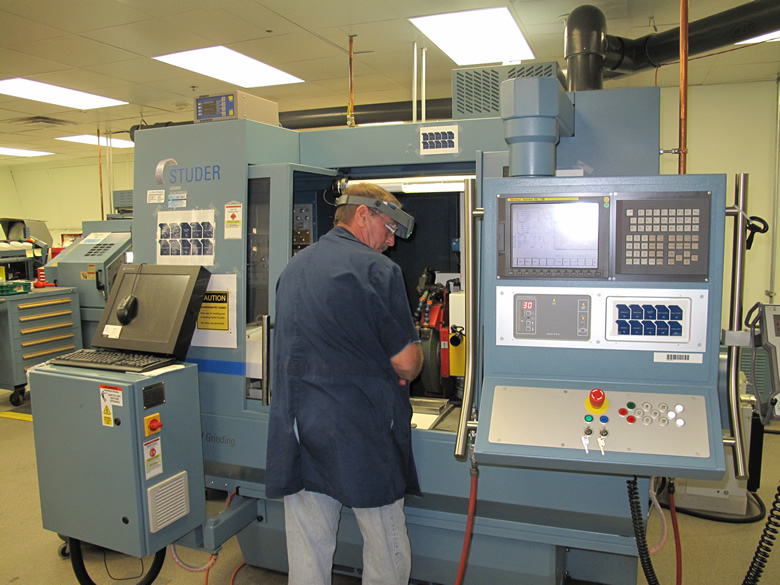
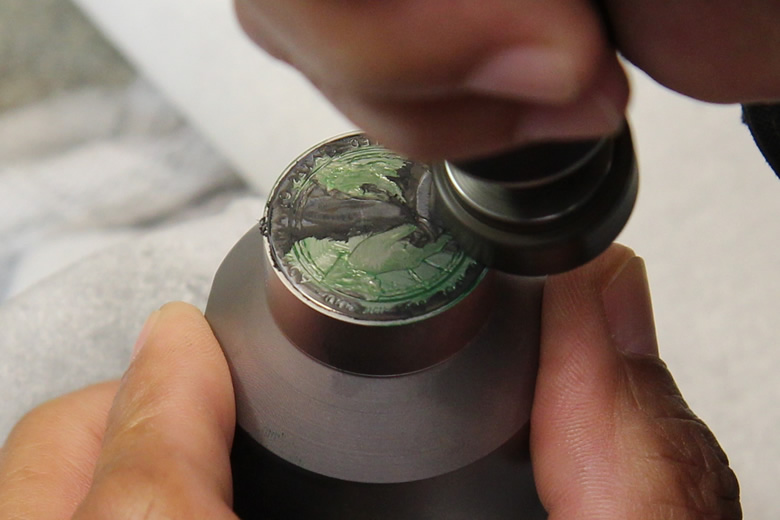
Out next article described how dies are manually polished to impart that cameo effect on proof coins. The dies are first sandblasted to achieve the frosted appearance. Then they are polished with three different grades of diamond dust. It is this process that ultimately results in the mirror-like affect on the backgrounds of proof coins.
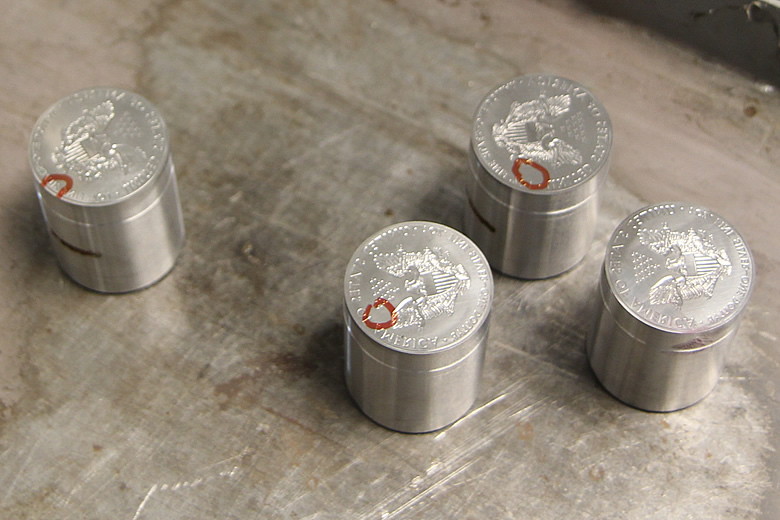
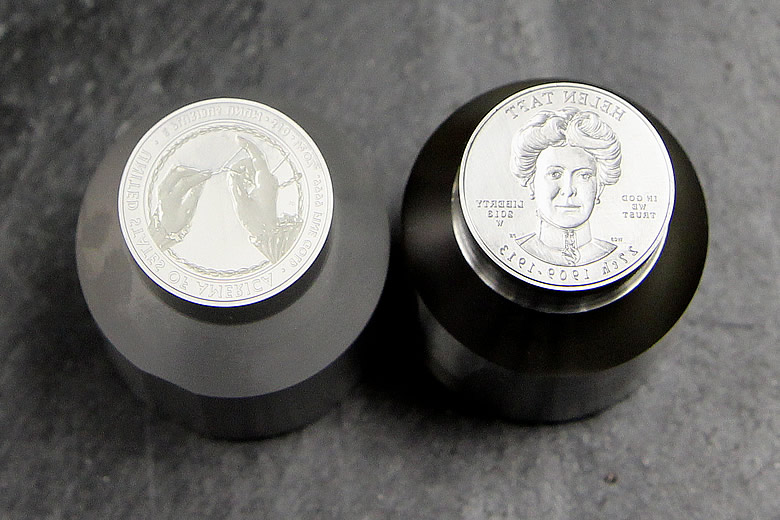
A reverse die of an Ida McKinley First Spouse Gold Proof Coin and an obverse die of a Helen Taft First Spouse Gold Proof Coin. They still need polishing.
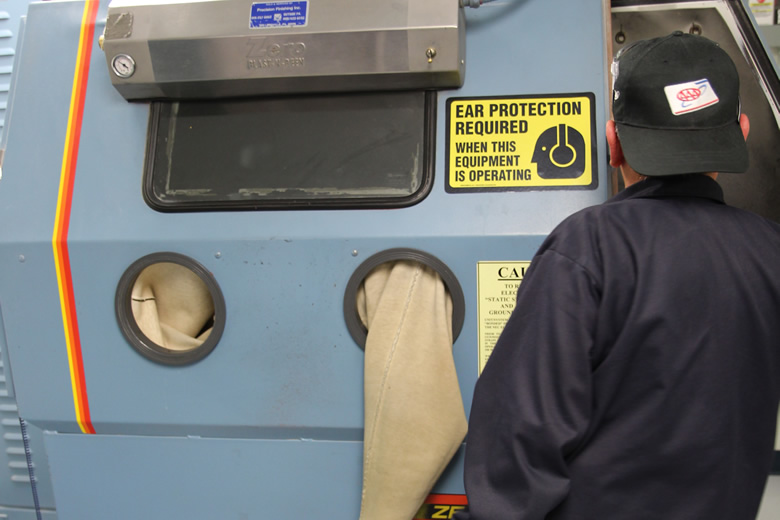
Here, Buffer-Polisher Alberto Morell is using a machine for sandblasting proof dies.
The bottom right of the photo shows how the die looks as its gets sandblasted.
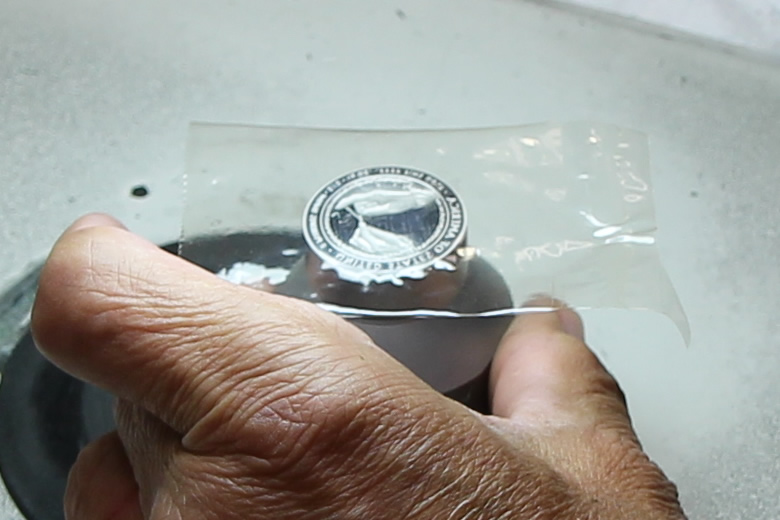
Before polishing, tape is used to hand-mask the die’s design elements. This particular die has been polished twice, with another, final round pending. Here, Alberto cuts away the tape to expose the flat surface, which will be the coin’s background.
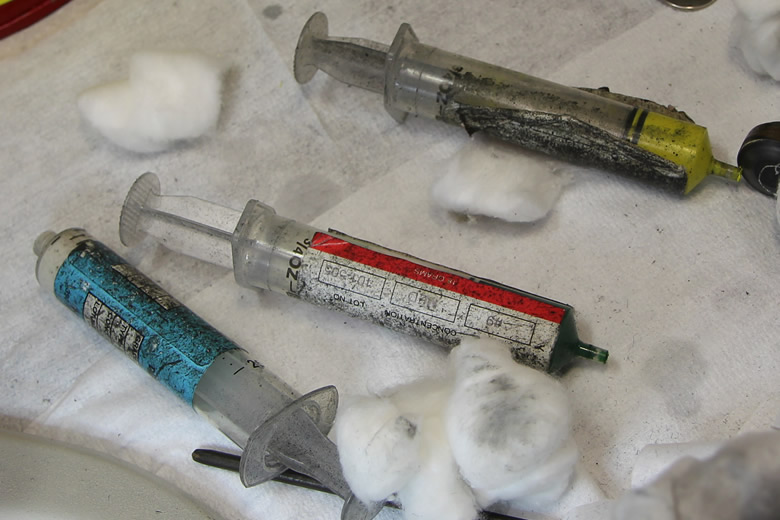
Three different grits of diamond dust are used in polishing dies.
Alberto applying diamond dust compound to a proof die.
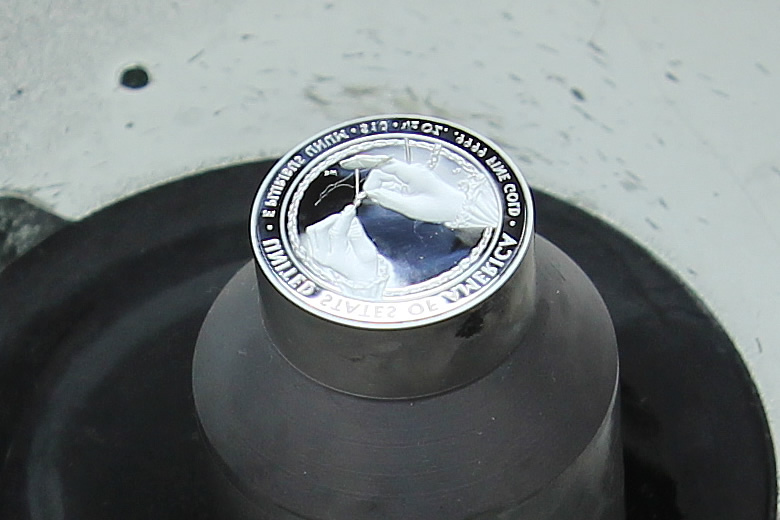
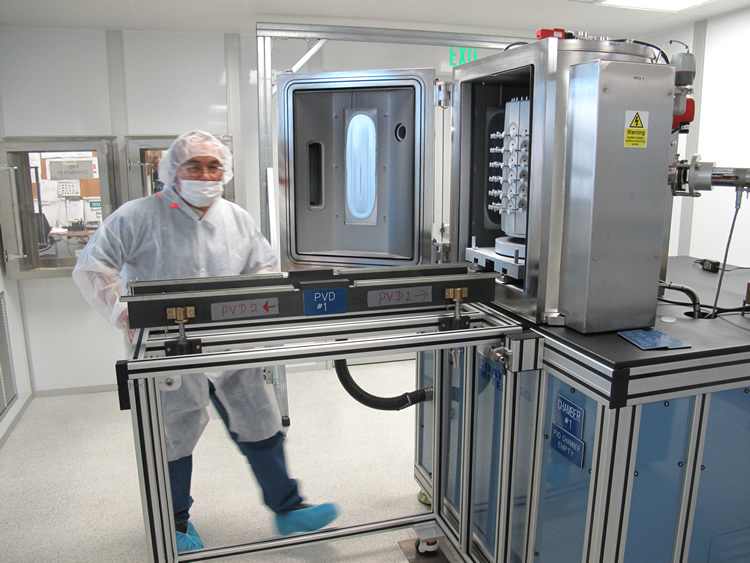
Here, Alberto polishes a die using diamond polishing dust and a rotary tool. A closer look at the polishing process. The polishing of this die is nearly completed. The entire process is repeated for each grade of diamond dust until the final mirror-like finish is achieved. Proof dies are placed inside a Physical Vapor Deposition chamber to chrome their faces. This strengthens and extends their life. This photo shows Robert Nyein preparing Physical Vapor Deposition (PVD) Chamber in Clean Room at the San Francisco Mint.
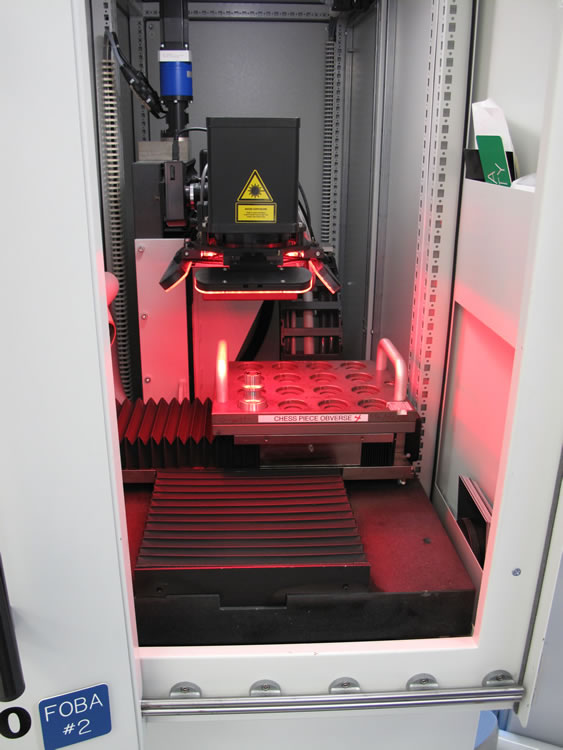
The above methods are not applied on all coin dies. Varying levels of die technology come into play based on the intended use. For example, at the San Francisco Mint which produces tens of millions of proof coins each year, dies are placed in a machine for laser frosting after they polished.
A laser machine at the San Francisco Mint that is used to apply frost to achieve cameo appearance on proof coins. Here, a die for the 2013 Theodore Roosevelt Presidential $1 Proof Coin is being laser engraved.